macOS
VidGrid for macOS v1.0 Now Available
06/12/2026 Filed in: VidGrid

VidGrid for macOS v1.0 is now available for download!
Transform your videos into a dynamic video wall on your Mac. VidGrid lets you play multiple videos simultaneously in customizable grid layouts, creating immersive and ever-changing visual displays. Simply choose a folder of videos and VidGrid automatically fills the screen with randomized playback. Perfect for parties, events, ambient visuals, digital signage, creative studios, office displays, and personal media collections.

Only Favs for macOS v1.0 Now Available
04/03/2026 Filed in: Only Favs
Only Favs for macOS v1.0 is now available for download!
Only Favs is a dedicated app for accessing files and folders. Create custom Groups and fill them with desired directory content. Quickly launch files/folders by double-clicking an item. Customize Groups' background color to provide a nice contrast between Group and content. Use built-in reorder functions to manage both files/folders and Groups.

App Groups for macOS v1.0 Now Available
12/27/2025 Filed in: App Groups
App Groups for macOS v1.0 is now available for download!
Using App Groups, you can put together your ideal collections of apps into a modern UI. Launch apps all together at the same time or individually. Powerful search shows just the app name you’re looking for.

Image Kanban for macOS v1.0 Now Available
11/24/2025 Filed in: Image Kanban
Image Kanban for macOS v1.0 is now available for download!
Image Kanban gives users an alternative method for managing images in folder directories. Connect to an entire folders worth of images or choose specific image files to display within Image Kanban. Useful built-in features like tagging make Image Kanban a useful management tool for your image collections.

Simple Text Compare for macOS v1.0 Now Available
09/26/2025 Filed in: Simple Text Compare
Simple Text Compare for macOS v1.0 is now available for download!
Compare two bodies of text for word differences.

Image Kanban for macOS Development
08/30/2025 Filed in: Image Kanban
I had a user of my apps express interest in an "image Kanban" style app to help manage images. I told him I would take a crack at developing one. So far this has been a fun little project. It has combined many of my favorite programming techniques of file management, images, and organization techniques.
Here is an example of the UI. This is still early and is a work in progress. I am currently working on implementing a "Tagging" system, so images can be assigned tags.

Double-clicking an image expands UI to a "profile" image, listing out image file meta-data.

Further image UI, allows for standard zooming/panning.

Media Wall Player for macOS Update v1.3
07/04/2025 Filed in: Media Wall Player
I have just updated Media Wall Player for macOS. Version 1.3 includes the following changes:

- Added new “Fill” Grid Style option.
- Changed “Flexible” Grid Style to scale with window. Removed vertical scroll.
- Changed toolbar to hide on fullscreen. Hover area to reveal toolbar.
- Added folder Drag/Drop to Navigation area.
- Changed Navigation Reorder to typical reorder method from within list itself. Removed Reorder from context-menu.
- Added fade for video swap.
Compare 2 Folder for macOS v1.6 Update
06/28/2025 Filed in: Compare 2 Folder
- I am working on updates for Compare 2 Folder for macOS, v1.6 update.
- This update will have the following changes:
- Added multiple selection capability.
- Added Delete right-click option.
- Added Quicklook via spacebar or right-click option.
- Changed Open Finder right-click option to include selection of file.
- Added Select All via Cmd+A and Deselect All via Cmd+Option+A. Functions are also available via right-click.
- Added Select Matches.
- Added Select Non-Matches
- Added Copy Over function.
- Added Move Over function.
- Added Cmd+R to refresh results.
The majority of the changes are to the right-click options.

Sidedesk for macOS v1.3 Now Available
06/22/2025 Filed in: Sidedesk
Sidedesk for macOS, v1.3 update is now available!
- Shifted side pane items to toolbar.
- Removed Element Drop icon and function. New items drop at center of current view.
- Moved Filter to toolbar.
- Added menu Item “Options”
- Moved “Size” combobox to new “Options” Menu. Renamed to “Default Element Size”.
- Added Canvas context option for Reset Zoom and Re-center option.
- Moved “Default Element Size” to options menu.
- Fixed websites not opening.
- Added Drag/drop for files and folders.
- Setup Drag/Drop of Image to add an “ImageElement”, when Option key held while dropping, as opposed to showing the file.
- Setup Drag/Drop of folders to add them as a ListView when Option key held while dropping.
- Setup Drag/Drop of folders to add them as a GridView when Command key held while dropping.
- Added Element context option to change Element Size.
- Improved Selection logic.
- Changed selection logic for individual files, folders, and websites.
- Added click canvas background to deselect (files/folders).
- Changed listview to custom selection.
- Added gridview selection.
- Changed listview & gridview drag locations. Can now only drag from icon/name.
- Changed listview & gridview expand/collapse to include name area.
- Added background for grid view. Removed border.
- Updated elements’ context menus options.
- Changed Notes, so the element name acts as Note Title.
- Changed element name, so it allows for a blank name.
- Added Mac QuickLook of Items.
- Changed Navigation items from Reorder pop-up to just reordering them within navigation view via drag/drop.
- Moved Elements’ right-click context menus to icon/name frame.
- Added context menu functions for Expand All, Collapse All, Collapse Others.
- Added context menu option to switch listviews & gridviews.
- Added multiple selection removal support for single file/folders/websites.
- Changed Note icon.
- Overhauled selection system. Canvas & Sidepane listview sync selections.
- Updated side pane to Listview of Elements.
- Added Open Finder right-click context menu function for files, folders, listviews, gridviews, and images.
- Re-designed App Icon
- Changed GridView to show image icons as Image Previews.
Sidedesk for macOS v1.3 Update Nearing Completion
06/14/2025 Filed in: Sidedesk
More changes to Sidedesk for macOS.
- Moved Elements’ right-click context menus to icon/name frame.
- Added context menu functions for Expand All, Collapse All, Collapse Others.
- Added context menu option to switch listviews & gridviews.
- Added multiple selection removal support for single file/folders/websites.
- Changed Note icon.
- Overhauled selection system. Canvas & Sidepane listview sync selections.
- Updated side pane to Listview of Elements.
- Added Open Finder right-click context menu function for files, folders, listviews, gridviews, and images.
- Redesigned App Icon
- Changed GridView to show image icons as Image Previews.
Sidedesk for macOS v1.3 Updates
05/30/2025 Filed in: Sidedesk
I've started working on some updates for macOS app Sidedesk.
v1.3 Updates:
Shifted side pane items to toolbar. Removed Element Drop icon and function. New items drop at center of current view. Moved Filter to toolbar. Added menu Item “Options” Moved “Size” combobox to new “Options” Menu. Renamed to “Default Element Size”. Added Canvas context option for Reset Zoom and Re-center option. Moved “Default Element Size” to options menu. Fixed websites not opening. Added Drag/drop for files and folders. Added Element context option to change Element Size. Improved Selection logic. Changed selection logic for individual files, folders, and websites. Added click canvas background to deselect (files/folders). Changed listview to custom selection. Added gridview selection. Changed listview & gridview drag locations. Can now only drag from icon/name. Changed listview & gridview expand/collapse to include name area. Added background for grid view. Removed border. Updated elements’ context menus options. Changed Notes, so the element name acts as Note Title. Changed element name, so it allows for a blank name. Added Mac QuickLook of Items. Changed Navigation items from Reorder pop-up to just reordering them within navigation view via drag/drop.

I am still working on a few remaining items, then I am going to test the app for a few days, then I'll release v1.3 update.
v1.3 Updates:
- Setup Drag/Drop of Image to add an “ImageElement”, when Option key held while dropping, as opposed to showing the file.
- Setup Drag/Drop of folders to add them as a ListView when Option key held while dropping.
- Setup Drag/Drop of folders to add them as a GridView when Command key held while dropping.

I am still working on a few remaining items, then I am going to test the app for a few days, then I'll release v1.3 update.
That Text for macOS Updates
05/22/2025 Filed in: That Text
I've started on a round of updates for macOS app That Text.
Updates now live:
Updates now live:
- Adding Filter Keyboard shortcut, CMD+F.
- When not focused on filter textbox, CMD+F moves focus to it.
- When filter textbox is focused, CMD+F will switch between filter criteria.
- Adding additional Filter Method
- Tree - Filters by Tree name.
- Text - Filters by text content under each Tree.
- Both - Filter both Tree & Text.
Move File There for macOS v1.0 Release
03/14/2025 Filed in: Move File There
Move File There for macOS is now available!
Move File There is the best way to move files for macOS. It has been developed to provide a consistent and fast experience, especially when moving files in large directories. Dedicated source directories allow resuming from previous file move sessions. A dynamic file view provides a list, grid, or gallery layout to see files. Customizable folder destinations give unique control to users, so you can move files with ease. After moving a file the app automatically selects the next file, so at times you may only need to click one button (Move button).
Instructions for app operation:
1.) Startup app.
2.) In the upper left corner of the app window, click the + button. Navigate to a desired folder containing files. With the folder selected, click "Open".
3.) The added folder will appear in the left-side navigation list. Repeat process for adding new folders. Folders containing files can also be dragged/dropped onto the left-side navigation area to be added.
4.) Click the newly added folder. The "Files to Move" section will populate and list out any files contained in the chosen folder.
5.) Click the + button in the upper right corner of the app's window, toolbar area. Navigate to the desired folder, where you would like to "move" file(s) to. These folders are known as "Move Locations". You can also drag and drop folders into the Move Locations area.
6.) To complete a "move" operation, select a file from the middle "Files to Move" area, then click the "Move" button for the desired "Move Locations" folder. This will complete a macOS "move" operation, moving the file from the source folder to the destination folder.
7.) Upon move completion, if user needs to "return" the file back to the source, 3 dots will appear next to the Move Location's folder. Under the 3 dots, will list out all files moved to that location. Clicking the listed file there will return the file back to the source. This list will not "persist" through other source directory navigations nor app restarts.
8.) To see all "Move Locations" added within the app, even locations added under different Source Directories, use the 3 dots next to the "Move Locations" top title, called "Show All Locations".
9.) Added folders under the "Move Locations" area each have right-click options, one option called "Pin" will allow the folder to stay "pinned" to the top of the list, even if alternate sort methods are changed.
Compare 2 Text for macOS v1.6 Updates
01/25/2025 Filed in: Compare 2 Text
Compare 2 Text v1.6 update. The following features have been added:
- Changed placeholder text for “Enter text here...” to be less of a hassle.
- Added in toolbar toggle to persist text or not during app restarts.
Image Slide for macOS v1.3 Updates
12/31/2024 Filed in: Image Slide
Image Slide for macOS v1.3 update. Adding the following features:
-Updated App Icon.
-Added prev/next buttons.
-Added left/right keyboard image change.
-Added UI component animations
Compare 2 Text for macOS v1.5 Updates
12/28/2024 Filed in: Compare 2 Text
Compare 2 Text v1.5 update. Adding the following features:
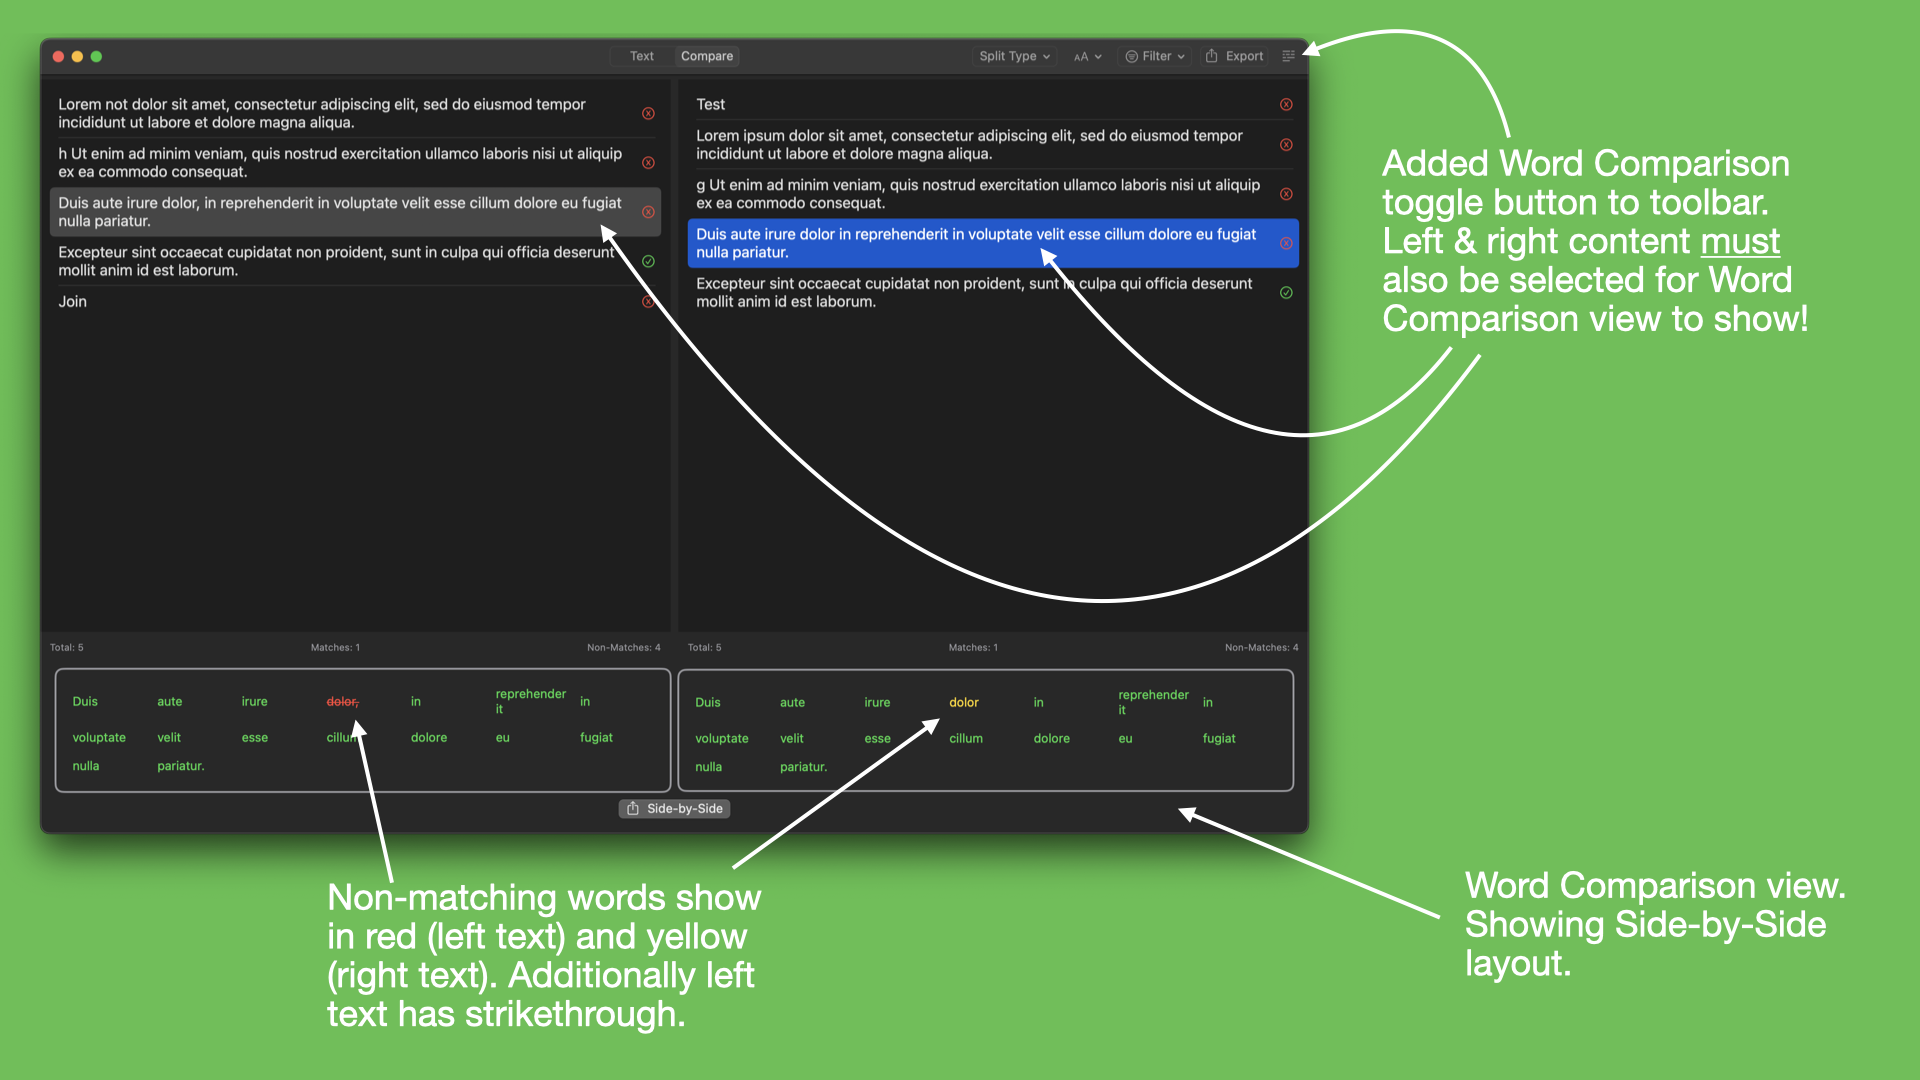
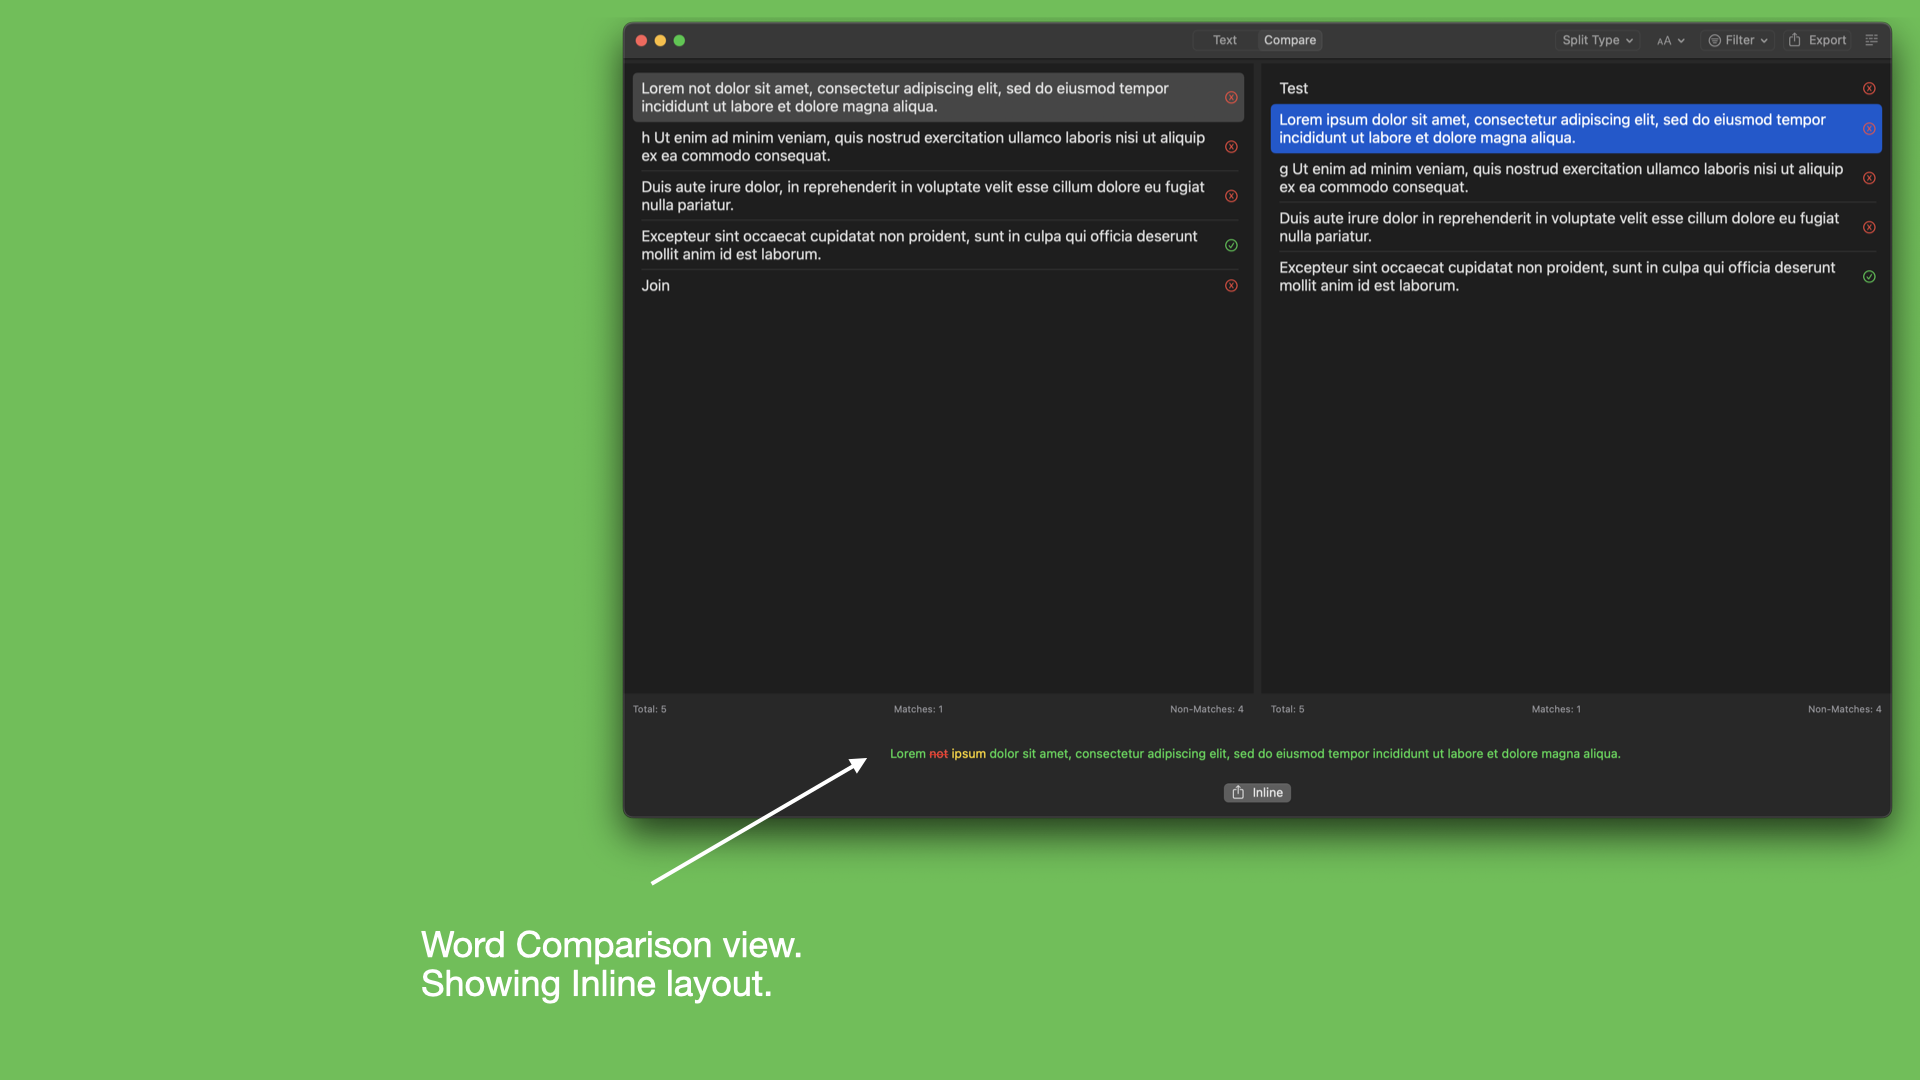
-Added Comparison View, with toolbar toggle button.
-Added Inline comparison view.
-Added Side-by-Side Comparison view.
-Adjusted 'Totals' footer layout, to make it easier to distinguish between text/values.
Recent Apps for macOS
11/27/2024 Filed in: Recent Apps
Recent Apps for macOS is now available!
Recent Apps lists out current and previously launched applications. Choose from viewing content in a detailed list-view or a visually stunning grid-view. Use built-in toggle buttons to hide/show additional app details, like app path, launch date and launch count. Re-launch previous apps by double-clicking them. Easy pin and favorite functions allow easier and faster recent app management. Use the hide command to hide unneeded apps from view. Use the Options menu “Show Hidden” command to see previously hidden apps. Toolbar placed filter buttons give quick and easy access to common filtering needs, like favorite or to filter apps by just today’s launch date. The toolbar also has an easy to use Search field, which will dynamically populate below content with search results. Recent Apps must be running to track app use. It works independently from operating system’s tracking of recent apps.
Features:
* List of recent apps.
* List-view and grid-view layouts.
* Toggle properties for path, launch date, and launch count.
* Launch apps by double-clicking.
* Pin apps to top.
* Favorite apps.
* Hide apps from list.
* Filter by favorite, running, and today’s launch date.
* Search field to find apps by name.
Instructions for app operation:
1. Launch Recent Apps.
2. Launch other desired apps.
3. Recent Apps will build a historical list of launched apps.
4. Apps that are quit will remain in the list and appear dimmed.
5. Running apps will not appear dimmed.
6. Choose view layout, list-view or grid-view.
7. Choose optional properties to view - path, launch date, and launch count.
8. Re-launch an app by double-clicking. Double-clicking an already running app will make it active.
9. Right-click an app and choose Pin to keep the app at the top of the list/grid (regardless of filter).
10. Right-click an app and choose Favorite to place a vibrant star next to app. Favorited apps will be shown when filtering by Favorite.
11. Right-click an app and choose Hide/Show to toggle between hiding and showing the app.
12. The Options menubar has a toggle for showing hidden apps.
13. When an app is hidden, if it was pinned or favorited, those properties are removed - to avoid filtering confusion.
Always Clipboard for macOS
11/27/2024 Filed in: Always Clipboard
Always Clipboard for macOS is now available!
Always Clipboard allows users to automatically copy preset text to the system clipboard when specified apps are active. A list of running apps is automatically populated. Users can select a running app and assign a single string of text to each app. When the specified app is active, the preset text is then automatically copied to the system clipboard, ready for pasting. The Always Clipboard app can be disabled without closing the app by the Enable toggle at the top of the user interface. Additionally each listed app can also be enabled/disabled. A secure “mask” toggle button allows users to obscure certain text entries if desired.
Features:
* Automatic text copying when specified apps are active.
* List of running apps.
* Add running apps to the Always Clipboard list.
* Enable/disable Always Clipboard app operation.
* Enable/disable individual app’s operation.
* Mask text so characters are obscured.
* Manage Always Clipboard items.
Instructions for app operation:
1. Open Always Clipboard app.
2. Open desired apps, e.g. TextEdit.
3. Wait for running apps to be populated on left of UI.
4. Hover above desired app, click + icon button to the right of app. This adds the app to the Always Clipboard Items list.
5. Locate newly added app in list. Enter desired text, that will be automatically copied to system clipboard when specified app is active.
6. Click mask icon button to right of text, if text should be obscured.
7. To remove an entry, click -(minus) icon button. If no text was entered, the item is just removed. If text was entered, there will be a confirmation. Hold option key while clicking to bypass confirmation.
8. App items that are removed are re-added back to the running app list (if app is still running).
9. Apps that have been added and are still running, their app name text appears in blue. If app is also active, text will be green. Gray text is for saved app entries, but are not currently running.
10. Under the app’s “Option” menu item, there are settings for auto-erasing the clipboard automatically after x seconds are passed.
11. The Option menu also contains a setting to require the “shift” key being held to copy the text to clipboard, when an app is being activated.
Zone Files for macOS
11/17/2024 Filed in: Zone Files
Zone Files for macOS is now available!
Zone Files provides window position relevant filtering for listed files & folders. This allows users to create "zones", where the Zone Files app will dynamically update and filter its list based on its relevant window position in regards to five separate zones - upper left, upper right, bottom left, bottom right, and center. Multiple zones can also be triggered together if the window size encompasses enough monitor width & height. For example making the window fullscreen will then show all five zones' content.
Files and folders can be added to a zone by first placing the window in a zone position and then dragging/dropping content to the app. Additionally using the "Edit" tab will allow users to add content to desired zone without moving the window position. Each zone has a dedicated "Add" button to add files/folders, as well as a "Clear" button to clear that zone's content.
Under the List tab, there are two layouts to choose from, list-view and grid-view. In the toolbar there are also toggle buttons to turn on/off additional properties, like Path, Date, and Size. To search an active zone list's content, click the magnify button and type in appropriate file/folder name you're looking for. Zone content is dynamically updated to include matches. Additionally the search field will remain active while dragging the Zone Files app window to other zone trigger locations.
Files and folders in the list have multiple right-click options, including "Pin" - which will keep the file/folder at the top and persist in the list regardless of which zone position is active. "Move to Zone" - which allows users to switch a file/folder's host zone. "Remove" - which will remove the file/folder from the app, but won't delete the content from the file system.
Instructions for app operation:
1.) Launch app.
2.0) Add files/folders to Zone Files app.
2.1) Option-1: Click on List tab. Position window in one of the screen corners or the center of the screen. Drag/drop content to the app.
2.2) Option-2: Click on Edit tab. Use "Add" button in desired Zone to add Files/Folders to the app. To see newly added content, drag the app window to that zone's position (e.g. bottom right corner).
3.) To load the different user added content, drag the app window to zone areas (upper left/right, bottom left/right, and center). If dragging from one monitor to another, the app should be dropped, then dragged again, so the app registers the monitor change.
4.) Change view layout via the toolbar button to either list-view or grid-view.
5.) Click properties buttons (Path, Date, Size, Zone #) to show desired info.
6.) Double-click a file/folder to launch the content.
Compare 2 Folder for macOS v1.4
09/05/2024 Filed in: Compare 2 Folder
Compare 2 Folder for macOS v1.4 update now available. This update contains the following changes:
- Added right-click “Open Finder” function for files.
- Added drag/drop support. Drag a single folder to left/right side to set Directory.
- Added keyboard modifier, “option” key when clicking “Set Directory” to reset directory back to Desktop.
- Added tooltip for pathbar.
- Added right-click “Open Finder” function for files.
- Added drag/drop support. Drag a single folder to left/right side to set Directory.
- Added keyboard modifier, “option” key when clicking “Set Directory” to reset directory back to Desktop.
- Added tooltip for pathbar.
Simple Week Routine for macOS & iOS v1.2
09/04/2024 Filed in: Simple Week Routine
Version 1.2 is now available. This is a small update that adds the following feature:
- Added Setting to switch between Sun-Sat / Mon-Sun. For macOS, setting appears under the "Simple Week Routine" menu>Settings. For iOS the setting appears under the system Settings>Simple Week Routine.
- Added Setting to switch between Sun-Sat / Mon-Sun. For macOS, setting appears under the "Simple Week Routine" menu>Settings. For iOS the setting appears under the system Settings>Simple Week Routine.
InFolder for macOS v1.0
08/23/2024 Filed in: InFolder
InFolder for macOS is now available from the macOS App Store.
View multiple folders' content at the same time. No other file manager matches InFolder's capabilities & simplicity for viewing & managing multiple folders' contents.
Features:
- View multiple folders' content at the same time.
- Smart batch selection by name.
- Integrated with Quick Look.
- Copy multiple files/folders.
- Move multiple files/folders to another location.
- Delete multiple files/folders from different directories at the same time.
- Multiple view layouts.
- Launch files/folders.
Instructions for app use:
1.) Drag/drop folders onto the main view, the folder's contents will be listed out.
2.) Click trash can button to clear content.
3.) Click Change Layout button to switch between vertical/horizontal layouts. Vertical layout works well when you have fewer chosen folders, but each folder contains a lot of content. Horizontal layout works well when you have a lot of chosen folders, but the folders only have a few items inside.
4.) Click Match Selections button when you want to make an attempt at automatically selecting other folders' content by name, when previously selected file/folder name matches.
5.) Right-click chosen folder for options like Refresh, Open Finder, and Delete.
6.) Right-click folder's contents for options like Open Finder, Copy, Move, and Delete.
7.) Type text into toolbar Search bar to filter content by name.
Auto Folder for macOS
07/15/2024 Filed in: Auto Folder
Auto Folder for macOS is now available from the macOS App Store.
Innovative concept for files and/or folders for individual apps. Add apps into a main list, then attach files/folders to the app. When a chosen app's UI is focused the built-in menubar list dynamically updates to show just the files/folders for the foreground app. Double-clicking on a menubar's item will launch the file/folder. Optionally toggling the Auto Selection button will automatically switch Auto Folder's UI to show the appropriate files/folders for the focused app.
1. Startup Auto Folder app.
2. Wait for apps to be listed in bottom left navigation, under 'Apps'.
3. Using mouse cursor, hover above an app you want to add a file/folder to. Click the + button that appears.
4. The chosen app will relocate to the upper left navigation area, under 'App Folders'.
5. The chosen app's main view should automatically load.
6. Using the main view's + toolbar button, add desired files/folders to app.
7. The right 'trash' button deletes the file/folder line item. Holding option key and clicking delete button will also bypass delete confirmation.
8. Click+drag by a file/folder icon/text to reorder items.
9. When a chosen app is focused on, the Auto Folder menubar (along system menubar in upper right) will dynamically update to show appropriate files/folders for focused app. For example if you added a file/folder for the 'Calendar' app, when clicking on Calendar and bringing UI to the foreground, the menubar will update to show files/folders specified for the Calendar app.
10. Auto Selection can be toggled from the Auto Folder's upper left toolbar. This function will automatically select an app and load an app's files/folders in the Auto Folder's window when that specific app is focused on.
Compare 2 Folder for macOS Update v1.3
07/12/2024 Filed in: Compare 2 Folder
Newly released Compare 2 Folder v1.3 update now available from the macOS App Store.
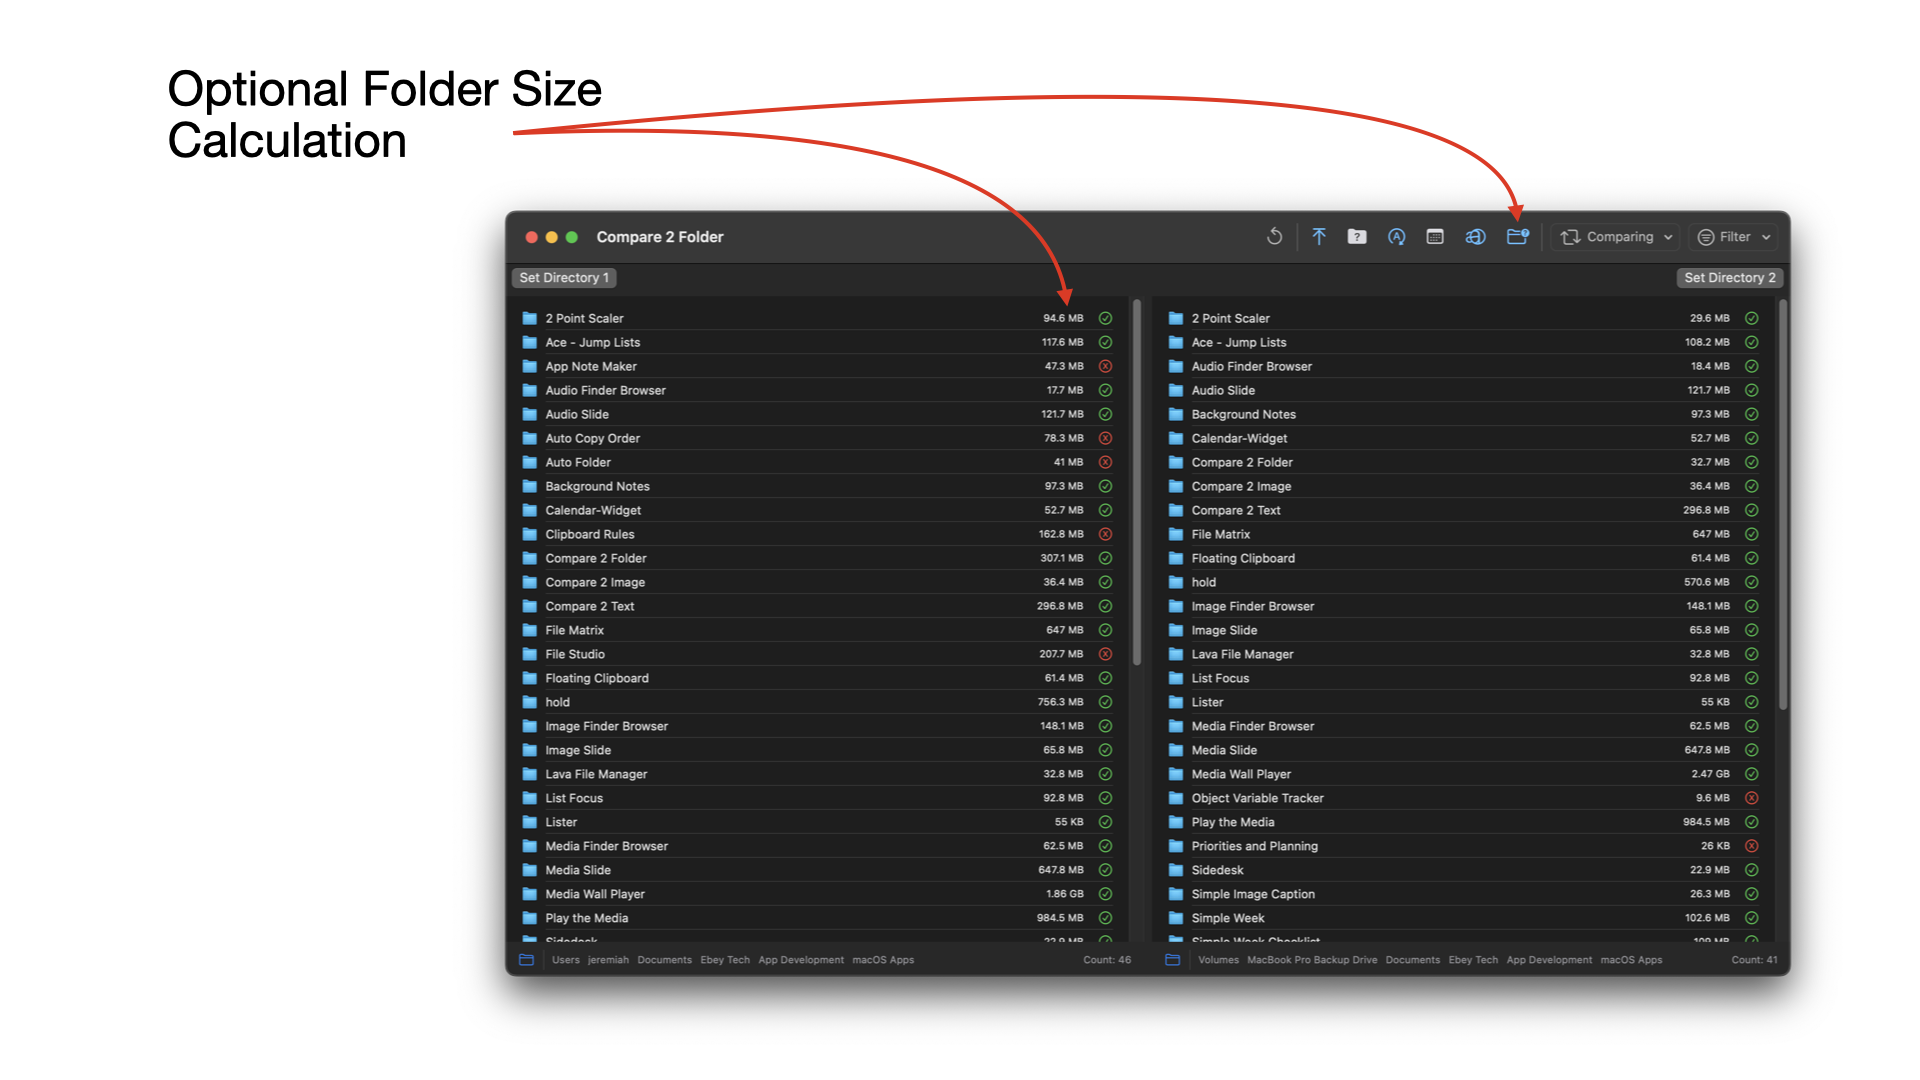
v1.3 Changes:
- Added Compare Folder Sizes toggle.
App Note Maker for macOS
06/09/2024 Filed in: App Note Maker
App Note Maker for macOS is now available from the macOS App Store.
Innovative concept for creating and managing notes for individual apps. Add apps into a main list and create notes for the apps. When a chosen app's UI is focused the built-in menubar list dynamically updates to show just the notes for the foreground app. Clicking on a menubar's text will copy the text to the system clipboard, ready for pasting. Optionally toggling the Auto Selection toggle button will also automatically switch App Note Maker's UI to show the appropriate notes for the focused app - which can be useful when observing App Note Maker while it is in the background.
1. Startup App Note Maker app.
2. Wait for apps to be listed in bottom left navigation, under 'Apps'.
3. Using mouse cursor, hover above an app you want to add a note to. Click the + button that appears.
4. The chosen app will relocate to the upper left navigation area, under 'App Notes'.
5. The chosen app's main view should automatically load.
6. Using the main view's + toolbar button, add desired number of notes for apps.
7. The first text field is for labeling the line item. This is optional, but may provide important context.
8. The second text field is the note field, enter appropriate note text here.
9. The far left 'checkmark' button copies the text in the note field to the system clipboard.
10. The second 'mask' button obscures the note field from view.
11. The right 'trash' button deletes the note line item. If a line item doesn't have any text entered in the note field, click the delete button won't prompt for delete confirmation. Holding option key and clicking delete button will also bypass delete confirmation.
12. The far right menu icon can be used to grab a line item for re-ordering items.
13. When a chosen app is focused on, the App Note Maker menubar (along system menubar in upper right) will dynamically update to show appropriate notes for focused app. For example if you added notes for the 'Calendar' app, when clicking on Calendar and bringing UI to the foreground, the menubar will update to show notes specified for the Calendar app.
14. Auto Selection can be toggled from the App Note Maker's upper left toolbar. This function will automatically select an app and load an app's notes in the App Note Maker's window when that specific app is focused on.
Updates to Media Wall Player for macOS
04/21/2024 Filed in: Media Wall Player
Media Wall Player for macOS has been updated to v1.2
Updates:
- Bug fixes
- Added Audio Muting
Clipboard Rules for macOS Now Available
04/20/2024 Filed in: Clipboard Rules
Clipboard Rules for macOS is now available from the macOS App Store.
Extend your system clipboard's functionality by using Clipboard Rules. Setup automated functionality to complete actions, like opening a file or folder, or showing a notification. Create elaborate triggers based on clipboard's text, files, or even web URLs!
Launch app and click ? button to see help topics.
Click + button in toolbar to create a new Clipboard Item.
Double-click new Clipboard Item. Type in a Rule Name.
Set type to 'Text'. Enter a Text to look for in system clipboard. Also you can copy that text you just entered.
Choose an action. Open File is an easy one, check the Open File checkbox, click File icon to right. Browse to a file and click Open.
Click Save button to close editor.
Check the circle icon to Enable Rule. If you had copied the Clipboard Text from editor, the Rule should fire and open your file.
Rules will only fire once per match, the row will appear Dimmed until the system clipboard changing to something else.
If the system clipboard again gets update to your Rule's Clipboard Text field text, the Open File action will fire again.
Compare 2 Folder for macOS v1.2 Now Available
04/20/2024 Filed in: Compare 2 Folder
Compare 2 Folder for macOS has been updated to v1.2.
v1.2 Changes:
- Added Cancel operation button. Option key.
- Added Toggle to Compare on Startup.
- Added Cleanup of Bookmarks (internal code)
- Added Menu option to change Date/Time format to European standard.
- Updated App Icon to Mojave styling.
How To Narrate List Using Speaking List for macOS
02/17/2024 Filed in: Speaking List
Use Speaking List to speak text back to you with an optional delay between list items. Useful when you need to turn away from the computer, but can still listen to spoken text reading things back to you. Can be used to translate data from one app to another via manual typing of content once text has spoken. Delay ensures adequate time for manual translation.
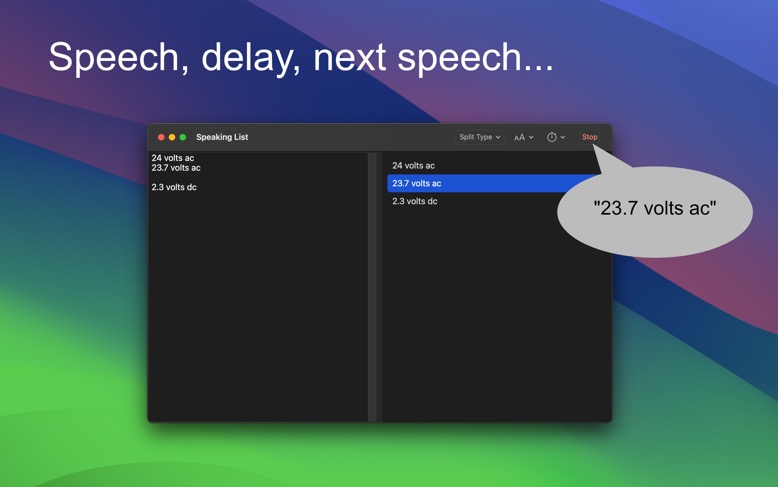
Type text into left side.
Choose Split Type in toolbar. Recommend selecting "Both".
Adjust Font Size.
Select Speaking Delay value. Recommend "2".
Verify right-side listview shows data to speak.
Make sure computer volume is at a reasonable level.
Click "Speak" button or double-click right-side list item.
How To Automatically Copy Text Using Auto Copy Order for macOS
02/16/2024 Filed in: Auto Copy Order
I finished development on Auto Copy Order for macOS. It is now live and available on the macOS App Store.
After pressing CMD-V to execute a 'paste' operation, Auto Copy Order automatically copies the next text content to the system clipboard for you. This can be especially useful when encountering a changing user interface like forms, or from apps that don't support autofill.
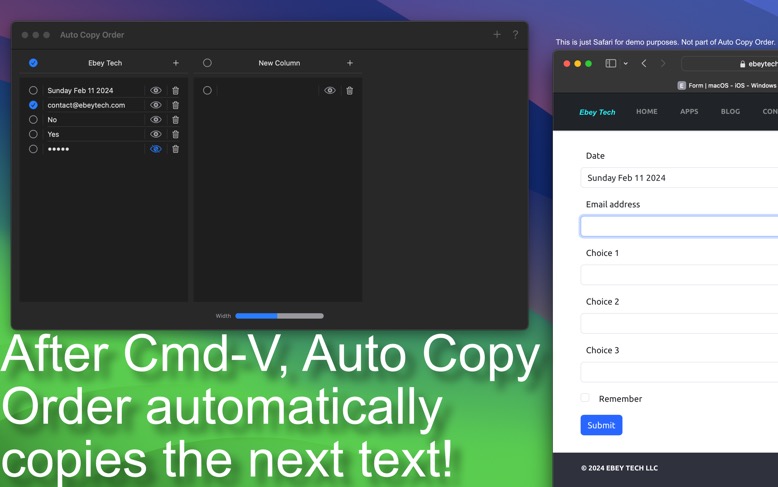
In order for 'Auto Copy Order' to detect when the 'V' key is pressed (user pasting via CMD-V), users will need to add 'Auto Copy Order' to the approved list of Accessibility Control. This setting is located under - Apple Menu > System Settings > Privacy & Security > Accessibility. Click the + button at the bottom, browse to the 'Auto Copy Order' app, then click Open. Auto Copy Order app will then be listed under the Accessibility control list. Verify the toggle button is ON. Finally restart Auto Copy Order app.
Click the + button in the toolbar to create a new Column Item.
Columns appear in a horizontal view. New Columns are inserted at the far left. Double-click the column name to rename the column. Right-click the column name to see context menu options for Rename and Delete. Each Column has a checkmark to their left, this activates which Column is currently active to provide automatic text copying to the clipboard. Clicking the checkmark also deactivates the Column. Right click a Column name and choose Reorder to access a list of Columns to be reordered.
Click a Column's + button to create new List Items.
Each List Item has a checkmark, a text field, and a delete button. Click in the center area or on an existing text string to modify a List Item's text. Click the far left checkmark to activate a List Item for automatic copying to clipboard. Click the Delete button to remove a List Item (holding option when clicking will Delete without Delete confirmation). Reorder List Items by dragging them to new positions.
Once you have your Column's List Items filled out with the appropriate text you want, click either the starting List Item or click the Column's checkmark to store the text to the clipboard. Locate the desired text field (external to Auto Copy Order) and press system CMD-V to initiate a paste operation. Auto Copy Order will detect (100ms detection rate) the keyboard shortcut was used and shift down to the next List Item, automatically copying its text string to the clipboard. Repeat operation. Auto Copy Order will loop back to the top List Item once it reaches the bottom of list.
The Mask button for each item obscures the text field characters, which can be useful when you need to hide text from view. Text content will still be copied in normal string format (unobscured).
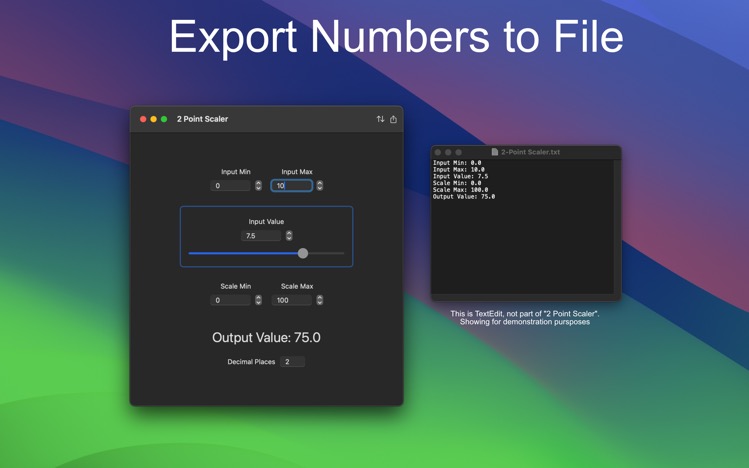
2 Point Scaler for macOS Now Available!
12/20/2023 Filed in: 2 Point Scaler
2 Point Scaler takes an input and converts it from one range to another scaled range. For example you could convert an input value from Celsius to Fahrenheit and view the converted output. Or convert an input value from a 4-20mA signal to a 0-50 psi value.
For conversion to work properly, minimum values should be less than maximum values for both input setpoints and scale setpoints.
Auto Copy Order for macOS in Development
12/19/2023 Filed in: Auto Copy Order
I am working on a new macOS app aimed at helping users iterate through text content for pasting from the clipboard. When autofill isn't available it can sometimes be frustrating copying pasting content, having to switch back and forth between apps. Auto Copy Order helps with those situations by providing a list of text that is incrementally and automatically copied to the clipboard when the user presses CMD-V.
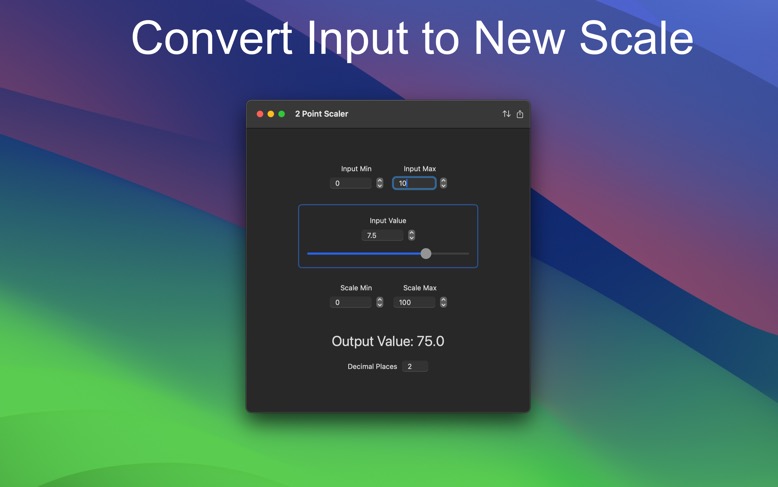
Working on a 2 Point Scaler App for macOS & iOS
12/17/2023 Filed in: 2 Point Scaler
I started development on a 2 Point Scaler app for macOS & iOS. The purpose of this app is to convert an input of a certain range to a new scale, then output the result. For example if you have an input that is a 4-20 mA sensor and you want to convert the input value from 0-50 psi. This app will produce the output value. Another example is converting Celsius to Fahrenheit, input min/max of 0-100 and scaling between 32-212.
Create Checklists using Simple Week Checklist for macOS
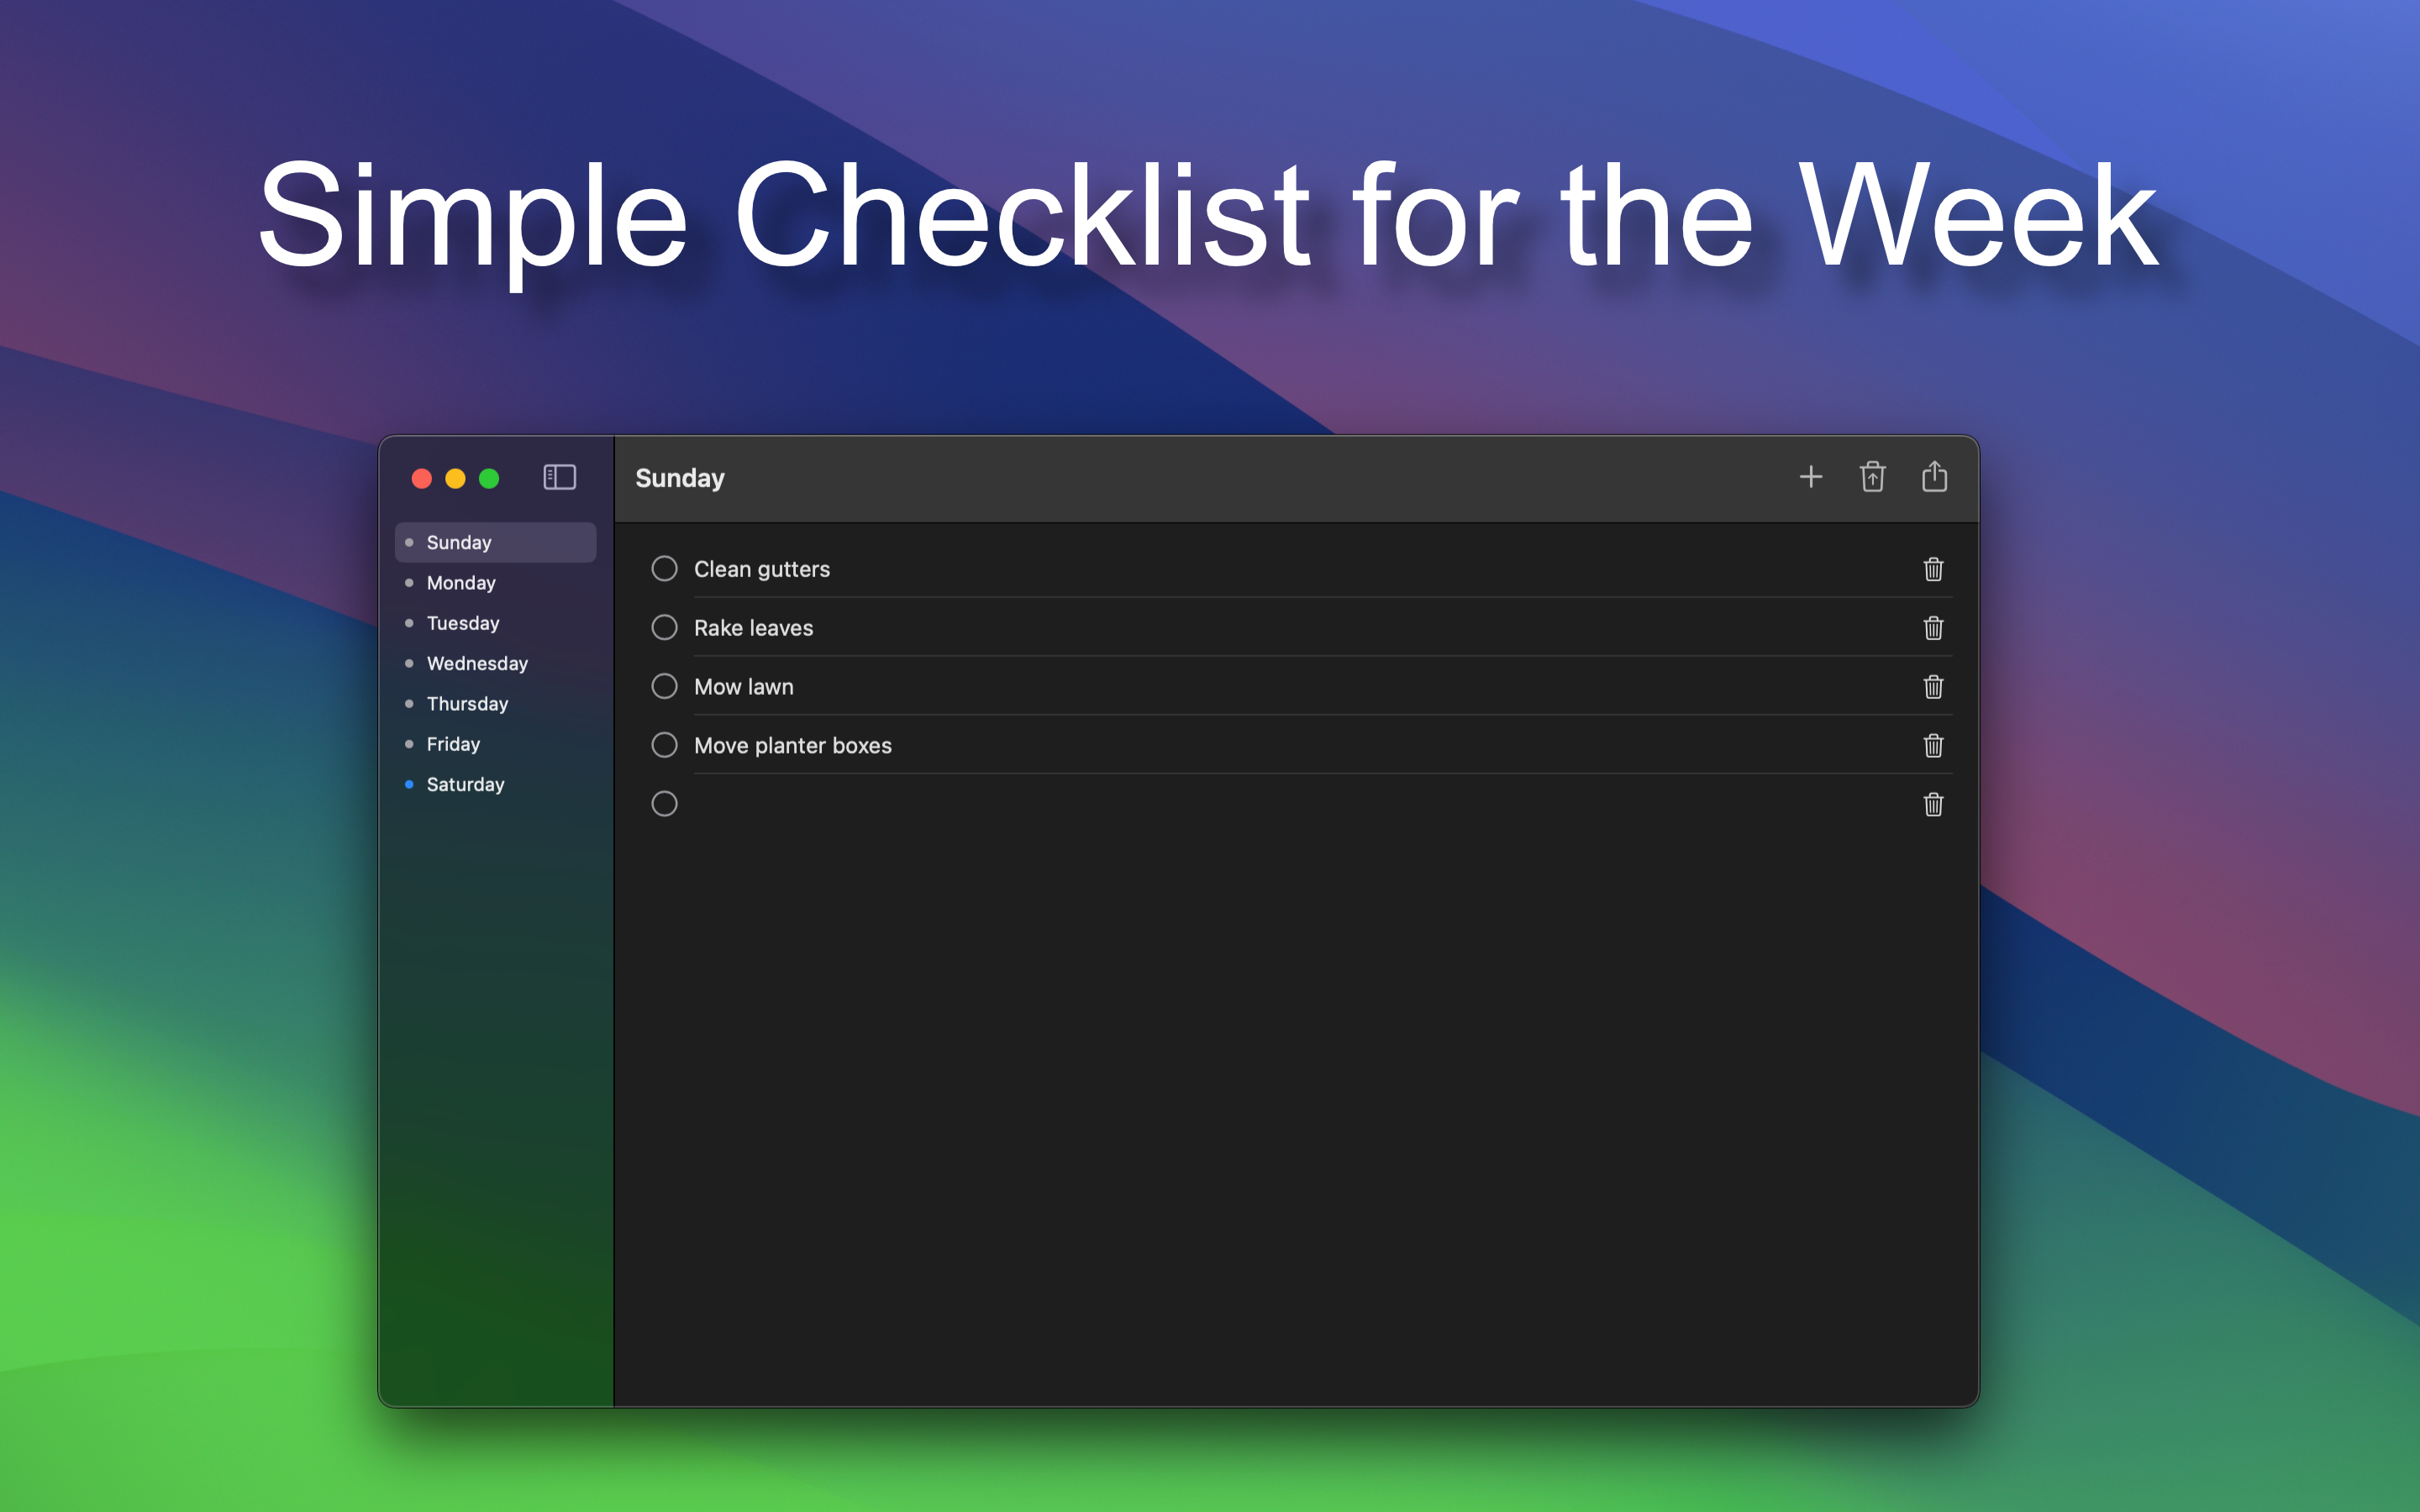
12/06/2023 Filed in: Simple Week Checklist
Some tasks should be tracked simply. Use Simple Week Checklist to track weekly task status. At the start of a new week, clear checklists and start again. Simple Week Checklist makes simple work of everyday checklists, from work, to family to chores - track your simple tasks using Simple Week Checklist.
Updates to Simple Week for macOS
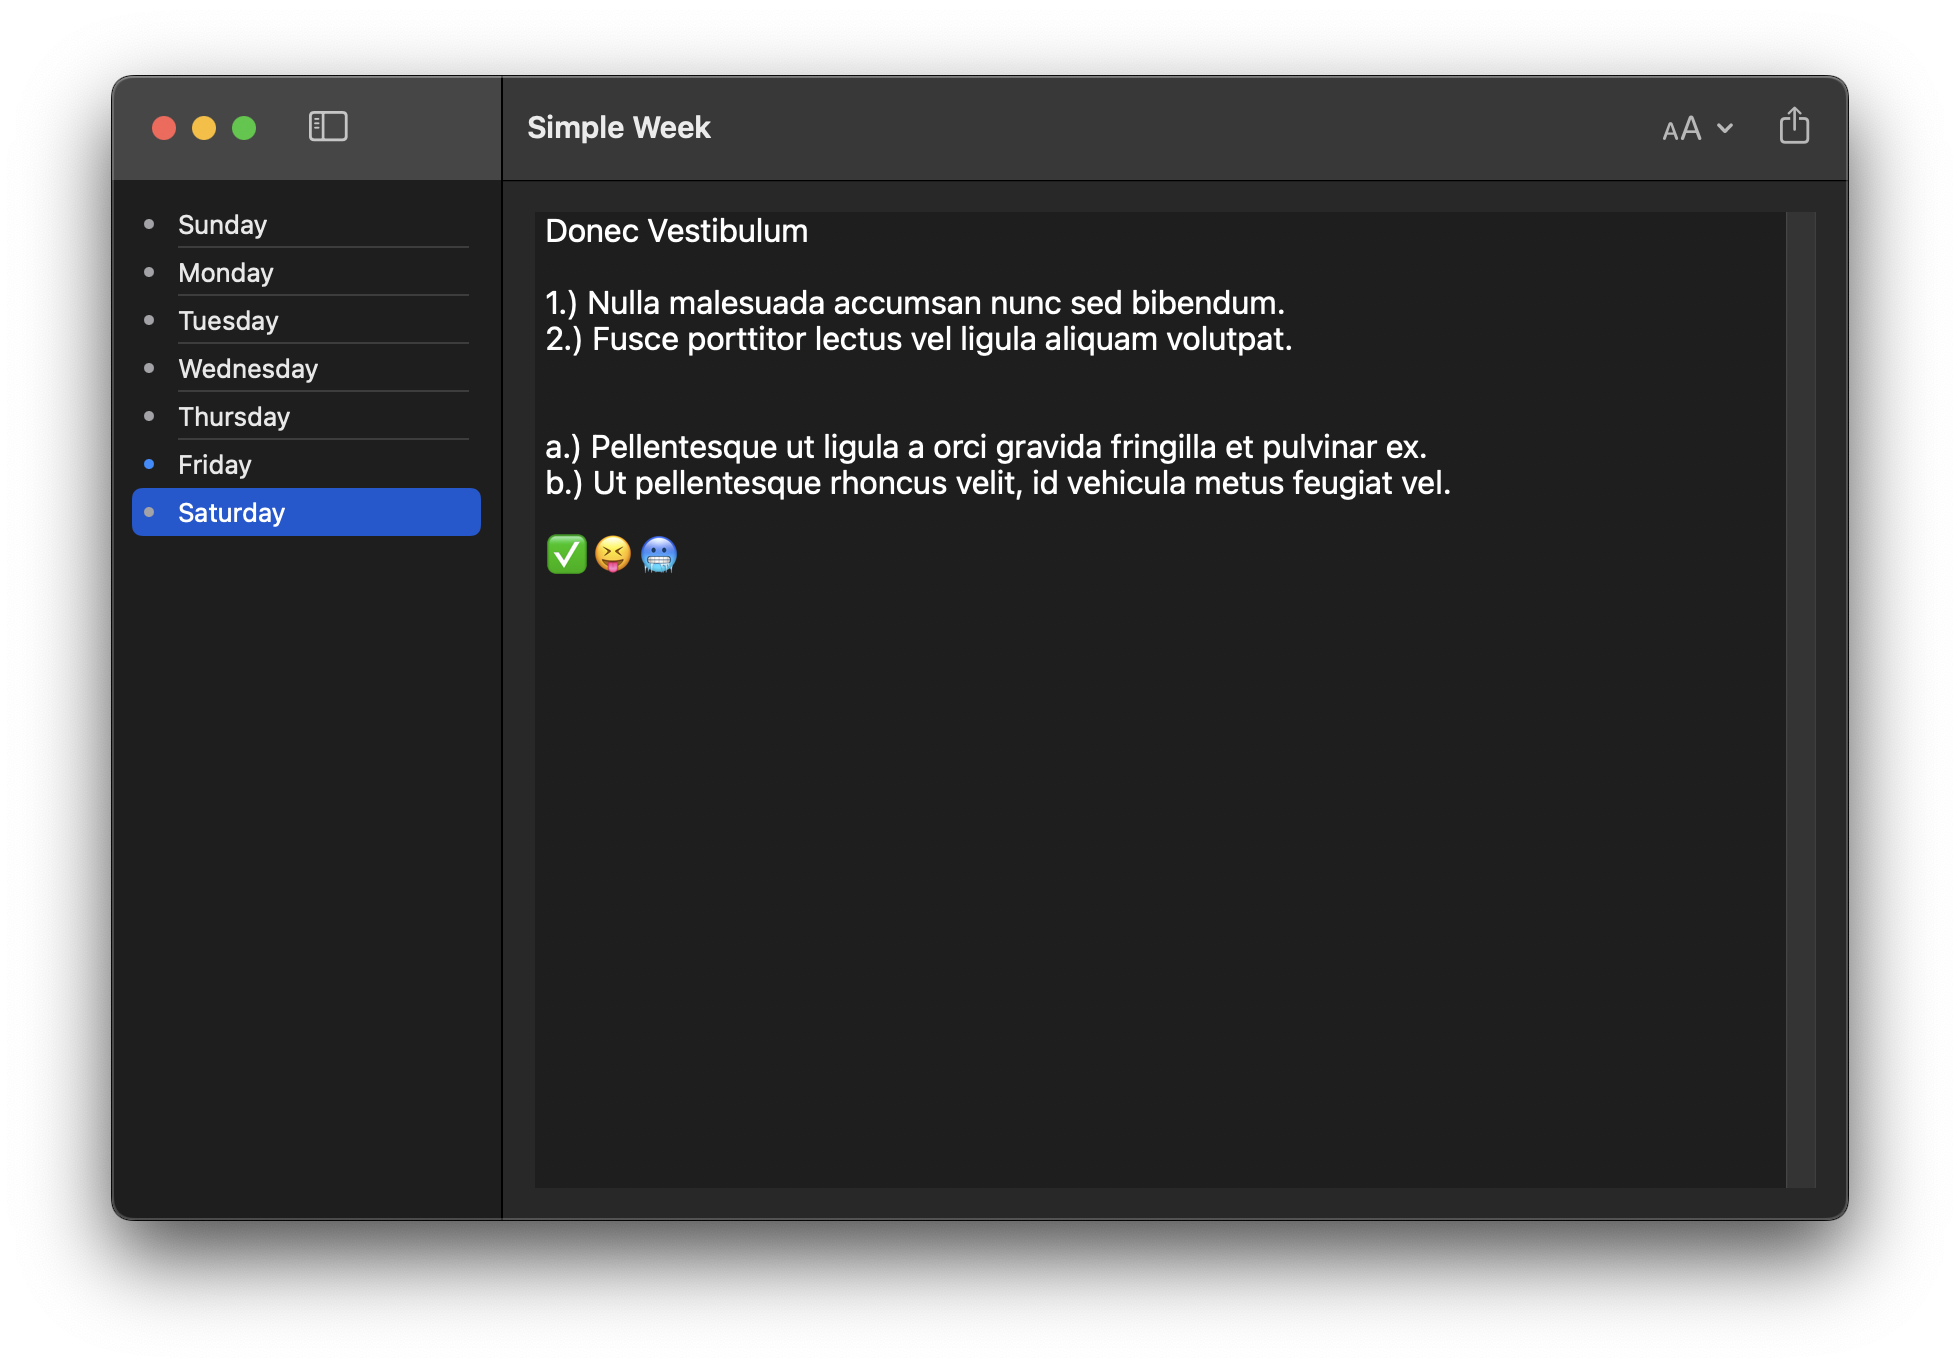
12/04/2023 Filed in: Simple Week
I updated Simple Week for macOS. This was a quick change that adds in a button to hide/show navigation pane.
Simple Week Routine for macOS- Now Available!
10/31/2023 Filed in: Simple Week Routine
Wakeup and accomplish more with Simple Week Routine. An app designed specifically to quickly track your "Routine" progress throughout the week. Simple Week Routine allows for fast creation of routines and powerful tools for accomplishing your routine goals.
Instructions for App Operation:
1.) Click the + at the top of navigation to add a new Group.
2.) Enter in a Group Item Name.
3.) Select a color. The furthest left color (white/black) is the system primary color. Depending on light/dark mode, this color may appear different.
4.) Click Add button to create the new Group.
5.) Click the newly created Group. The main view will load with days of the week.
6.) In the Toolbar, toggle the S, M, etc… buttons to hide/show days of the week. This can be useful for focusing on specific days of the week.
7.) Click the + button in the main view’s toolbar to add a new Routine.
8.) Enter in a Routine Item Name.
9.) Toggle the S, M, etc… days of the week toggle buttons. When creating a new Routine, it’ll be listed under whatever days of the week are toggle active (blue).
10.) Use the M-F link button to automatically activate the Monday-Friday toggle buttons.
11.) Set an appropriate Routine Start Time for when your Routine is to be accomplished.
12.) Click Add button to create the new Routine.
13.) New Routines are added to the main view’s days of the week.
14.) To mark a Routine as complete, check the Routine’s checkbox (square).
15.) To edit Routines, double-click any Routine. This will load the editor, which is similar to the Add Routine prompt. For example if Tuesday was toggled on, toggling it again will turn it off and remove the Routine from that day of the week in the main view.
16.) Clicking the Delete Routine button in the editor will remove the Routine from all days of the week and from the app.
17.) In the main view toolbar, clicking the Clear Checkboxes button will uncheck all Routine’s checkboxes. This can be useful when starting a new week and you want to clear previous week’s progress.
18.) Click the Search field in the toolbar and type in desired text content to filter the days of the week for Routines matching similar text by Routine Name.
19.) In the main view, double-click a day of the week to toggle a UI focus on that day’s Routines. This can be helpful to further focus on content. Double-click it again to return UI to normal.
20.) Right-click a day of the week’s name to see additional functions. Check All will check all Routines for that day of the week. Uncheck All works the same. Delete All Routines will remove Routines for that day of the week.
21.) Right-click options for a day of the week when using “All Groups” work a bit differently. The Check All function will apply to all Groups for that day of the week. Same for Uncheck All. Additionally when using All Groups and performing right-click option Delete All Routines, it will remove all Routines for all Groups on that day of the week. Care should be taken when using these global functions as they can impact multiple items in one operation.
22.) Right-click a Group to Edit or Delete the Group. Editing allows for name and color change. Deleting a Group will also delete all of it’s Routines, so care should be taken when using.
Compare 2 Text for macOS Update v1.4
10/28/2023 Filed in: Compare 2 Text
Updated Compare 2 Text for macOS to v1.4.
-Updated Export message.
-Updated App Preview and Screenshots.
Create Custom Dock Menus Using Ace - Jump Lists for macOS
10/28/2023 Filed in: Ace - Jump Lists
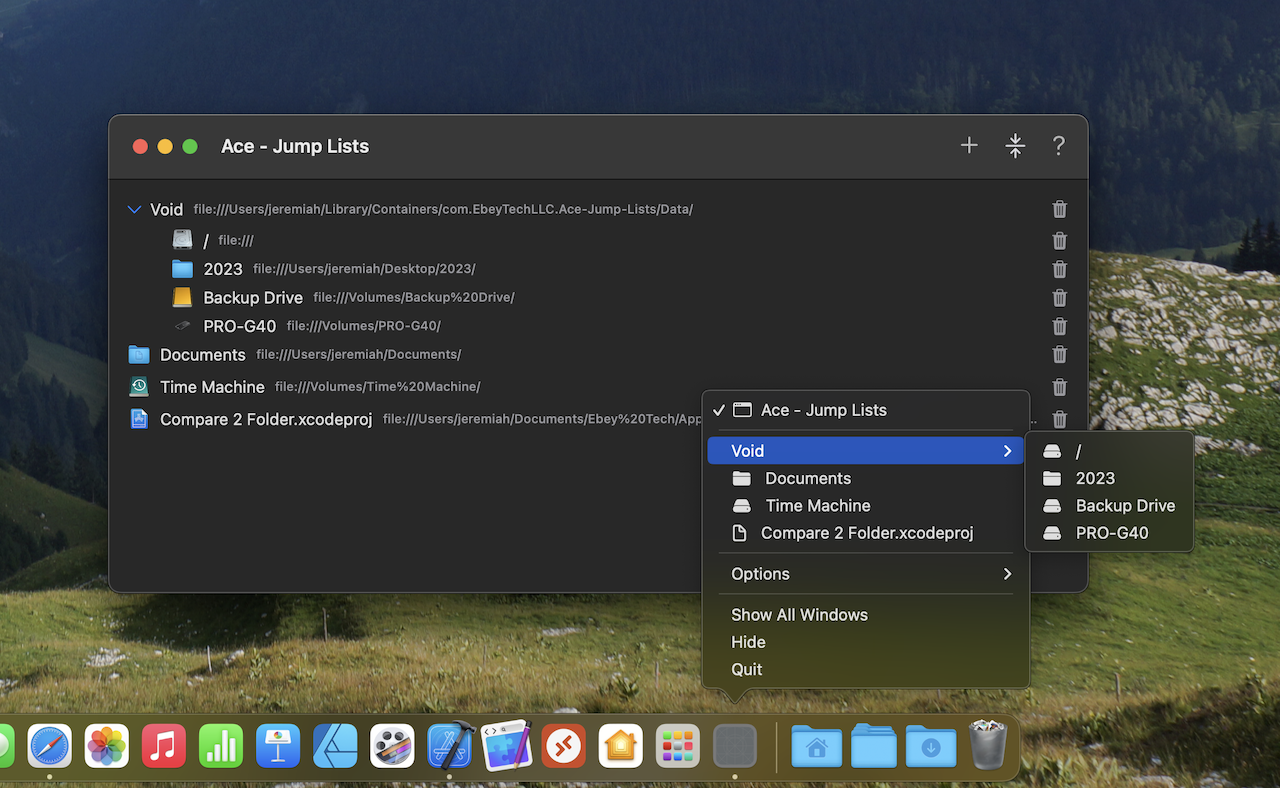
Ace - Jump Lists gives users the power to create awesome easily accessible and FAST Dock Menus! Everyone agrees, the Dock Menu is the fastest way to access content on macOS systems, because the Dock is always there, but Dock Menus are dependent on recent files and folders that serve the app ONLY. Ace - Jump Lists changes that by allowing for customizable Dock Menus! Users can now place whatever Files, Folders, or even website URLs they want in the Dock Menu. This changes everything!
To utilize Ace - Jump Lists’ Dock Menu features, the Ace - Jump Lists app MUST be running. It CAN be minimized or hidden though, so it appears out of sight.
Click the '+' button to add a new Jump Item. Jump Items can be a Group, File/Folder, or a URL. If adding a Group, click Group, enter in a Group Name, then click Add button. If adding a File/Folder, click File/Folder, if you have already created a Group, you can select a 'Parent' (Group). This will nest your new File/Folder under that Group. If you've selected a Group and change your mind, click on Group or URL to clear the UI selections, then you can click File/Folder again and the Parent field should be cleared. To browser to a File/Folder, click 'Add' button. This will launch the macOS Finder File/Folder picker. Choose whatever items needed. You can also select multiple Files/Folders. Click 'Open' when complete. New items are added to the main view list.
Ace - Jump Lists supports drag/drop for Files and Folders from macOS Finder. Locate desired File/Folder, then drag to Ace - Jump Lists. Drop either over the blank UI canvas, or existing Files/Folders, or drop on top of a Group. Dropping over canvas or existing Files/Folders will place the content at the root level of the list. Dropping over a Group will nest the content under the Group.
Ace's primary mechanism to usefulness is the Dock menu. Any content built out (Groups, Files/Folders, URLs) will be ported automatically over to the Dock menu. Access the Dock menu by right-clicking the Ace app icon. There, all items mirroring the Ace main UI list will be present. You can click on whatever item you want to 'launch' the content.
In Ace's main view list, double-click a File/Folder/URL 'name' to launch the content. Clicking on the icon or path will NOT launch the content. From the Dock menu right-click app icon, click any item to launch the content. For Groups, hovering over the menu item will expand its list of children (if it has any).
From the main view list, right-click any item and choose 'Edit' menu item. This will launch the item's appropriate type editing view. For Groups, there will be the 'name' field. Type in appropriate name and click 'Done' button. If you want to revert to original value, use 'Edit / Undo Typing' (or CMD-Z shortcut). For editing File/Folder parents', the Editing view will show a list of available Groups. Select a Group or click the 'Clear Parent' to not nest item in a Group. URLs can be edited in the same manner, enter in a label and URL. URLs are NOT verified, so be sure to enter in valid website URLs.
Click the Delete Button (trash can icon) to remove a Jump Item. To bypass the Delete confirmation prompt - hold down the 'option' key and click Delete Button. Delete is also available from each Jump Items' right-click menu. Hold 'option' key while clicking that Delete menu will also bypass the Delete Confirmation prompt.
Ace - Jump Lists for macOS
10/06/2023 Filed in: Ace - Jump Lists
I am working on a dock menu builder app for macOS called Ace - Jump Lists. Ace allows users to build-out their own custom dock menu using the Ace UI. Files, folders, and URLs can be inserted into Ace, their names are then ported over to the dock menu. Additionally users can insert a "Group" element and nest files, folders, and URLs in them.
The Keywords for macOS - Now Available!
09/26/2023 Filed in: The Keywords
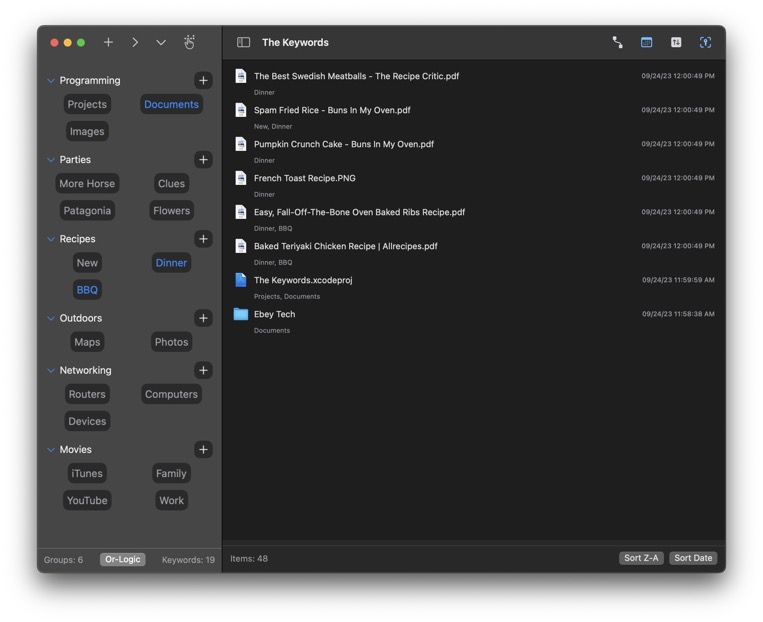
Use The Keywords app to assign keywords to files and folders. Utilize keywords to filter files & folders to access items fast and efficiently.
Click + button to create a new Tree Item. Click the Tree Item's + button to create new Keyword Items. In the navigation's toolbar, there are buttons for express operations, including Expand/Collapse Trees and Clear Keyword Selections. Tree Items can be Expanded/Collapse individually using the triangle next to them or by clicking the Tree Item Name. Tree Items have right-click options to Edit, Reorder, as well as some productivity buttons, for example turning the Group's Keywords on/off.
Keyword Items act like toggle button. Click them once to activate them. Click them again to de-activate them. Keyword Items have an important "key" feature for "Assigning Keywords" to a file/folder. A file/folder must be selected in the right-side Main View area before using the Assign Keywords functions. There are additional right-click features for Keyword Items too, like Clear Others - which de-activates other Keywords, and only activates the right-clicked Keyword.
Drag/drop file(s)/Folder(s) to the Main View (right-side area) to include files/folders in the app. Once a file/folder has been dropped and appears in the Main View, users can click to select it. To assign a Keyword to that File/Folder, with the file/folder selected, right-click a Keyword and choose "Assign Keywords". This links the Keyword to the selected file(s)/folder(s). After a Keyword has been assigned, clicking the Keyword would initiate the Main View to filter only files/folders that include the activated Keyword(s).
The Keywords app includes a toggle for filtering methods, referred to as "And-Logic" and "Or-Logic". And-Logic method would filter only files/folders that include ALL matching activated Keywords. Or-Logic method allows for filtering for ANY files/folders assigned to the activated Keywords.
For the Main View, along the top toolbar are optional toggles to hide/show file/folder properties, like Date Added and File Size. Date Added refers to the date of when the file/folder was dropped into The Keywords app. *Some files may not report a file size when read from the system. The macOS Finder may report the file's size, if true size is needed.
The Main View results can be sorted by Name or Date Added by clicking the Sort buttons along the bottom. The order can also be reversed by changing A-Z to Z-A.
The Keywords for macOS in Development
09/24/2023 Filed in: The Keywords
Working on a new macOS app called "The Keywords". This app allows users to drag/drop files/folders into the app and assign Keywords to them. Users can then use the keywords to filter specifically for target file/folder and then launch the item accordingly. Still doing some testing with the app to verify proper app operation. Also brainstorming some other similar keyword-based apps that focus on user productivity. Also considering porting The Keywords app to Windows.
macOS Media Player App - Media Slide Blog
09/07/2023 Filed in: Media Slide
Media Slide is a great way to skim through an array of media files. Media files can be images, videos, music, or audio format.
Click the 'Choose Media Directory' button in toolbar to locate a directory containing media files (images, videos, audio). Typical image formats like png and jpg are supported. Typical video formats like mov and mp4 are supported. Typical audio files like mp3 and m4a are supported. If Quick Look can see/play it, it'll likely work. Media will be loaded into a background collection and default to showing the first media item from list. Media items in collection will be listed in alphabetical order.
Use the 'Clear App Data' button to remove the media directory reference from Media Slide app. Clear App Data doesn't affect any files stored on computer. Media Slide uses the Entitlement 'Access User Selected Files (Read Only)' - meaning it can't change any computer file data.
Use the Slider along the bottom to drag left/right. Moving the slider will switch between media files from the chosen directory. The Slider will only be visible if there are two or more media items. Optionally the left/right arrows in the bottom left corner can also be used to switch between media items. Those buttons also have a keyboard shortcut (left/right arrows respectively).
Along the bottom of the UI will show the selected media file name. Hovering above the media file name with the mouse cursor will show a tooltip of the media file path. To the bottom right corner lists the media directory count.
Right-click the media item's name and choose 'Show in Finder' to open the macOS Finder to the selected media item's directory.
macOS Music Player App - Audio Slide Blog
09/02/2023 Filed in: Audio Slide
Audio Slide is a great way to skim through an array of audio files and playback music, audio recordings, or sound effects.
Click the 'Choose Audio Directory' button in toolbar to locate a directory containing audio files. Typical audio files like mp3 and m4a are supported. If Quick Look can play it, it'll likely work. Audio will be loaded into a background collection and default to showing the first audio item from list. Audio items in collection will be listed in alphabetical order.
Use the 'Clear App Data' button to remove the audio directory reference from Audio Slide app. Clear App Data doesn't affect any files stored on computer.
Use the Slider along the bottom to drag left/right. Moving the slider will switch between audio files from the chosen directory. Slider will only be visible if there are two or more audio items.
Along the bottom of the UI will show the selected audio file name. Hovering above the audio file's name with the mouse cursor will show a tooltip of the audio file path. To the bottom right corner lists the audio directory count.
Right-click the audio item's name and choose 'Show in Finder' to open the macOS Finder to the selected audio item's directory.
Better Clipboard Management in macOS
08/24/2023 Filed in: Floating Clipboard
Utilize Floating Clipboard for macOS to increase your productivity. Clipboard managers are a necessary tool for this day in modern computing. If you are struggling to constantly re-copy and re-paste text, images, and URL, checkout Floating Clipboard for macOS. Available on the Apple App Store!
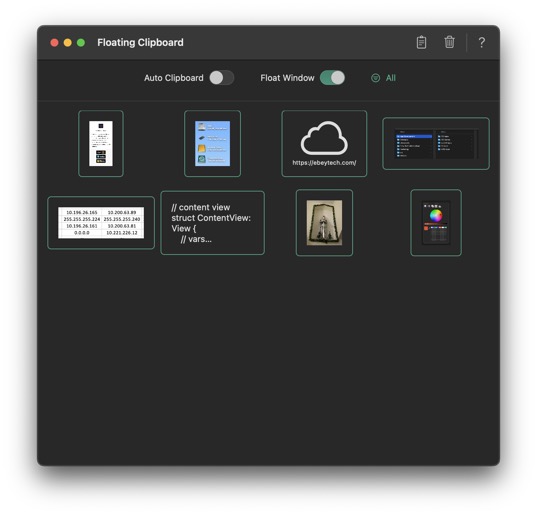
Floating Clipboard has a lot of great functionality, like Auto Clipboard, Float Window, and a powerful Image Viewer.
Create Temporary Notes for macOS using Temp Notes
07/03/2023 Filed in: Temp Notes
Sometimes I find myself needing to jot some quick notes or capture a screenshot. A lot of times I don't intend to keep the content, but need it readily accessible for a bit. Information like IP addresses, ticket numbers, or a screenshot of data - fleeting data where I may just need it around for awhile, then it can be trashed. Temp Notes helps provide that solution. I can throw content into it and recall it up in the future if need be. I don't need to login to an app or web portal, or organize any files. Just throw it in! Temp Notes keeps 30 days of content, with the option to set elements to 'static', so they stick around longer and are persistent through the apps date ranges. Temp Notes provides a lot of useful features to make using it a no-brainer. Other apps just can't do what Temp Notes does so easily.
Features:
- Near infinite canvas
- Canvas panning
- Text Elements
- Image Elements
- Draggable Elements
- Slider for date target
- Calendar picker for date target
- Text Editor - with font size & color
- Image Viewer - with zoom to cursor
- Paste text/image
- Drag/drop images
- List View of Elements
- Internal Help Topics
- Fast Delete shortcuts
- Z indexing for Element layering
Skim through Videos using Video Slide for macOS
07/03/2023 Filed in: Video Slide
Video Slide is a great way to skim through an array of videos.
Click the 'Choose Video Directory' button in toolbar to locate a directory containing video files. Videos will be loaded into a background collection and default to showing the first video from list. Videos in collection will be listed in alphabetical order. Care should be taken to choose a location with an appropriate video quantity. The more videos in a directory the slower the processing time. Fewer videos like in the range of 20-60, make for a better experience.
Use the 'Clear App Data' button to remove the video directory reference from Video Slide app. Clear App Data doesn't affect any files stored on computer. Video Slide uses the Entitlement 'Access User Selected Files (Read Only)' - meaning it can't change any computer file data.
Use the Slider along the bottom to drag left/right. Moving the slider will switch between videos from the chosen directory. Slider will only be visible if there are two or more videos. Optionally the left/right arrows in the bottom left corner can also be used to switch between videos. Those buttons also have a keyboard shortcut (left/right arrows respectively).
Along the bottom of the UI will show the selected video name. Hovering above the video name with the mouse cursor will show a tooltip of the video path. To the bottom right corner lists the video directory count.
Right-click video name and choose 'Show in Finder' to open the macOS Finder to the selected video's directory.
Static Copy for macOS Update v1.3
05/23/2023 Filed in: Static Copy
Completed Static Copy update v1.3.
Added Label fields. Changed Delete behavior to confirm if Copy Text entered. Added check for if Control key down, then skip Confirm Deletion. Changed Reorder pop-up size to scale with main window. Added Help Topics.
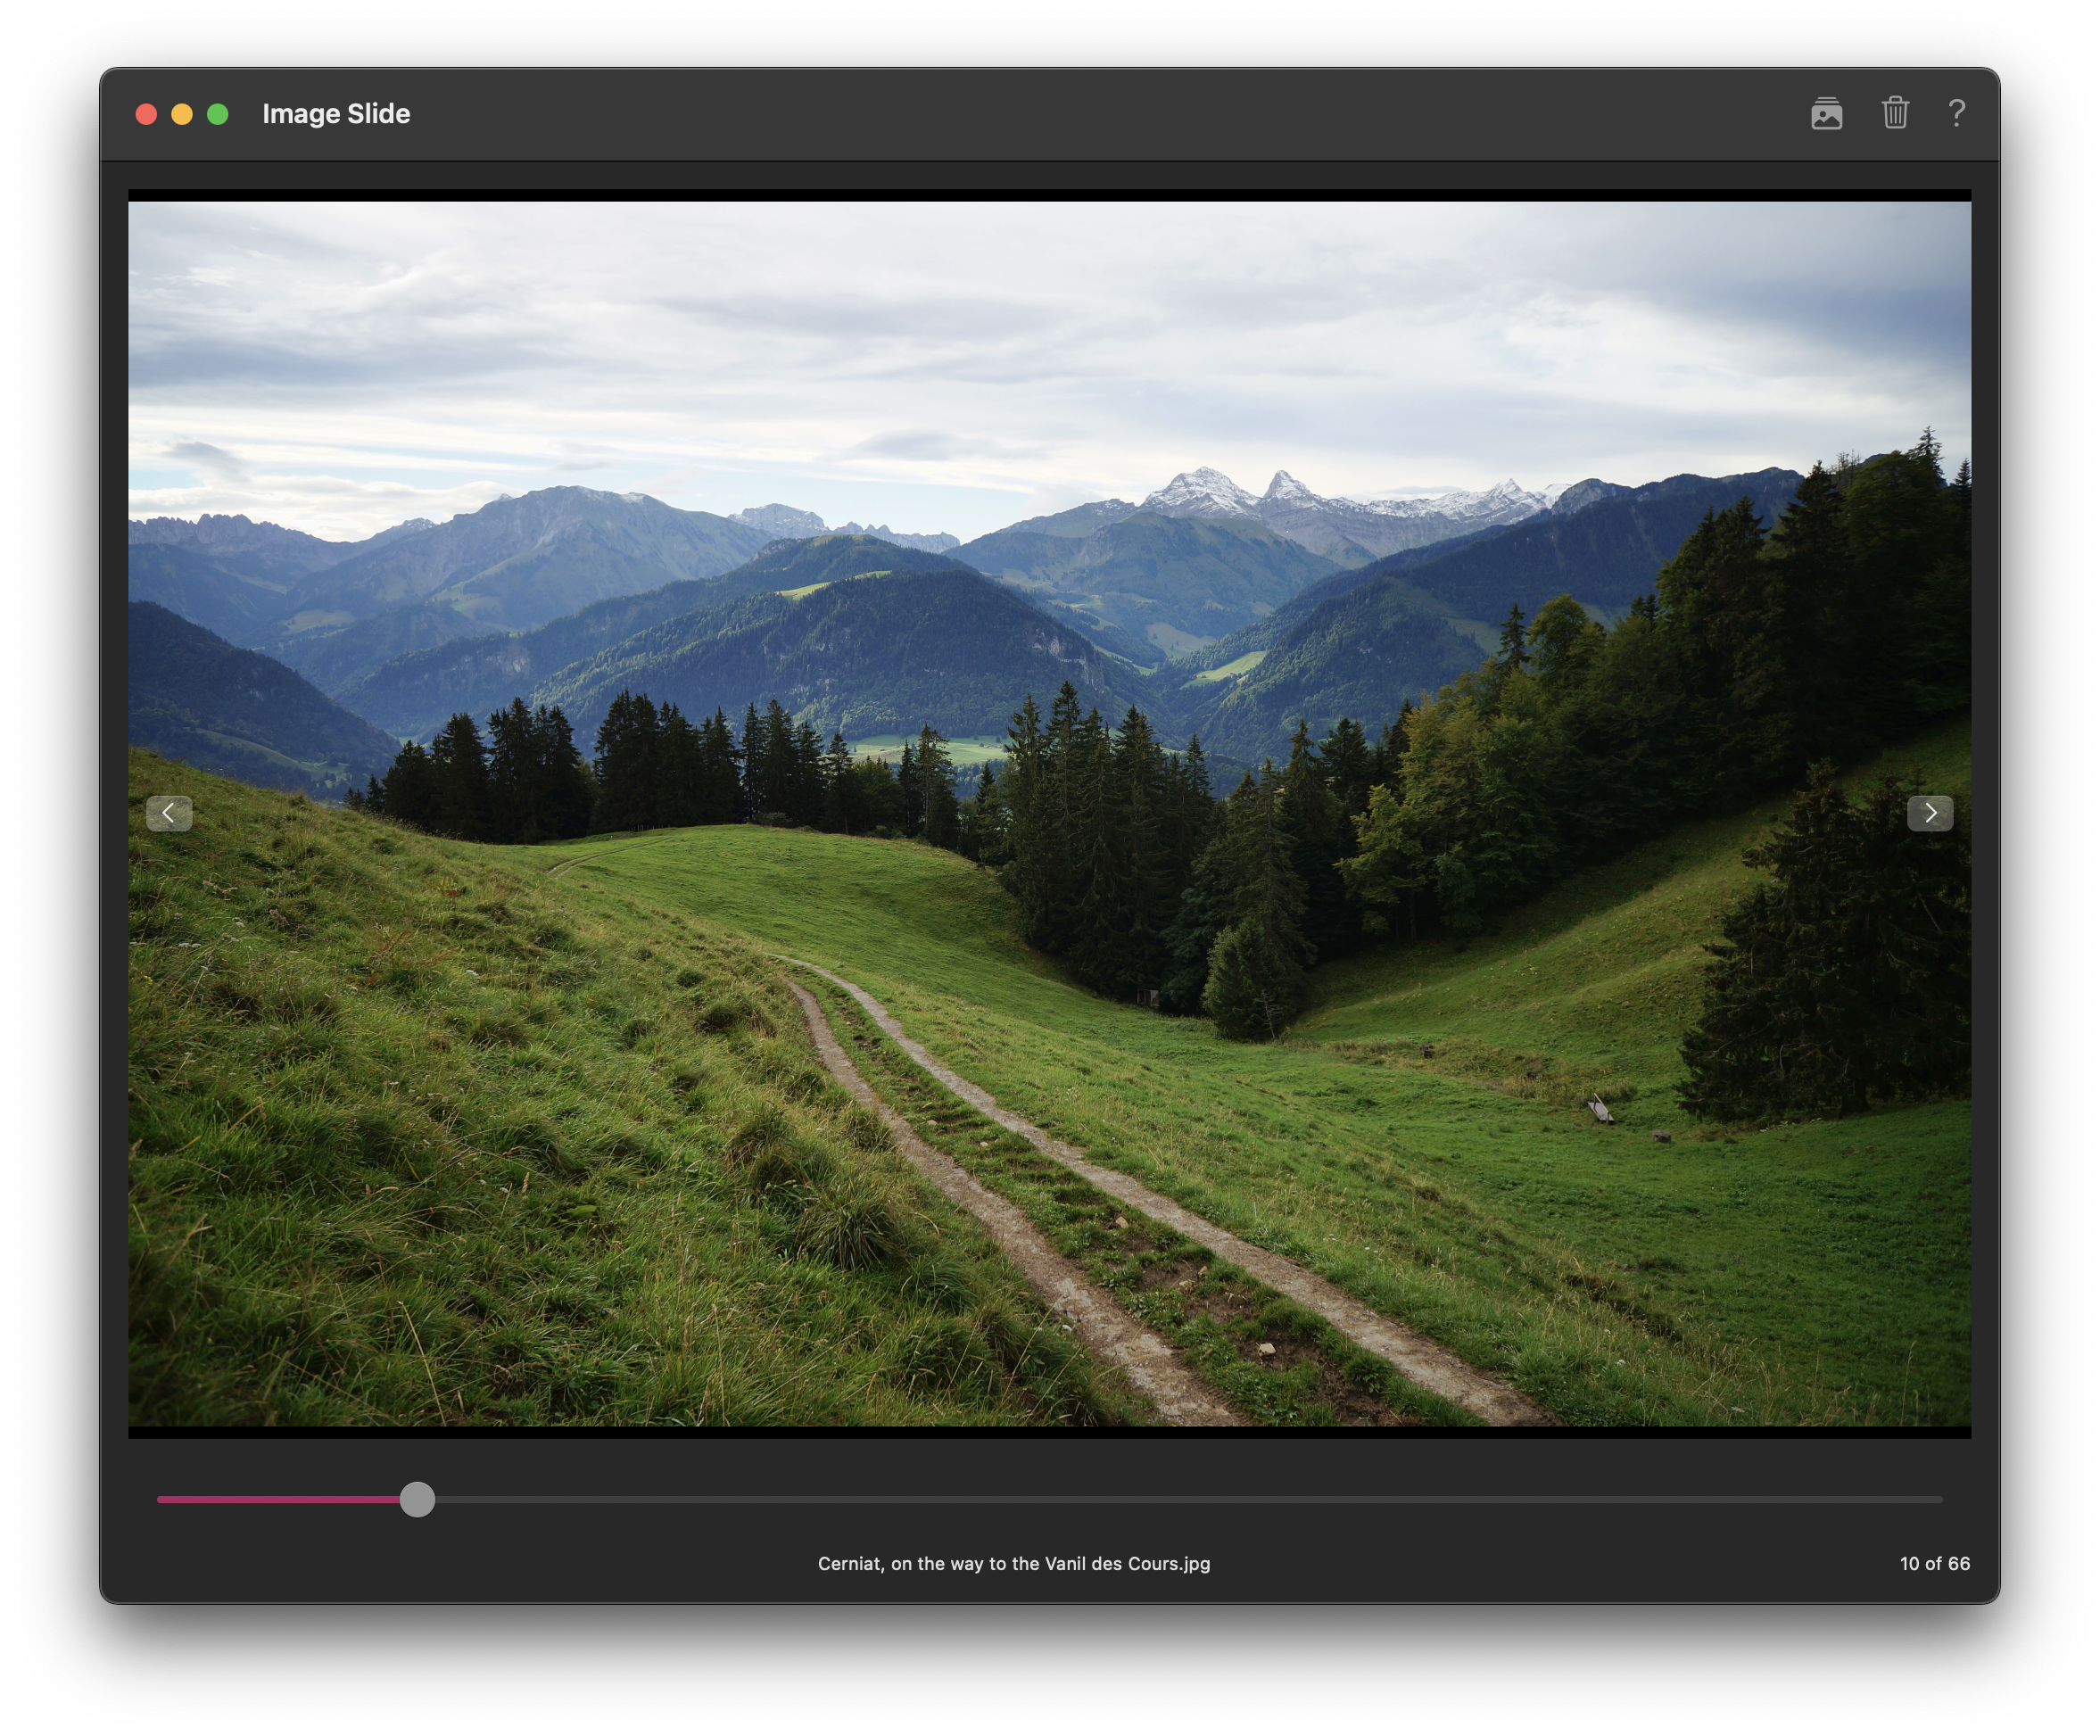
Skim through Images using Image Slide for macOS
04/19/2023 Filed in: Image Slide
Image Slide is a great way to skim through an array of images.
Click the 'Choose Image Directory' button in toolbar to locate a directory containing image files. Images will be loaded into a background collection and default to showing the first image from list. Images in collection will be listed in alphabetical order.
Using Finder, drag some images and drop them onto Image Slide's app UI. Images will appear in the view and can be cycled to using the Slider control. Dropped images won't persist through app relaunches (use Directory Picker for that). If you had set an image directory and then drag/dropped some images, upon next app restart the image directory items will re-appear. If you wish to clear the image directory when drag/dropping different images, click the 'Clear App Data' button before drag/dropping new images.
Use the 'Clear App Data' button to remove the image directory reference from Image Slide app. Clear App Data doesn't affect any files stored on computer.
Use the Slider along the bottom to drag left/right. Moving the slider will switch between images from the chosen directory.
Along the bottom of the UI will show the selected image name. Hovering above the image name with the mouse cursor will show a tooltip of the image path. To the bottom right corner lists the image directory count.
Use mouse scroll or trackpad pinch gesture to Zoom into the image.
Use left-mouse-click-hold + drag to pan around the image.
After zooming/panning, if you need to reset the image position, double-click the image. Keep in mind if the image is already at reset coordinates/zoom-level, double-clicking will launch the image.
Double-click the image to launch the image using its default application. Keep in mind if the image has been panned or zoomed, double-clicking will reset the image position.
Right-click image and choose 'Copy' to copy the image to the system pasteboard (clipboard).
How to Compare Images for macOS Using Compare 2 Image
03/21/2023 Filed in: Compare 2 Image
Compare images in directory or compare multiple directories using include subfolders toggle button. Comparison can be made by name, date modified, size, data, or all of the above to quickly identify images that are different. Further highlight images with a difference using built-in fast filter options for the display of all results, just matches, or non-matches. Images that don’t have a match will have a mark identifying them as a non-match. Ability to hide/show properties for date modified and size. Use the Include Subfolders option to list all images; including images nested inside other folders. Care should be taken using the subfolders option, as the processing time for comparison will be much longer for large lists.
Features:
- Compare images quickly.
- Images nested in subfolders can be compared.
- Multiple comparison methods; by name, date, size, and data.
- Preview images.
- Launch images in default app.
Here are instructions for app operation:
1.) Launch app.
2.) Click button for Set Directory 1. Choose a directory for comparison. Directory should include images.
3.) Click button for Set Directory 2. Choose a directory for comparison. Directory should include images.
4.) The left/right lists will update to show images and a comparison status green/red checkmark/x to indicate comparison results. A green checkmark indicates the item appeared in the other list. An X indicates no match was found for selected comparison parameter.
5.) Toggle toolbar buttons appropriately.
6.) Change 'Comparing' toolbar selection for desired comparison. E.g. choosing 'Name' will compare image names between the two lists.
7.) Change 'Filter' for desired filtered result for Lists.
8.) Double-click a list's image to see an image preview.
9.) Right-click a list's image to see 'Open' to launch the item.
10.) Right-click pathbar along bottom to see 'Open' to open the path location in Finder.
Use Examples:
- Compare images on local disk to a backup directory on another disk.
- Confirm images have been copied to a location by a specific date.
- Determine image sizes for directories.
- See all images from a root folder through all subfolders.
Clipboard History Manager for macOS - Floating Clipboard
03/16/2023 Filed in: Floating Clipboard
Use this app to take screenshots of content, then store them in the Floating Clipboard window. Now you can zoom in and focus on details using the built-in image viewer. Since Floating Clipboard floats above other apps and windows, the app can be tucked into a Desktop corner and you can still reference the content with ease.
Also use this app to copy text and do similar operations like images. The built-in text editor has a 'Virtual Line' function to draw focus to desired content.
Finally, there is a built-in URL viewer to view pasted URL content from the web (with limited functions).
Features:
-Clipboard history.
-Auto fetching of clipboard contents (optional).
-Float Window above other apps & windows (optional).
-Fast & fluid type-based filtering.
-Inserted content management.
-Editable text.
-Image Viewer with simple mouse-scroll zoom.
-URL Viewer for webpage viewing.
-Built-in Help Topics.
Instructions for Operation:
1.) Launch app.
2.) Optionally choose Auto Clipboard - used to automatically fetch clipboard contents (if image, text, or URL) and inserts into Floating Clipboard.
3.) Optionally choose Float Window - used to keep Floating Clipboard app UI above other apps & windows.
4.) Elsewhere in system copy image, text, or URL content via traditional means (e.g. use macOS screenshot command to take a snapshot).
5.) Once desired content is copied to system clipboard, use the Paste button in Floating Clipboard to insert the content. Or, if Auto Clipboard function is enabled, content will automatically be inserted without having to click Paste button.
6.) Repeat for other images, text, or URL if desired.
7.) Double-click an image, text, or URL inside Floating Clipboard to open either an editor/viewer (depending on clicked item).
8.) If double-clicking an Image item - an Image Viewer pop-up will show. If NOT using the optional 'VIew as PDF' mode, mouse-scroll will zoom in/out on image. Left-clicking + dragging will 'pan' image around. If using the 'View as PDF' mode active, zoom can be done by using shortcut command CMD & +/-. There are traditional right-click functions for PDF options too.
9.) If double-clicking a Text item - a Text Editor pop-up will show. Users can edit the text and click 'Complete' button to save changes. Or 'Cancel' button to discard changes. An optional 'Virtual Line' function is available to use as a mark to allow easier focusing on text content. The line can be moved up/down by left-clicking + dragging.
10.) If double-clicking a URL item - a URL viewer pop-up will show. Typical BUT limited browser operation can be achieved.
11.) Use the trash icon, Delete button in toolbar to Delete All items in grid view.
12.) Filtering can be achieved by clicking the 'All' link-button next to the filter icon. Filter for Image, Text, or URL can be performed. The filter link-button will cycle through the types and then loop back to 'All' to show all possible results.
Examples of Use:
-I use this app to screenshot content from other Mission Control screens and paste it into Floating Clipboard so I can zoom in on the data. With the window floating I can tuck it off to the side and still work on other tasks. Optionally Floating Clipboard (any app for that matter) can be set to appear on other Mission Control screens by right-clicking app's dock icon - Options - Assign to - "All Desktops".
That Text for macOS
03/15/2023 Filed in: That Text
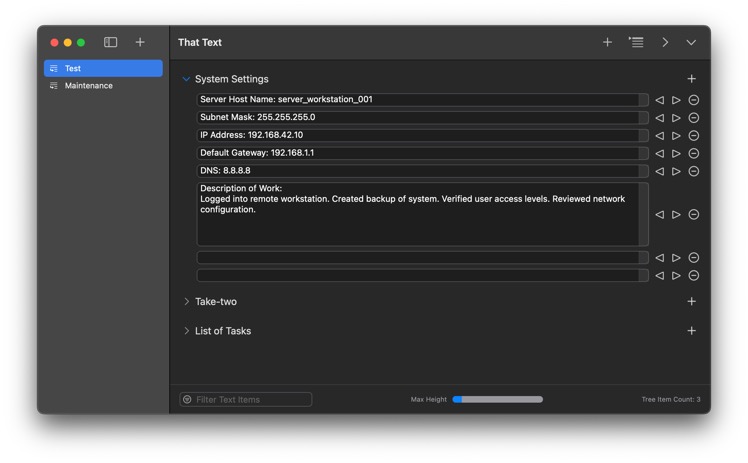
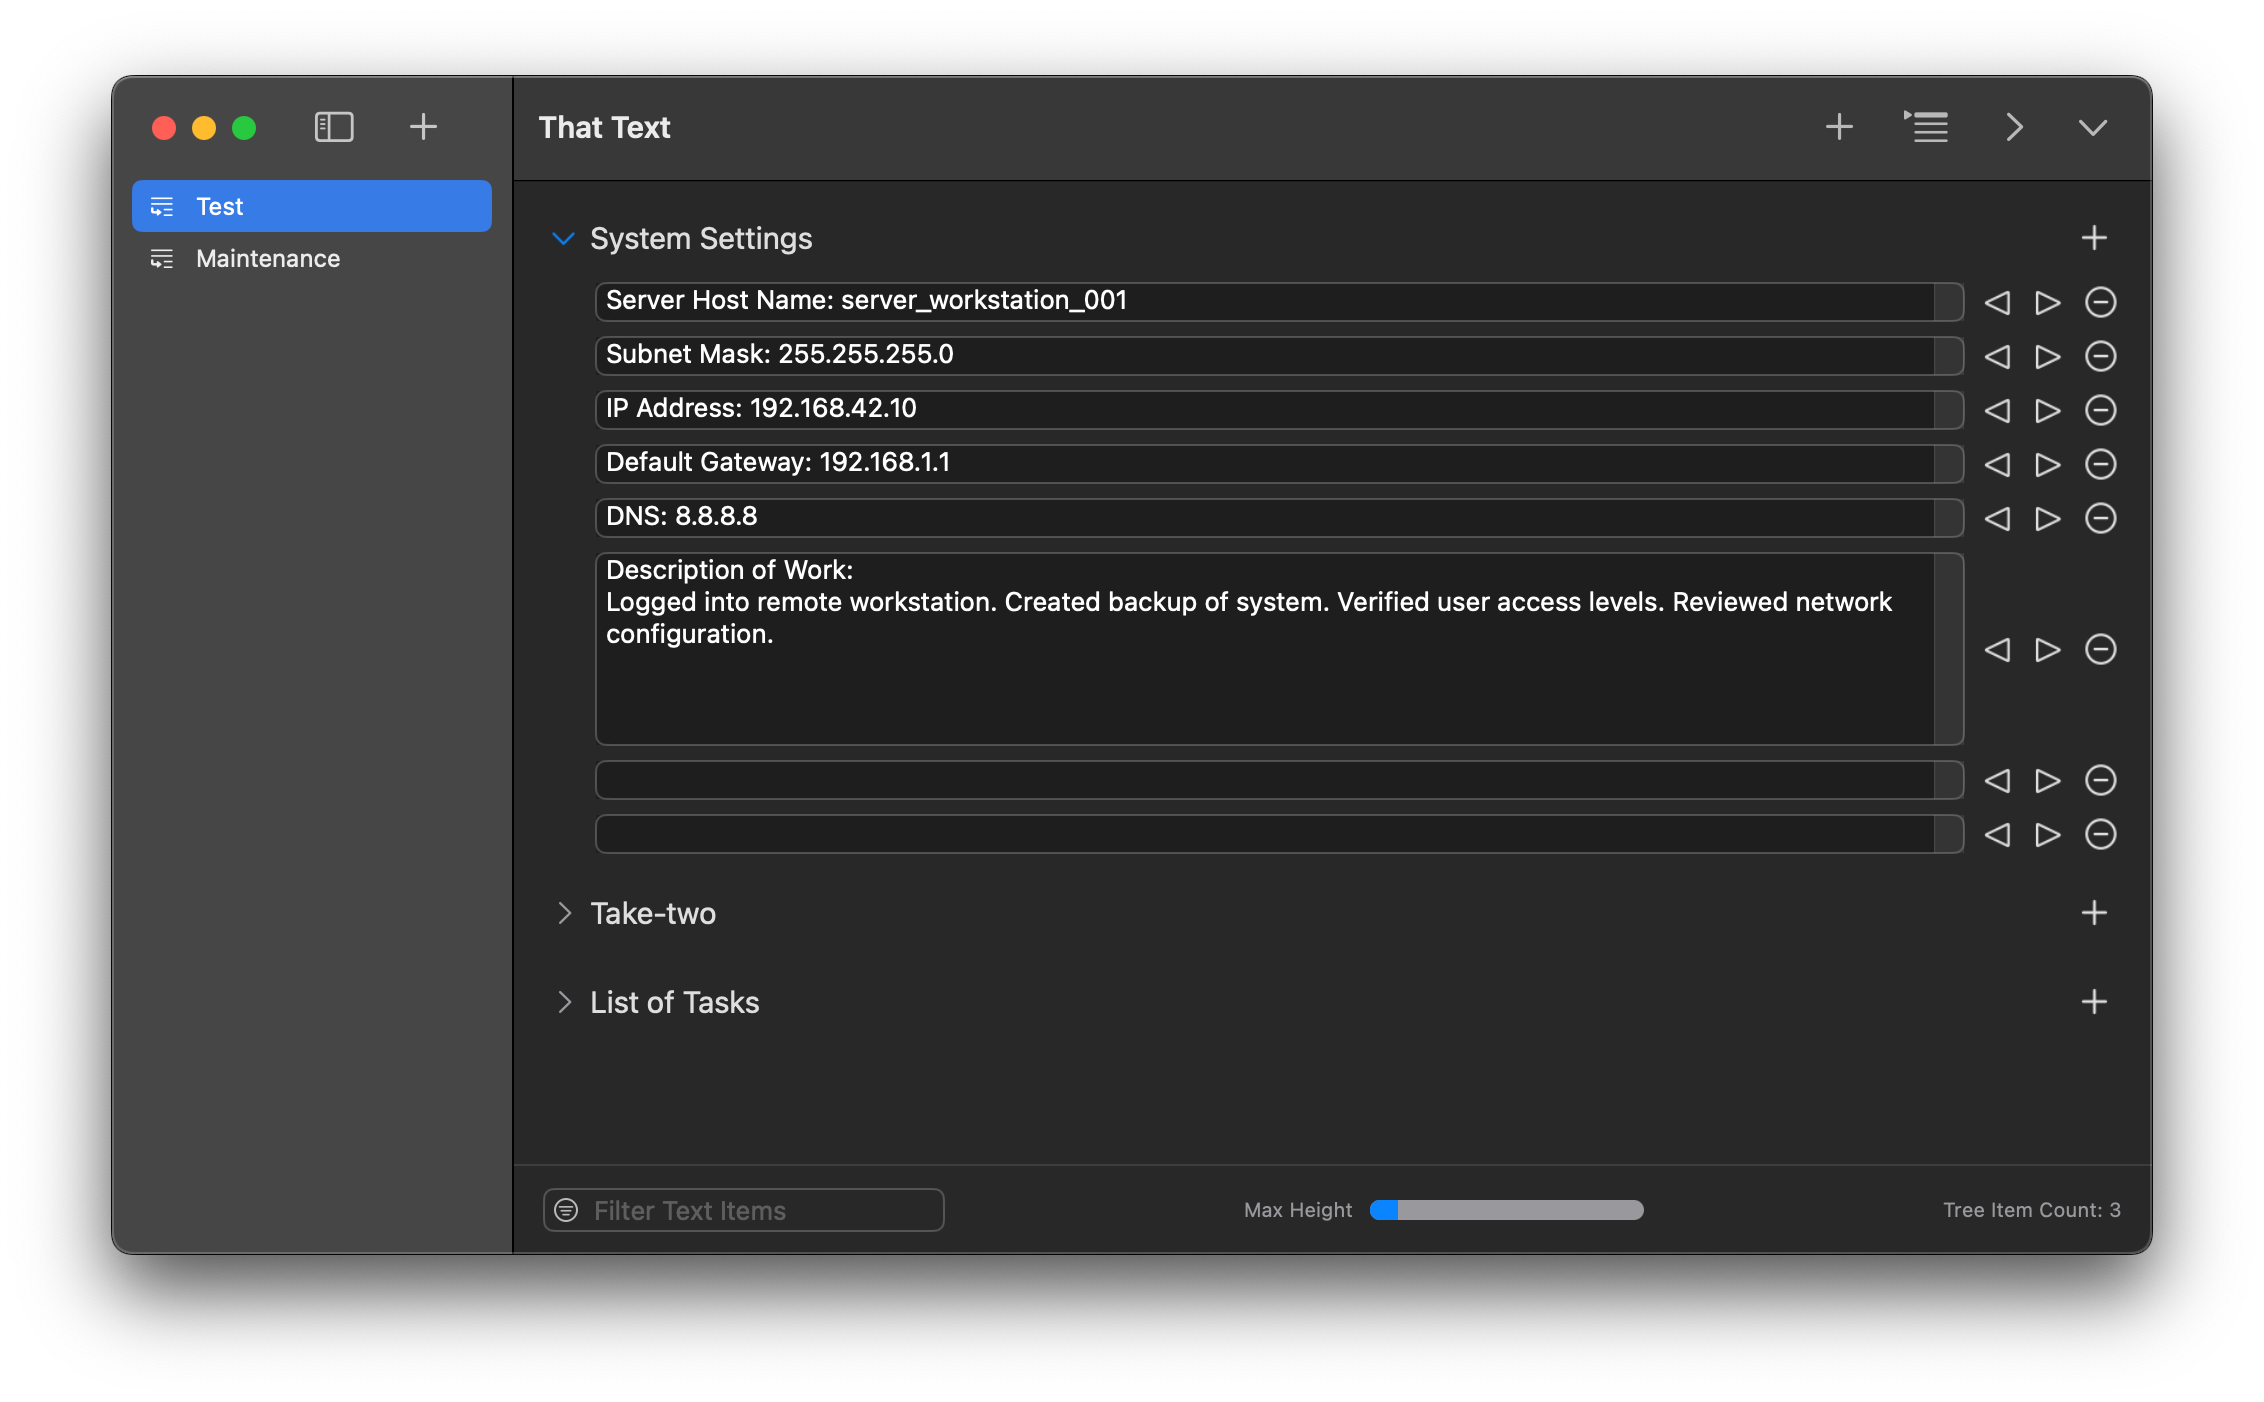
That Text allows for quick data entry into text fields. Group text content into navigable entries to easily organize content. Click on a Nav Item to bring up previous text entries fast. Edit or reorder content using built-in context menus. Text entries can be shifted left/right to simulate a parent/child tree-like structure. A powerful Filter field allows for fast filtering of content. Filtering can be toggled between filtering by Text entry or Tree name.
Features:
- Editable navigation items.
- Stellar tree view to organize complex checklists.
- Great looking text fields that can be indented to form parent/child structures.
Instructions for app use:
1.) Launch app.
2.) Click + icon to create a new Navigation Item (Nav Item).
3.) Enter in a Nav Item name.
4.) Click newly created nav item.
5.) Main view loads. Click + icon in upper right to add new Tree Item. When pop up shows, enter a name.
6.) Click newly created Tree Item’s + icon. This creates Text fields for data entry.
7.) Type data into text fields. It auto saves content.
8.) Click move left/right arrows to adjust indent.
9.) Click ( - minus) icon to delete a text field. If text field has data, there will be a confirmation pop-up. If no data, the field is just removed.
10.) Right click on text field's buttons to right for context options. For example right-clicking on minus (-) button will show more options.
10.1) Right-click options: Insert New Text Above/Below will insert a new text field either above current right-click location or below. Indentation of inserted items will match current indent of currently right-click item.
10.2) Reorder will show a pop-up view where user can drag/drop entries around in whichever desired order is wanted.
11.) Toolbar Reorder button will perform a similar task as the text field Reorder; although it will only show Tree items in list and they will be reordered to desired order.
12.) Toolbar chevrons for collapse all and expand all, this affects only Tree items under current Navigation item - unless using the "All Items" navigation, then all Tree Items for all Navigation Items will either expand or collapse.
13.) Right-click context options for Navigation items for editing Nav Item name, Reordering list, or deleting.
14.) Filter field at bottom left of main view - clicking the filter icon will cycle between either filtering by Text data or by Tree Item name. Toggle icon to appropriate choice and type into filter field. Data is dynamically filtered. Be sure to clear the filter when complete - changing to another Navigation item keeps the Filter text and will still actively attempt to filter content.
15.) Max Height slider affects only Text fields that have a lot of text content in them (usually a few rows of text). Changing the Max Height slider will "cap" the text content to specified height, triggering the vertical scrollbar to become active.
Use Examples:
-Document computer configuration
-Create notes regarding topics of interest
-List out your reminders.
-Record information regarding work tasks.
How to Single Click Copy in macOS
02/05/2023 Filed in: Static Copy
Quickly copy text with one click! Static Copy provides a user adjustable list of text, where any text can be copied either from the app's main window or the embedded menu bar. Need to hide text characters? Use the masking button to quickly obscure any text from view. Reorder text entries in whatever order is needed.
Features:
-Create as many text entries as needed in list.
-One-click copying of text.
-Masking of text characters, so the text cannot be seen.
-Dedicated menu bar list, where text can be copied by single click of text. This can be done when Static Copy app is not focused too!
-Ability to change order of text entries in list.
Instructions for use:
1.) Launch app.
2.) Click the + button in upper right corner.
3.) In the newly created text field, enter in whatever text is desired.
4.) Click the checkmark button to "copy" the text to the clipboard. Icon momentarily reacts.
5.) Click the mask button to change the text to secure characters.
6.) Click the trash button to delete any text entries.
7.) Click the Static Copy menu bar up by the macOS system date/time. Click a text entry to copy the text to the clipboard.
8.) Click the Reorder button in the Static Copy app's window, up by the + icon. Click & drag text entries to change their order.
Create Checklist in macOS
02/04/2023 Filed in: That Checklist
That Checklist allows for quick data entry into text fields and mark-off of checkboxes. Group checklists content into navigable entries to easily organize content. Click on a Nav Item to bring up previous checklists fast. Edit or reorder content using built-in context menus. Checklists can be shifted left/right to simulate a parent/child tree-like structure. A powerful Filter field allows for fast filtering of content. Filtering can be toggled between filtering by checklist text entry or Tree name.
Features:
- Editable navigation items.
- Stellar tree view to organize complex checklists.
- Great looking checklists that can be indented to form parent/child structures.
Instructions for App Operation:
1.) Launch app.
2.) Create a new Navigation Item by clicking " + " button.
3.) Type in a name for the Navigation Item.
4.) Click the newly create Navigation Item. A new view will load in the main view.
5.) Click the " + " button in the upper right corner.
6.) Enter in a name for the Tree Item.
7.) Click the " + " button next to the newly created Tree Item. This will automatically create a new Checklist Item.
8.) Enter in a text for the Checklist Item.
9.) Check the checkbox for the Checklist Item to mark the item complete.
10.) Use arrows to the right of the Checklist Item to shift the Checklist Item left/right. This allows for the appearance of parent/child visual.
11.) Click the trash can button to the right of the Checklist Item to remove the Checklist Item.
12.) Click the Reorder button in the toolbar to reorder the Tree Items.
13.) Right click any Checklist Item for context commands.
14.) Right click any Tree Item for context commands.
15.) Right click any Navigation Item for context commands.
Use Examples:
-Verify the packing of camping supplies.
-Create to do lists for chores.
-List out your reminders.
-Document completion of work tasks.
That Checklist for macOS
01/29/2023 Filed in: That Checklist
That Checklist allows for quick data entry into text fields and mark-off of checkboxes. Group checklists content into navigable entries to easily organize content. Click on a Nav Item to bring up previous checklists fast. Edit or reorder content using built-in context menus. Checklists can be shifted left/right to simulate a parent/child tree-like structure. A powerful Filter field allows for fast filtering of content. Filtering can be toggled between filtering by checklist text entry or Tree name.
Instructions for app use:
1.) Launch app.
2.) Create a new Navigation Item by clicking " + " button.
3.) Type in a name for the Navigation Item.
4.) Click the newly create Navigation Item. A new view will load in the main view.
5.) Click the " + " button in the upper right corner.
6.) Enter in a name for the Tree Item.
7.) Click the " + " button next to the newly created Tree Item. This will automatically create a new Checklist Item.
8.) Enter in a text for the Checklist Item.
9.) Check the checkbox for the Checklist Item to mark the item complete.
10.) Use arrows to the right of the Checklist Item to shift the Checklist Item left/right.
11.) Click the " - " button to the right of the Checklist Item to remove the Checklist Item.
12.) Click the Reorder button in the toolbar to reorder the Tree Items.
13.) Right click any Checklist Item for context commands.
14.) Right click any Tree Item for context commands.
15.) Right click any Navigation Item for context commands.
That Text for macOS in Development
01/29/2023 Filed in: That Text
Currently working on a macOS app called "That Text". This app will be used for documenting information in text form. The purpose of this app is to allow a clean navigable UI that presents text based data in an easy to consume and update format.
How to Make a SwiftUI List Scroll Automatically
01/22/2023
How to Make a SwiftUI List Scroll Automatically. Using Apple Xcode for macOS.
macOS: v13.1
Xcode v14.2
Swift: v5
iOS: v14.2
macOS: v13.1
Xcode v14.2
Swift: v5
iOS: v14.2
Compare 2 Folder - Compare macOS Files & Folders
01/20/2023 Filed in: Compare 2 Folder
Compare files and folders for directories. Compare by name, date modified, size, or all of the above. Fast filter options to display all results, just matches, or just non-matches. Ability to hide/show properties for date modified and size. Change how folders are displayed, either grouped at the top before files, or sort amongst files by alphabetical order. Use the Include Subfolders option to list all files and folders; including items nested inside other folders. Care should be taken using the subfolders option, as the processing time for comparison will be much longer for large lists.
Instructions for App Operation:
1.) Launch app.
2.) Click button for Set Directory 1. Choose a directory for comparison. Directory should include files or folders.
3.) Click button for Set Directory 2. Choose a directory for comparison. Directory should include files or folders.
4.) The left/right lists will update to show files/folders and a comparison status green/red checkmark/x to indicate comparison results. A green checkmark indicates the item appeared in the other list. An X indicates no match was found for selected comparison parameter.
5.) Toggle toolbar buttons appropriately.
6.) Change 'Comparison' toolbar selection for desired comparison. E.g. choosing 'Name' will compare file/folder names between the two lists.
7.) Change 'Filter' for desired filtered result for Lists.
8.) Double-click a list's file/folder to launch the item.
9.) Right-click a list's file/folder to see 'Open' to launch the item.
10.) Right-click pathbar along bottom to see 'Open' to open the path location in Finder.
Voice Commands to Launch macOS Files, Folders, and Websites
12/07/2022 Filed in: Speech Command
Use your voice to launch commands for things like files, folder, and websites! Create scenarios of automation to be more productive and utilize technology to do the heavy lifting for you. Setup voice triggered commands to open multiple files at the same time. Speak into your microphone to open folders to a specific directory. Edit commands to whatever you want to speak.
Instructions for App Operation:
1.) Launch app.
2.) Click toolbar button choice for folder, file, or website.
3.) Folder - browse to and select folder. Click open. Enter command to be spoken to launch folder.
4.) File - browse to and select file. Click open. Enter command to be spoken to launch file.
5.) Website - enter command to be spoken to launch website. Enter in website URL.
6.) Click Reorder button to change order of commands.
7.) Check the checkbox to cycle enable/disable operation for commands.
8.) Double-click a command to manually launch the item.
9.) Right-click a command to see options for Edit and Delete. Edit allows you to edit the Command Key or the website URL.
How to Use Voice to Clipboard for macOS
11/26/2022 Filed in: Voice to Clipboard
Automatically transfer spoken words to your system's clipboard using Voice to Clipboard! Simply click the record button (or use Spacebar) to start an audio recording. Speak clearly into microphone what words you want to appear on the clipboard. When complete, click the microphone icon again to stop the recording. The recorded audio is translated into text and then automatically copied to the system's clipboard, ready for pasting in any application.
Instructions for App Operation:
1.) Launch app.
2.) Accept audio & microphone privacy prompts.
3.) Click the green microphone icon to start a recording. Can also use shortcut Spacebar.
4.) Speak clearly into microphone to record spoken words.
5.) Click red microphone icon to stop the recording. Audio is translated into text and copied to the clipboard.
6.) Text that was copied to clipboard also appears for display. Use the provided "Test Paste" field if you need to test the paste operation.
7.) Use "History" tab to see a list of current and previous translated texts.
8.) You can right-click history items to "Copy" text.
9.) There is also a right-click "Speak" function which will re the text aloud.
10.) There is a right-click option to delete text.
11.) Use Delete All button to remove all histories.
12.) Use Export button to export histories to a text-based file. Includes history date & history text.
How to Use Compare 2 Text for macOS
11/24/2022 Filed in: Compare 2 Text

Using 'Compare 2 Text' you'll be able to automatically compare two bodies of text together and see comparison results with ease. Comparisons occur both directions, so you can see differences between the two bodies of text. Compare 2 Text is a fast and reliable app to show automatic comparison results for paragraphs of text. Compare 2 Text has easy to understand visuals that are colored in vibrant colors. Powerful filtering functions give you unparalleled capability to see fast text matching results.
Instructions for App Operation:
1.) Start up app.
2.) Enter text into the left Text pane.
3.) Enter text into the right Text pane.
4.) Select appropriate Split Type. Carriage Return works ideal for most text comparison.
5.) Click "Compare" to see text comparison results, separated by selected Split Type in a List View format.
6.) Click to select a list item row for selection.
7.) Change text font size by selecting "Font Size" in the toolbar and selecting preferred value.
8.) Filtering of list can be achieved by changing the "Filter" option in the toolbar.
9.) Right-click options for list items to "Copy" text or to "Speak" the selected text.
Calendar-Widget
09/27/2022 Filed in: Calendar-Widget
Finished development on an app I've been meaning to make for a while. It is a simple calendar app so I can keep it open to always see a calendar. Calendar-Widget has the ability to float above other windows.
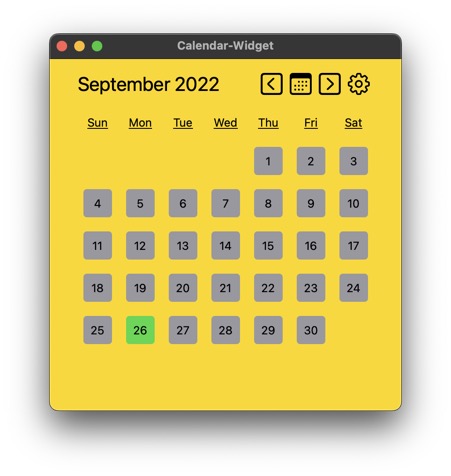
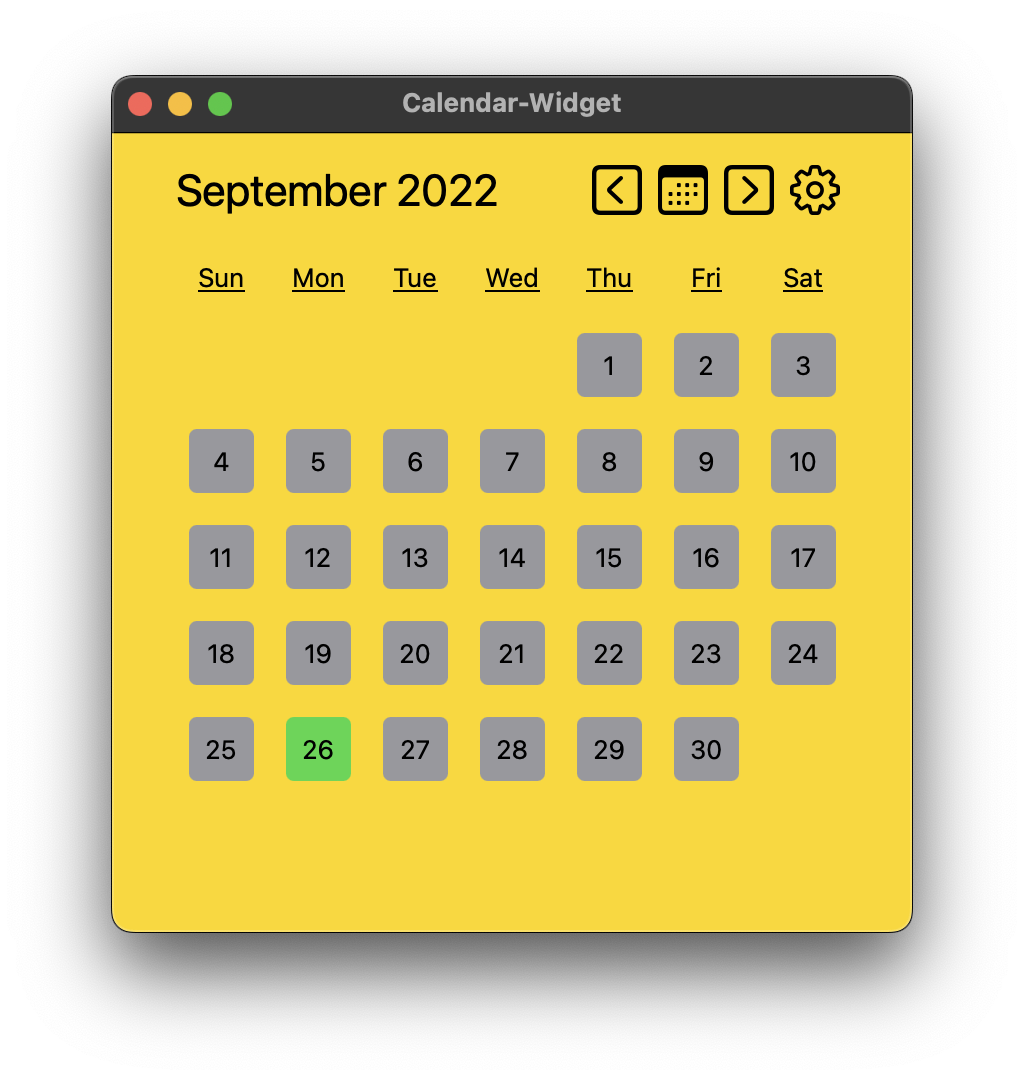
Compare 2 Text for macOS
10/15/2022 Filed in: Compare 2 Text
I commonly needed to compare two .ini files containing configuration information for some software. I need to be able to filter non-matching text data, so I could better synchronize the configuration in the files. 'Compare 2 Text' does all that and a bit more.
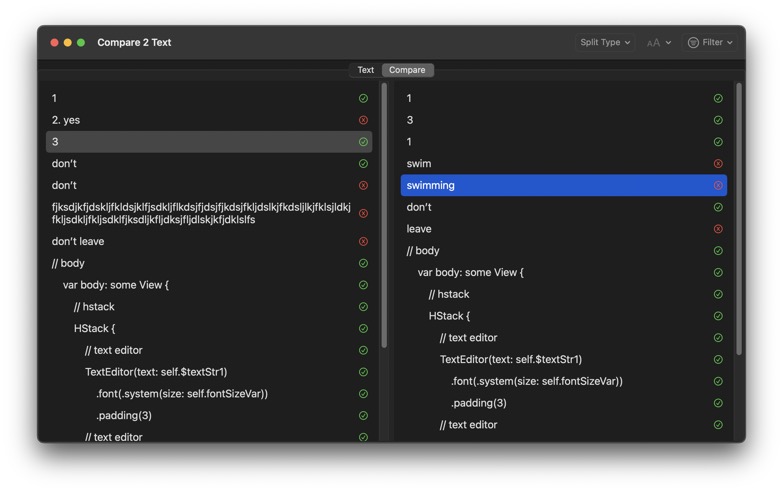
Media Finder Browser for macOS
08/13/2022 Filed in: Media Finder Browser
Media Finder Browser is now complete and is live in the macOS App Store. This app is part of the 'Finder Browser' suite of apps, where is aims to aid in the discovery and viewing of content. I initially set out to develop an app to help me with finding images and videos buried in sub-folders. If you are in need of such an app, please do check them out, thanks!
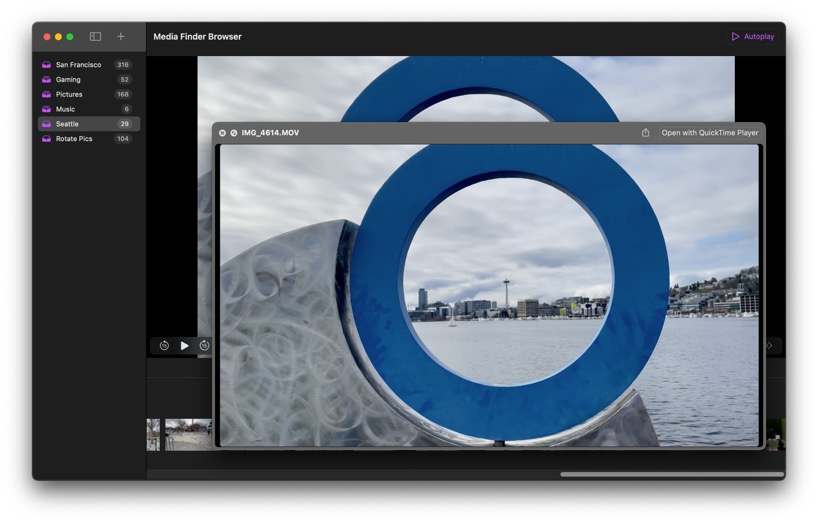
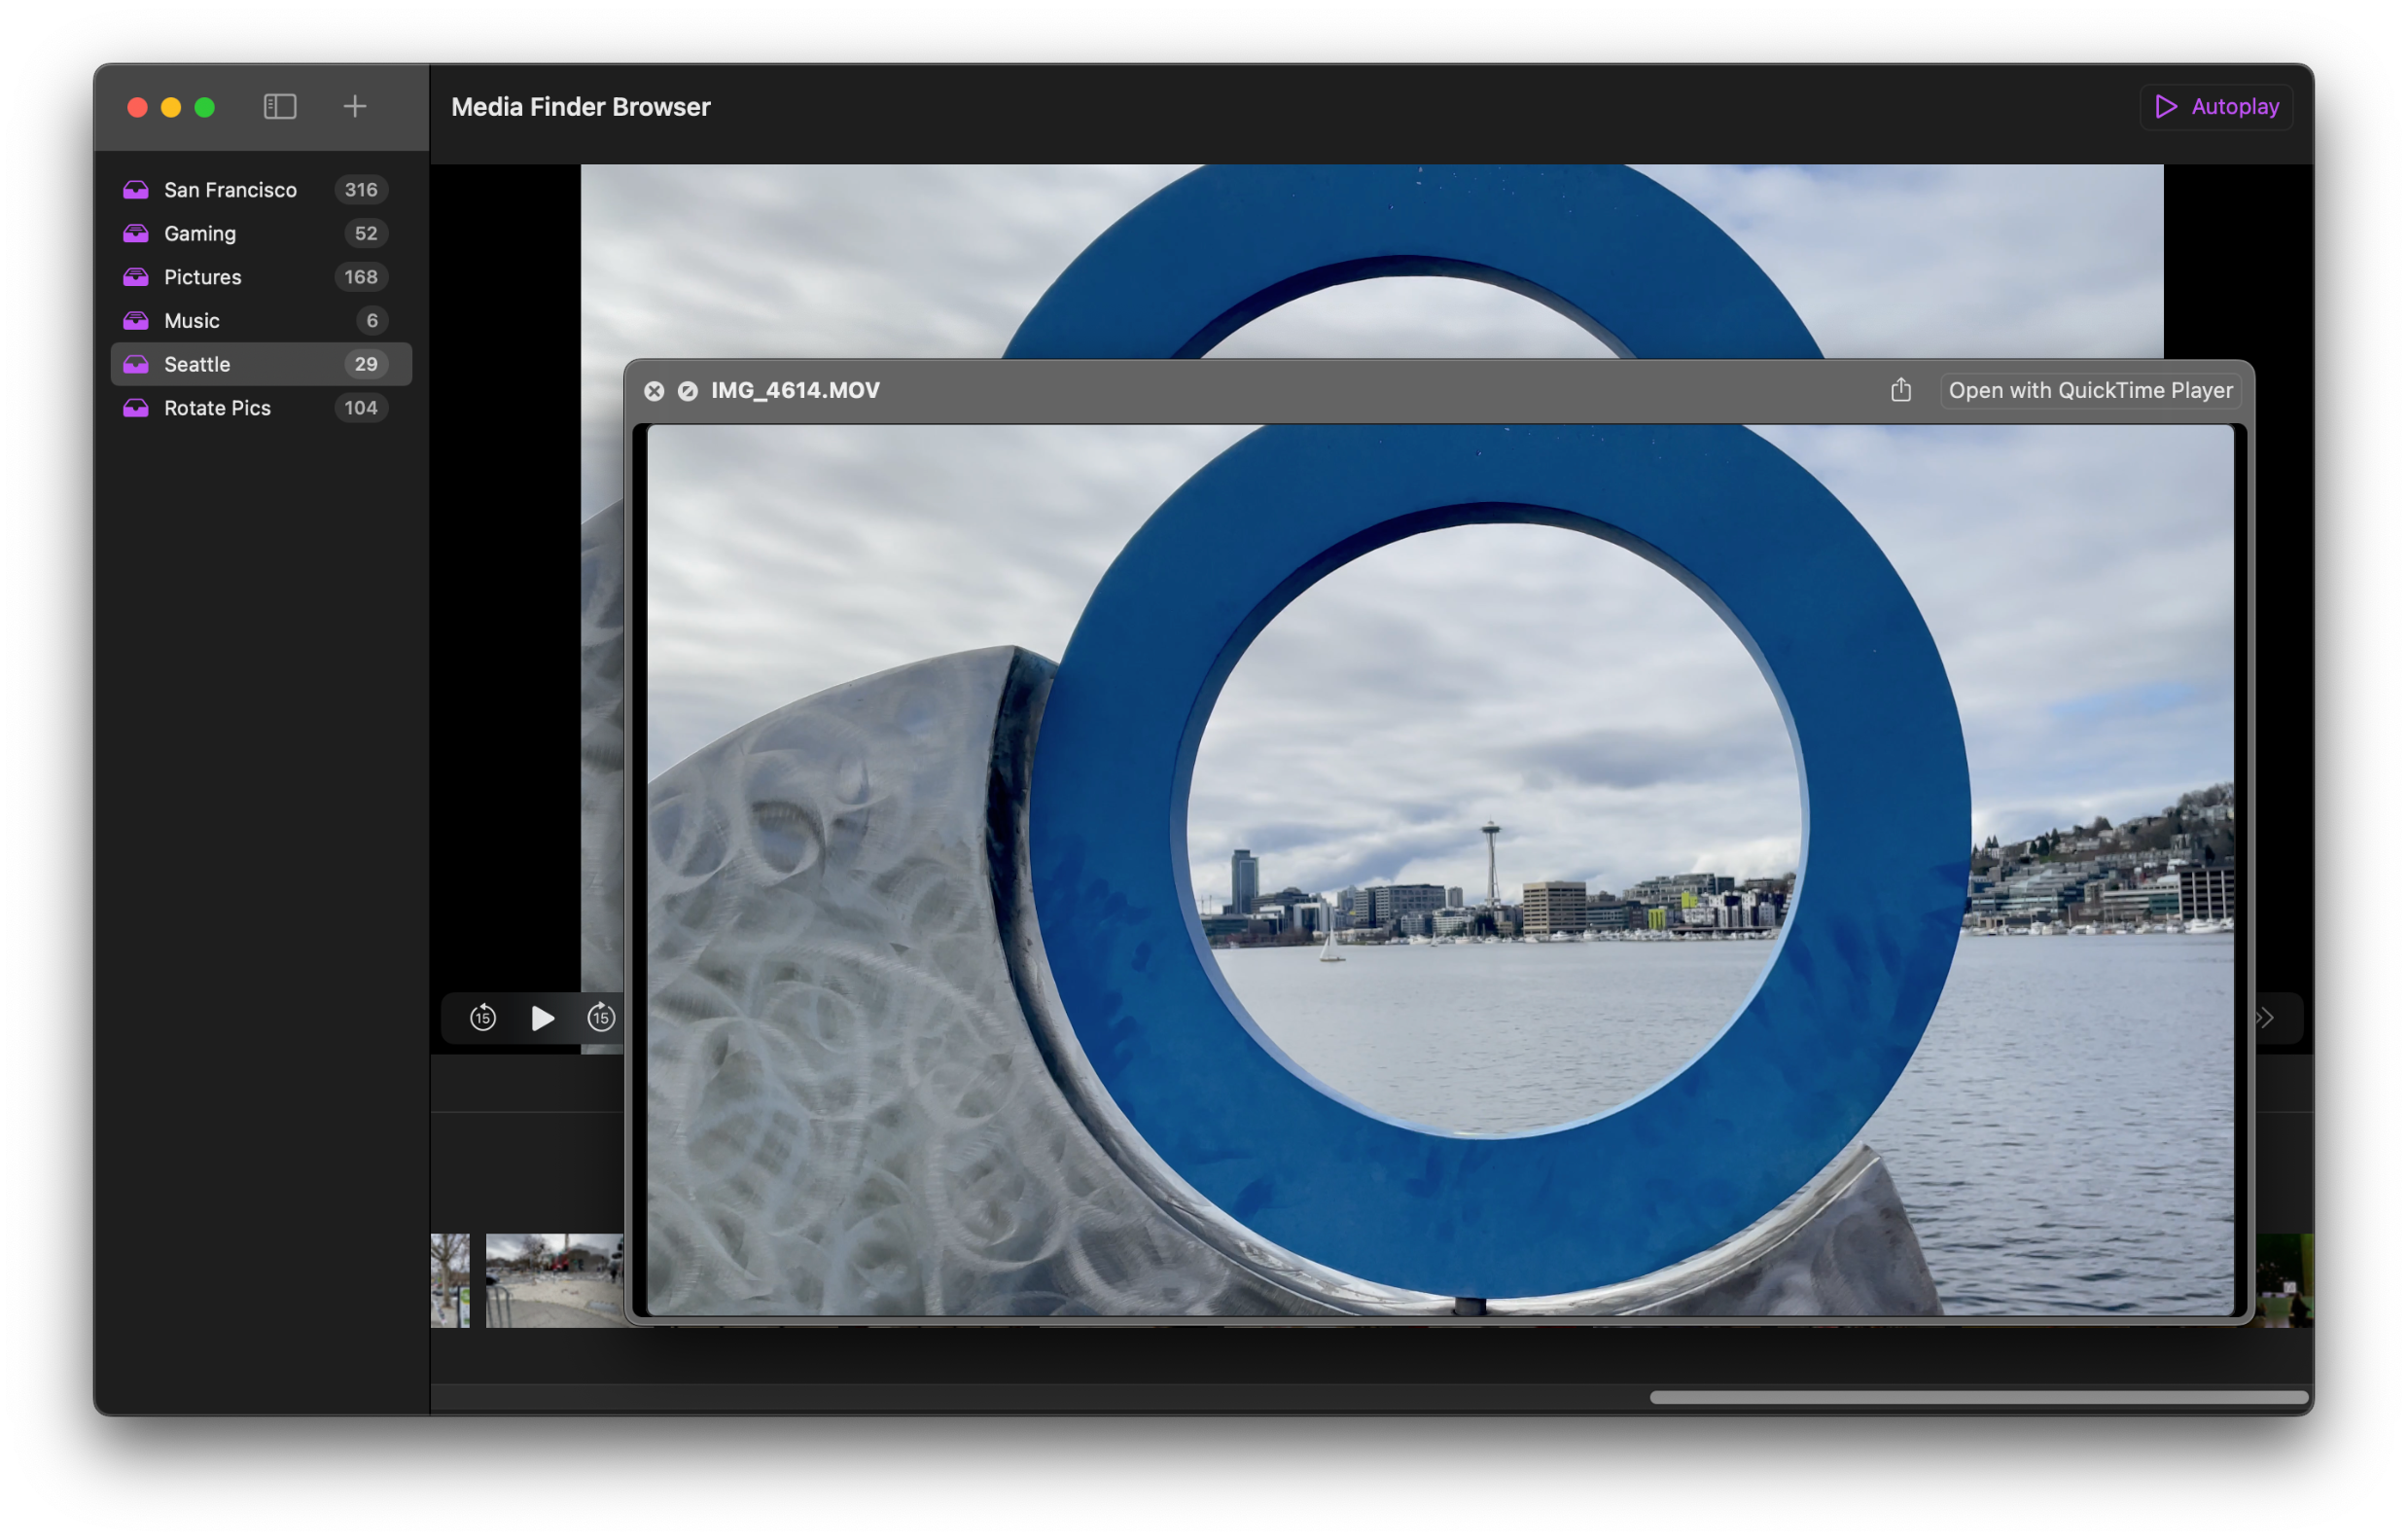
Audio Finder Browser for macOS
08/10/2022 Filed in: Audio Finder Browser
I finished development on my next app, part of the 'Finder-Browser' suite of apps. Audio Finder Browser aims to aid in discovery and playback of audio content in directories. Similar to other apps like Video Finder Browser & Image Finder Browser, Audio Finder Browser has a similar look & feel as well as some of the same functions like Filter and Open Location.
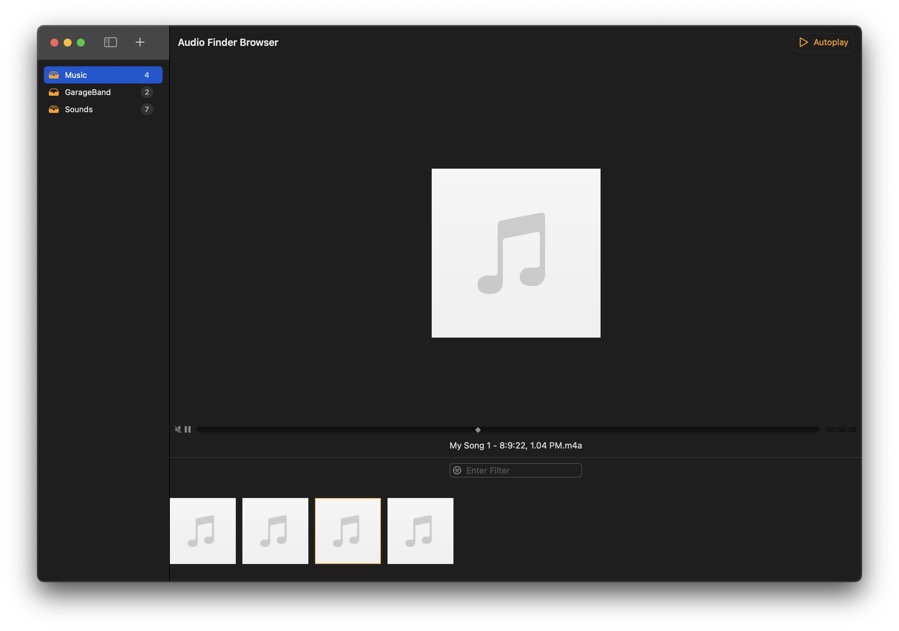
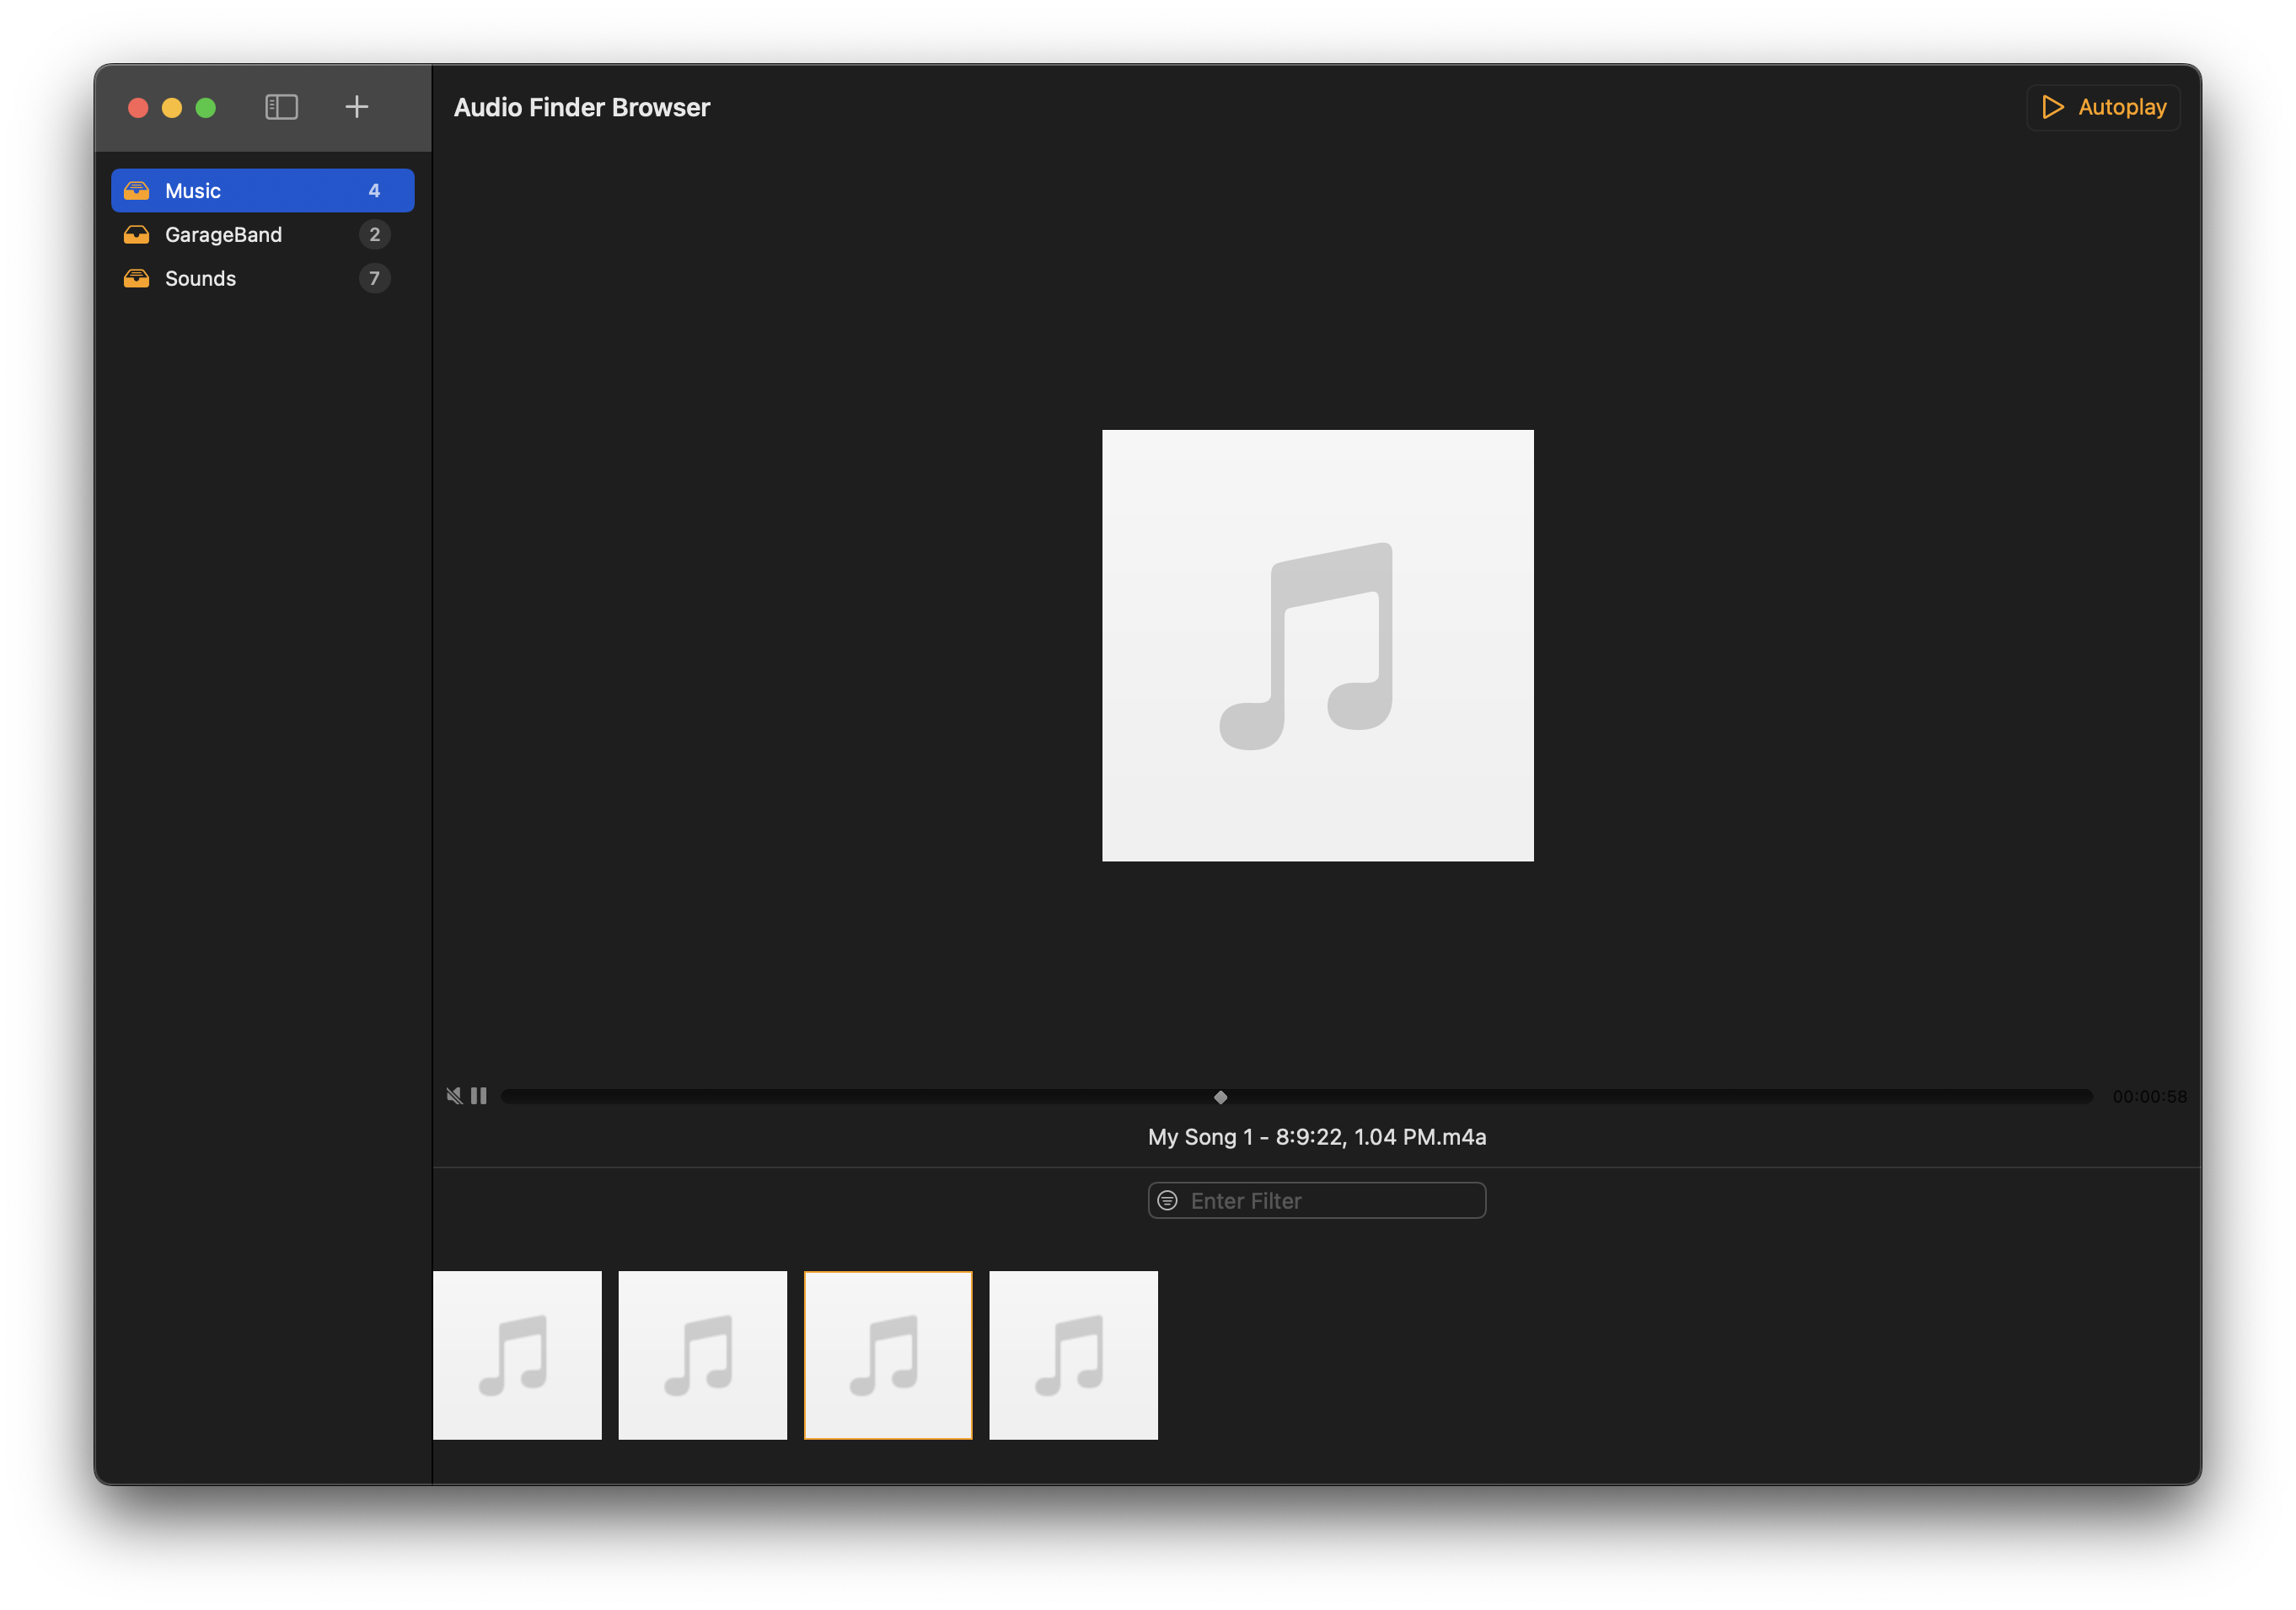
ThatTree Favorites
07/13/2022 Filed in: ThatTree
Working on implementing a Favorites View for ThatTree for macOS.
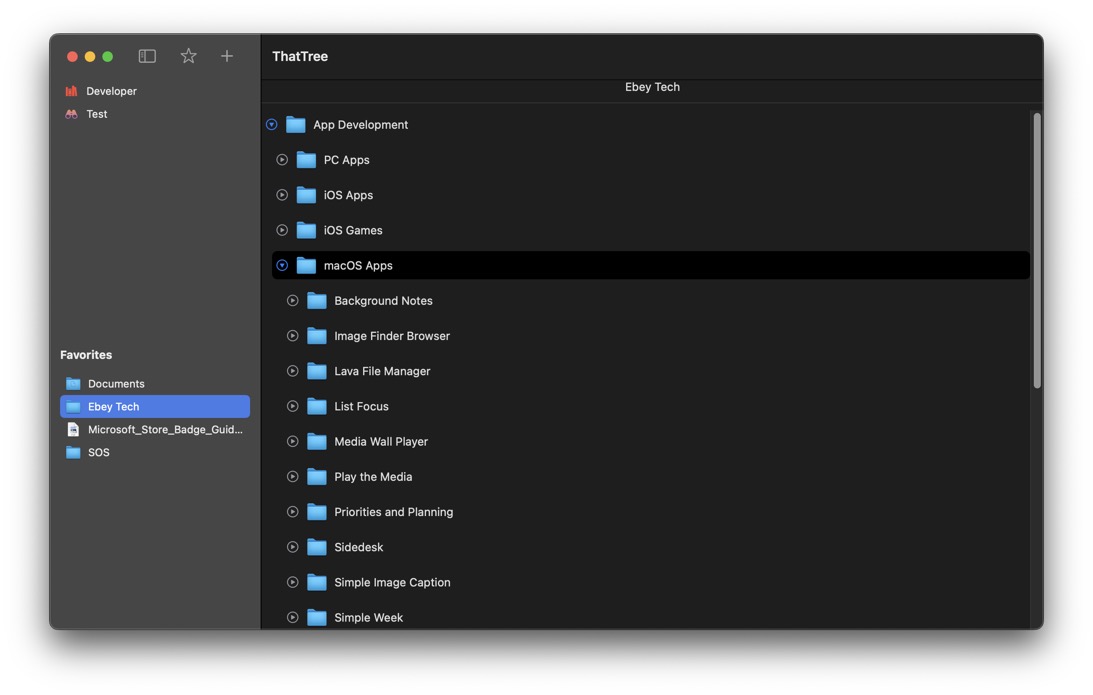

ThatTree for macOS in Development
07/10/2022 Filed in: ThatTree
I am experimenting with developing a file manager for macOS that largely uses a Tree View data view. Also adding features like "Pin" and "Favorites". Pinning a file/folder sorts it to the top of the tree node.
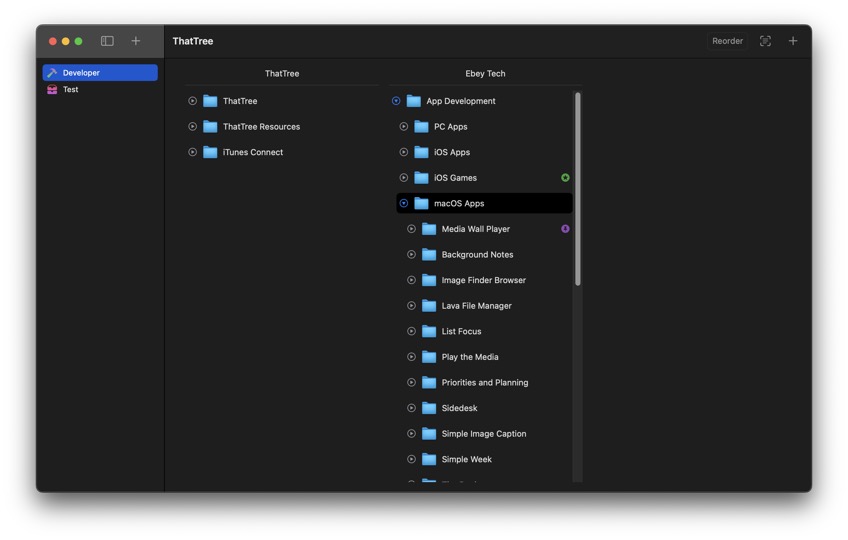
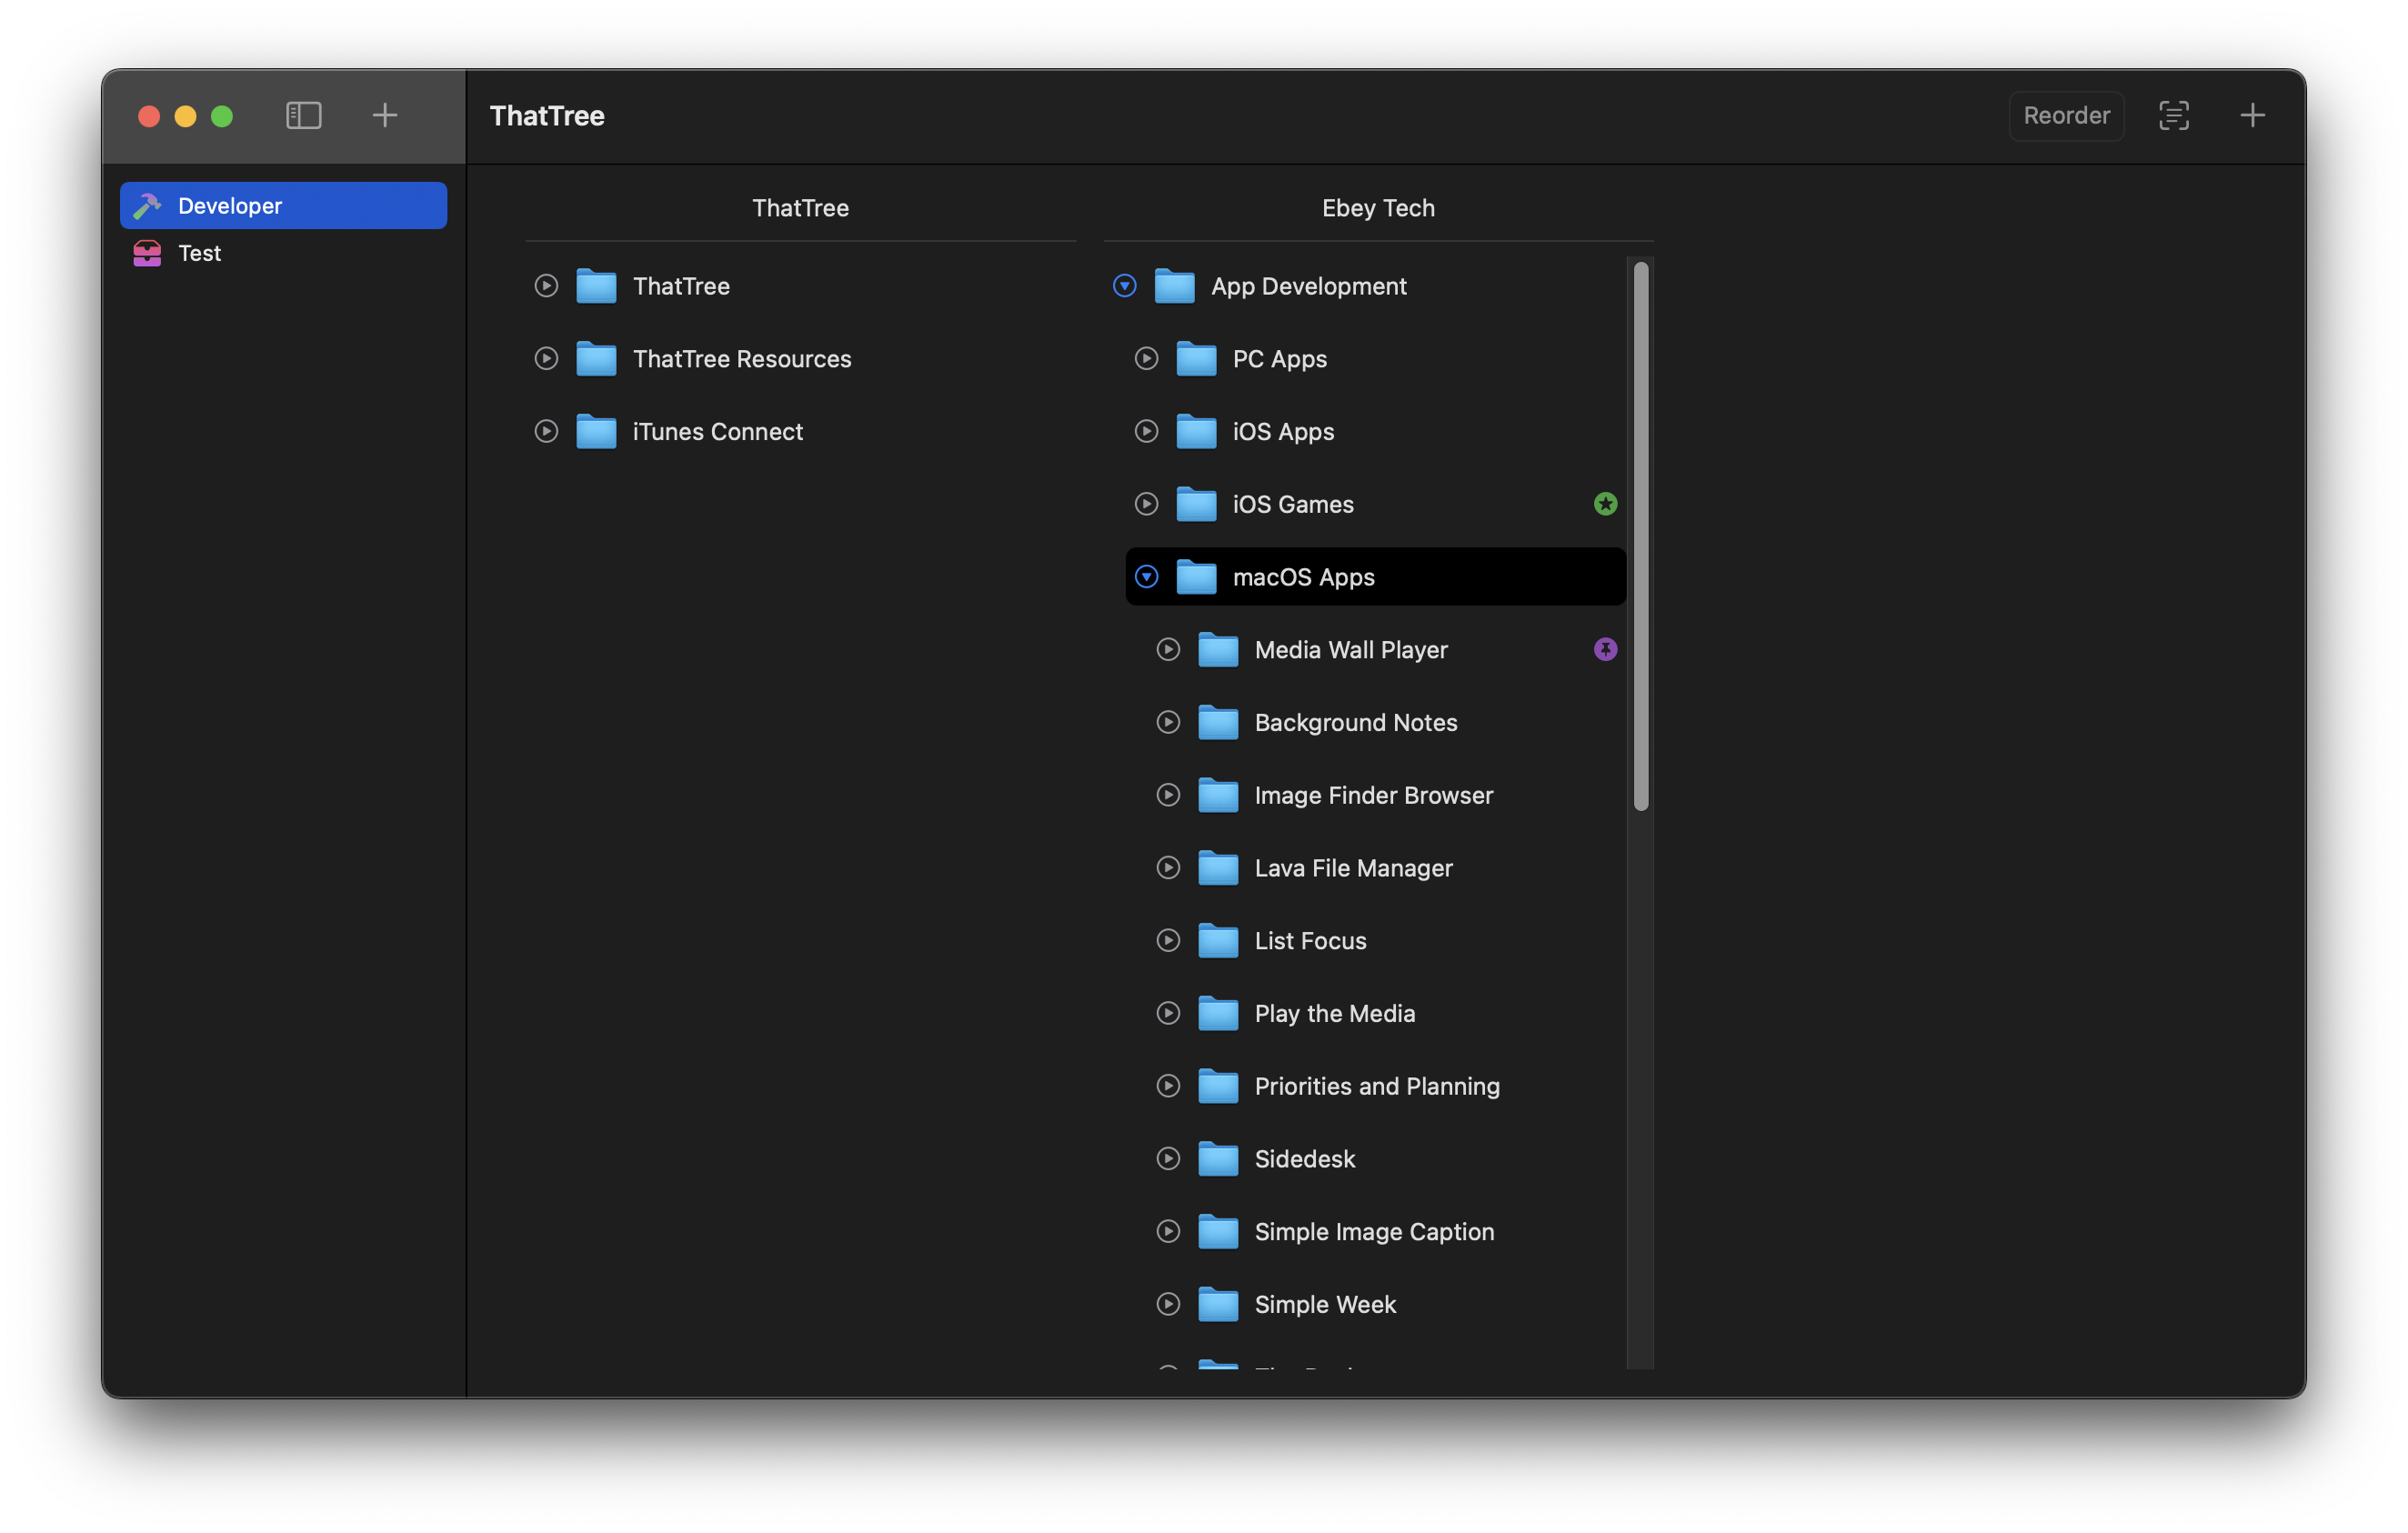
Speak Text in List Focus
06/17/2022 Filed in: List Focus
Added Speech support to List Focus for macOS. This will take a text paragraph and break it into individual text components separated by either period, carriage return, or both. This is a useful app for large text paragraphs where reading is more easily achieved with text broken into a list.
Also developing a Windows version in parallel.
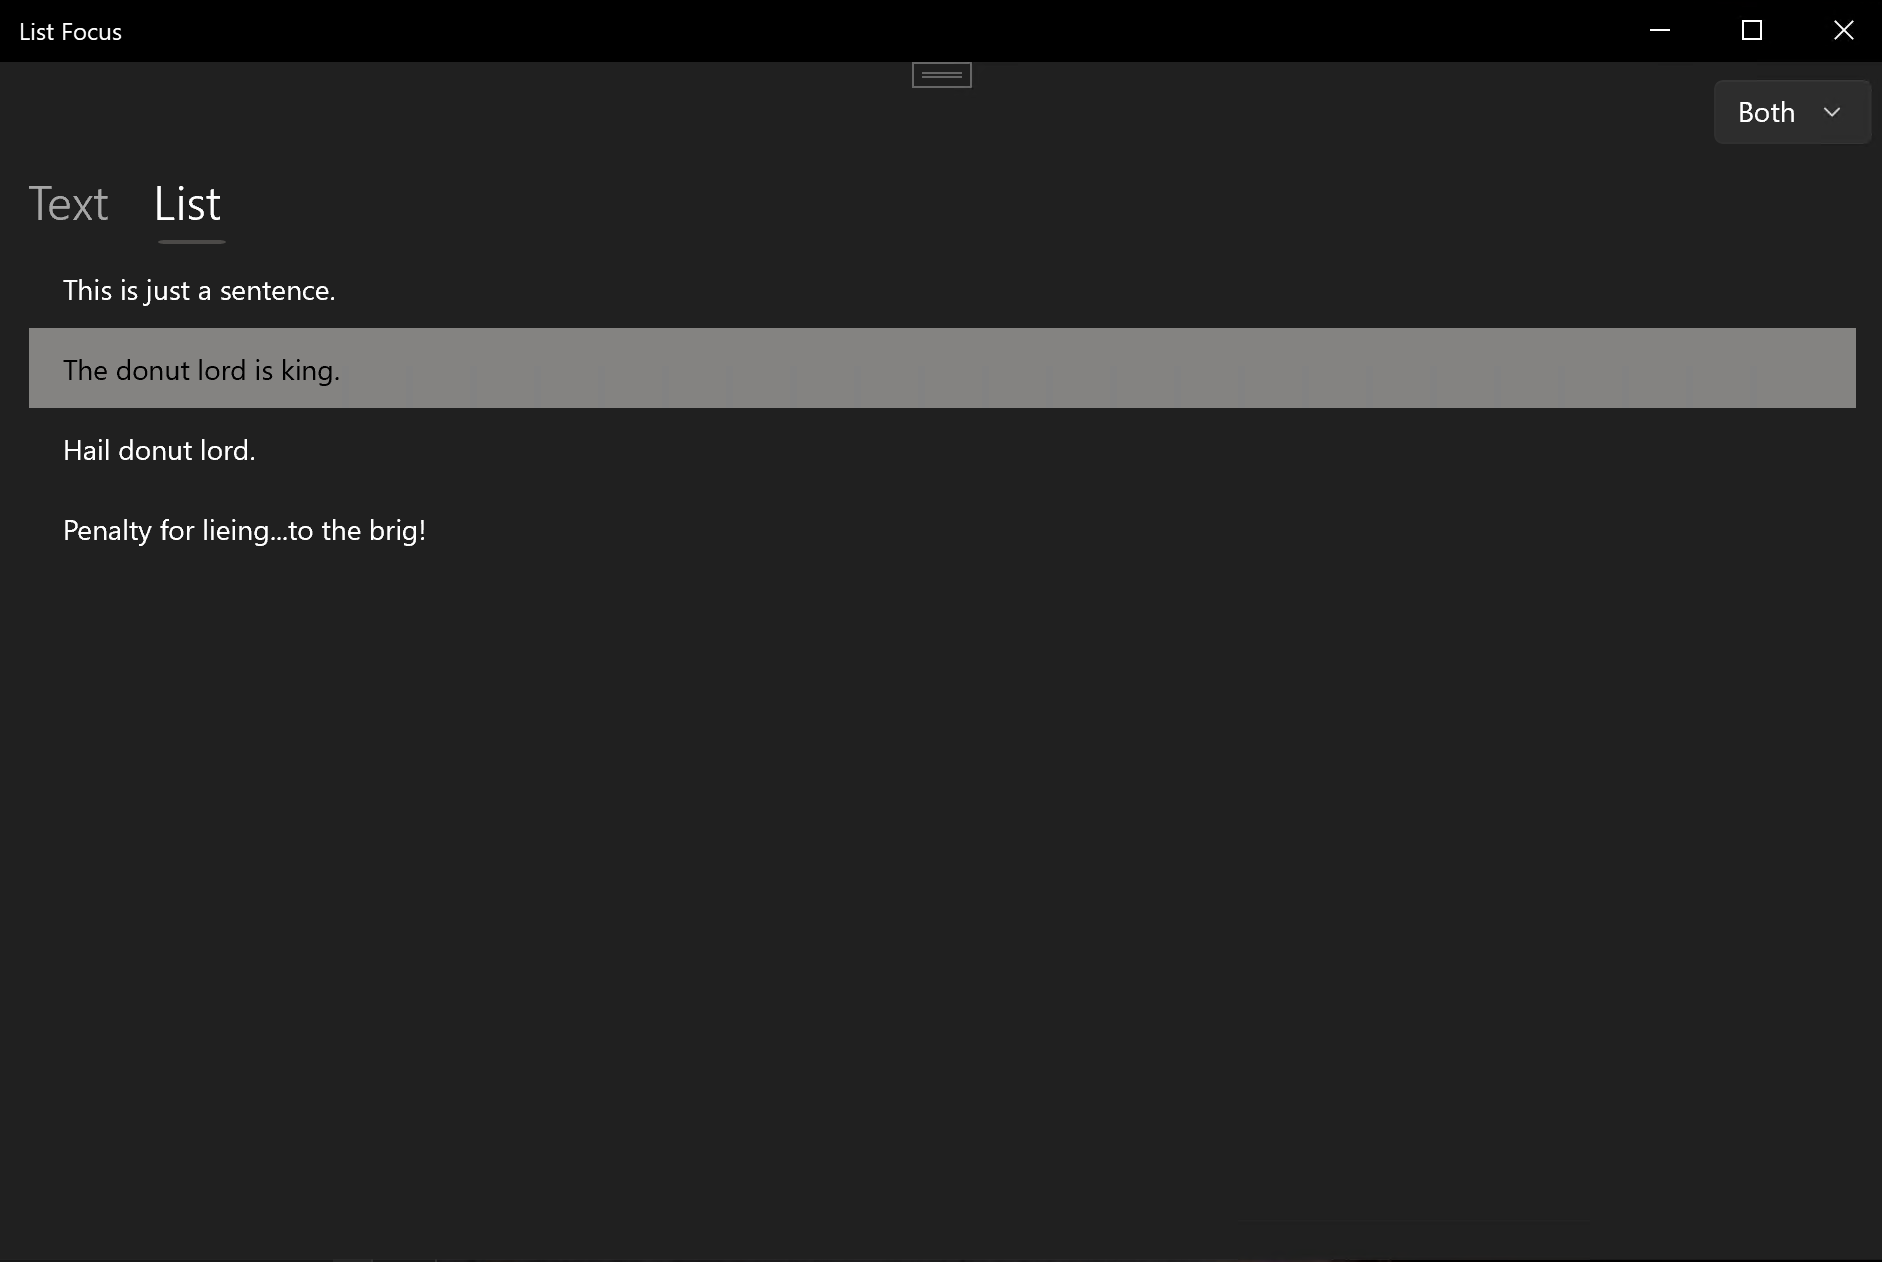
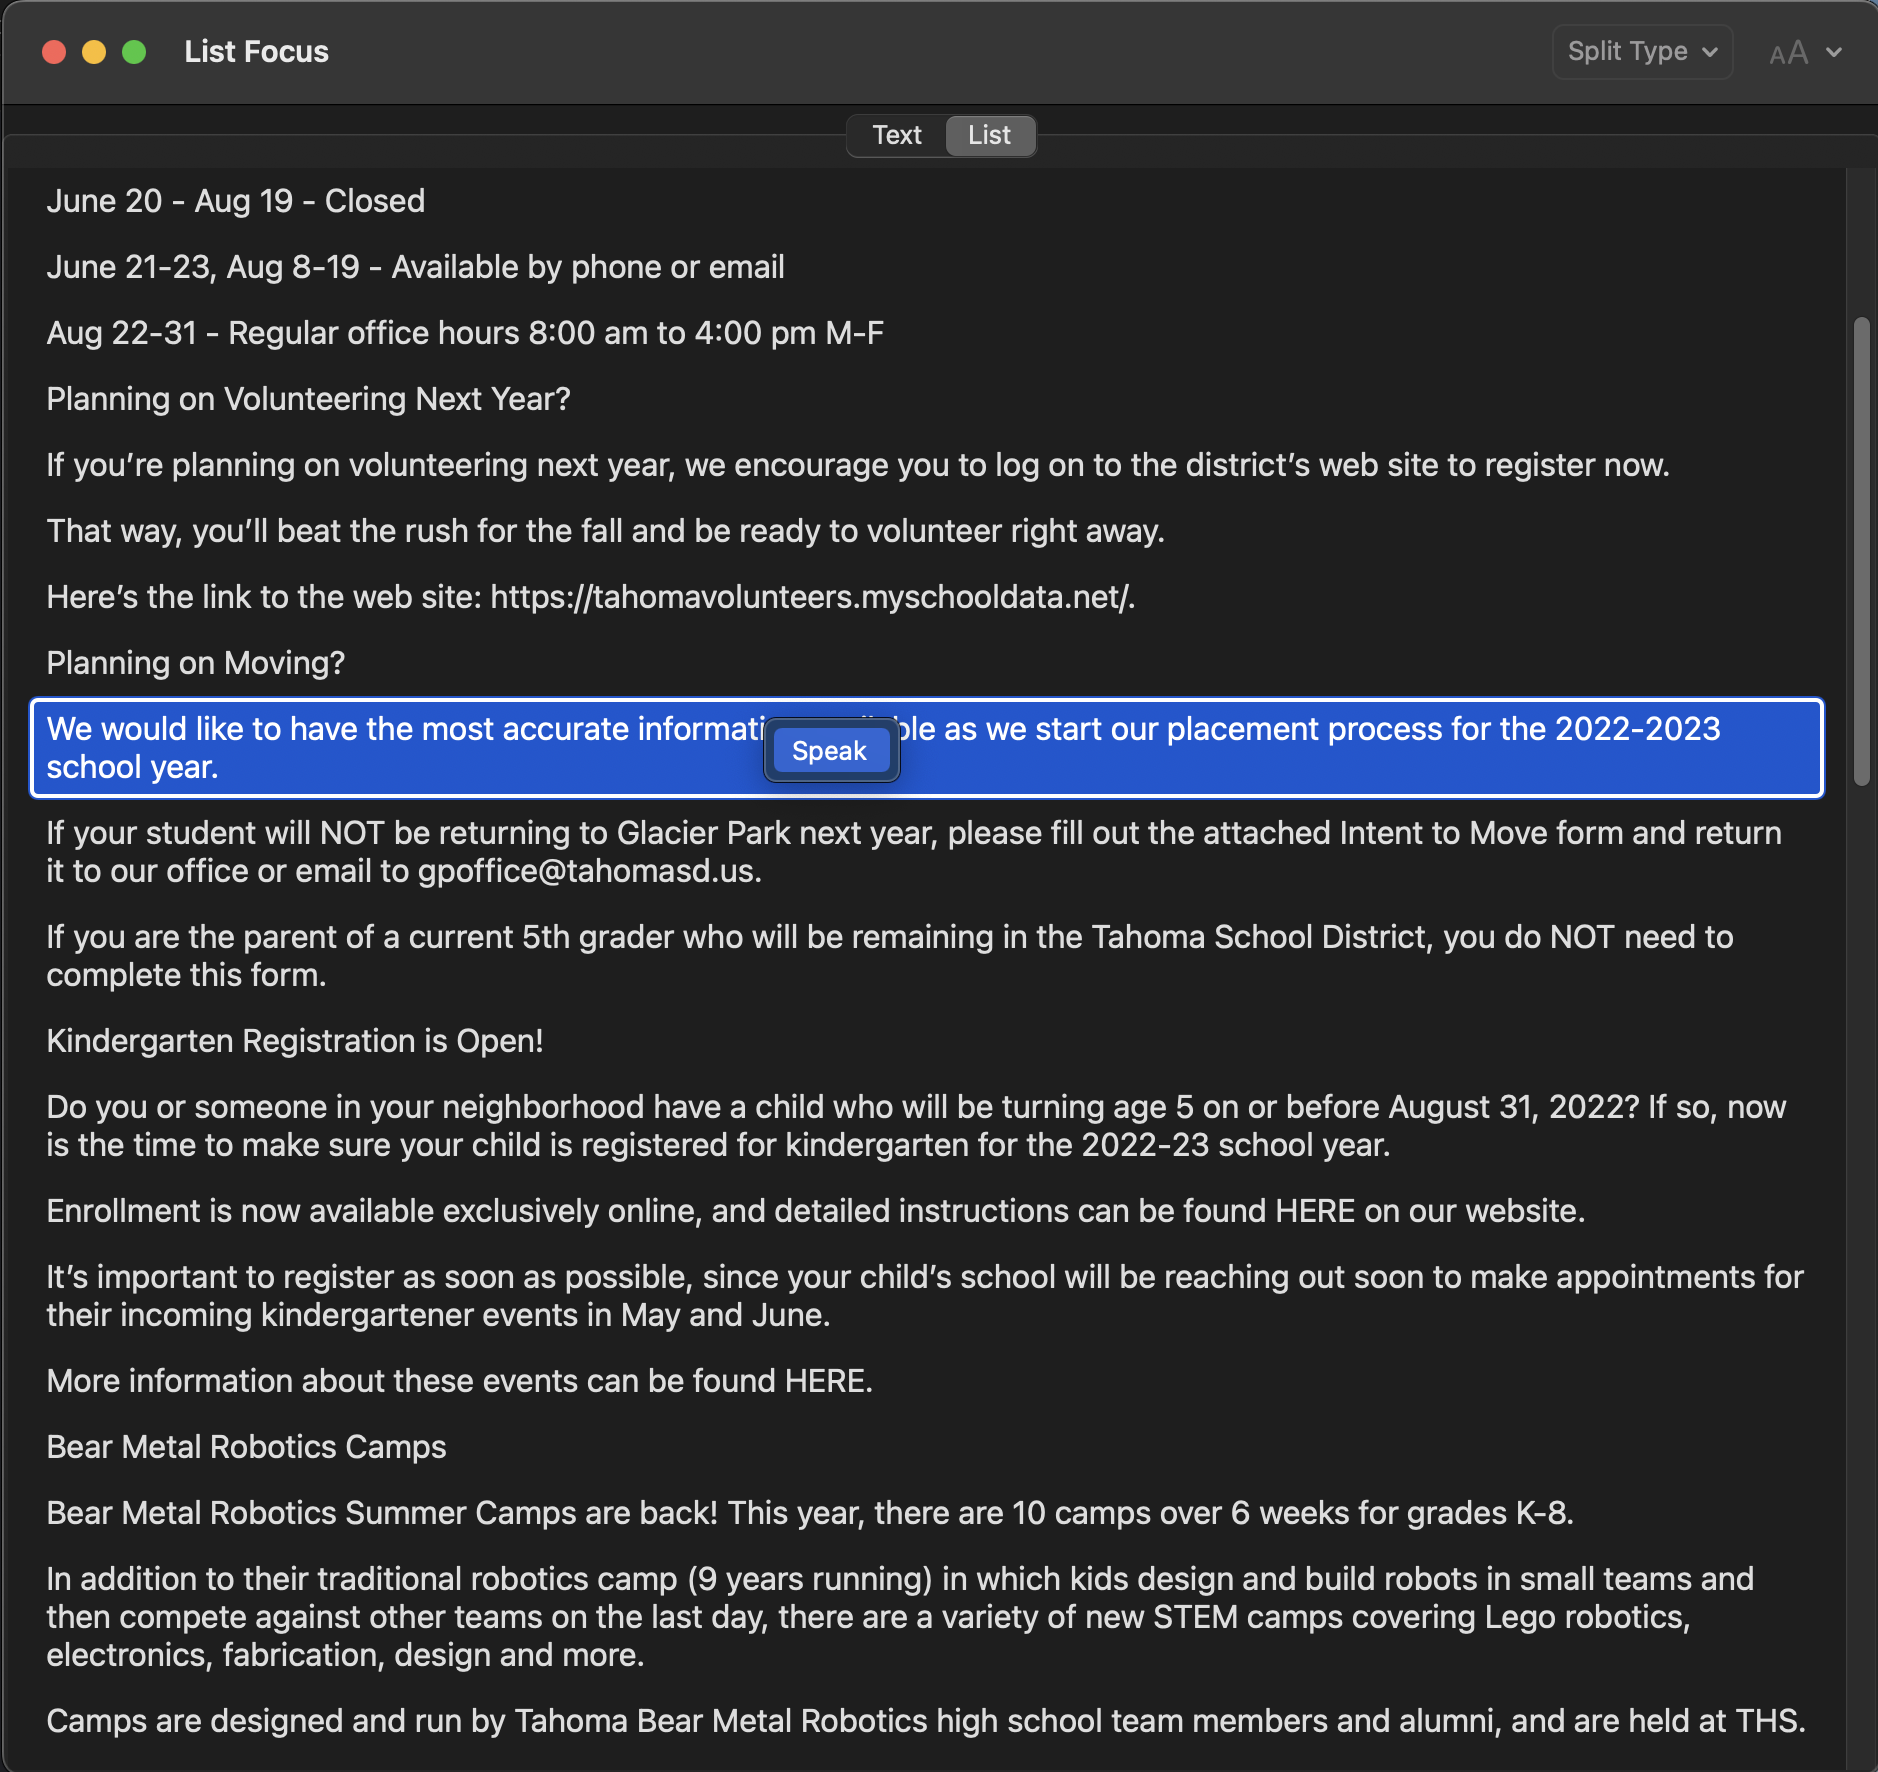
Also developing a Windows version in parallel.

Focus on Sentence from a Paragraph
06/15/2022 Filed in: List Focus
I started development on a new app to highlight a sentence from a paragraph via a List View. I often find myself referencing a paragraph of text and need to maintain a highlight of content; however I need to at times select different parts of the paragraph. This can be cumbersome and time consuming re-highlighting sections of a paragraph.
List Focus will aim to put the paragraph of text into individual List View Items, so the whole Item can be highlight by simply clicking on it in a List View or using a keyboard shortcut to progress up/down through list.
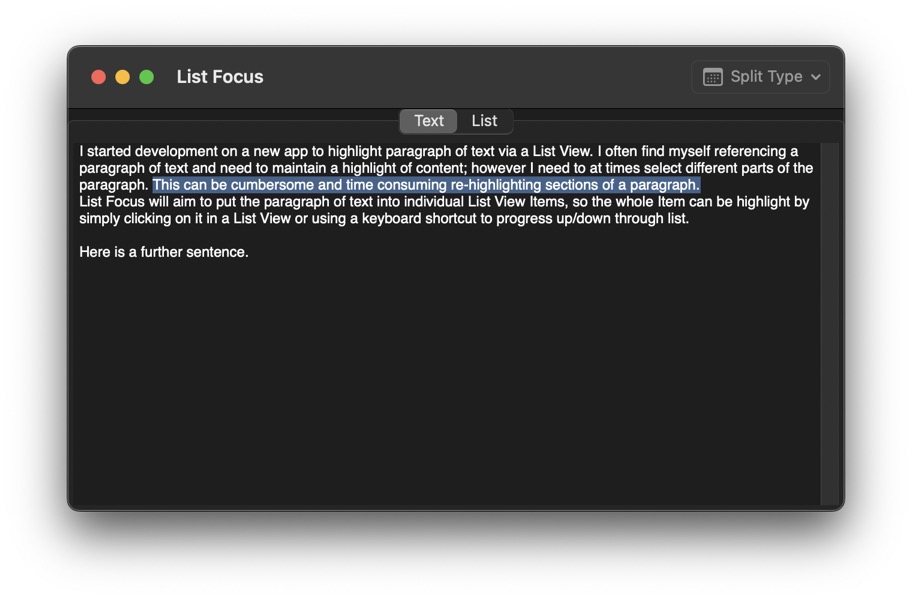
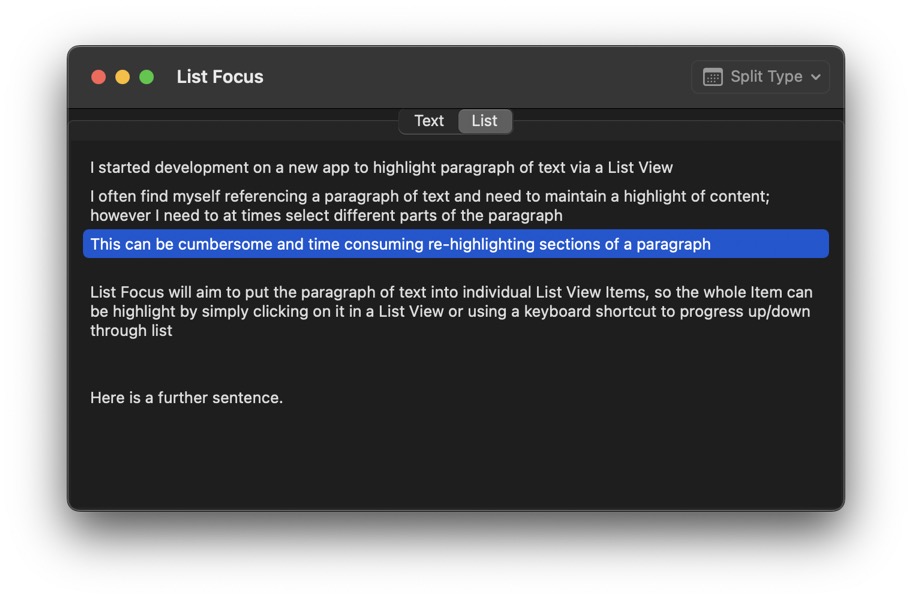
List Focus will aim to put the paragraph of text into individual List View Items, so the whole Item can be highlight by simply clicking on it in a List View or using a keyboard shortcut to progress up/down through list.
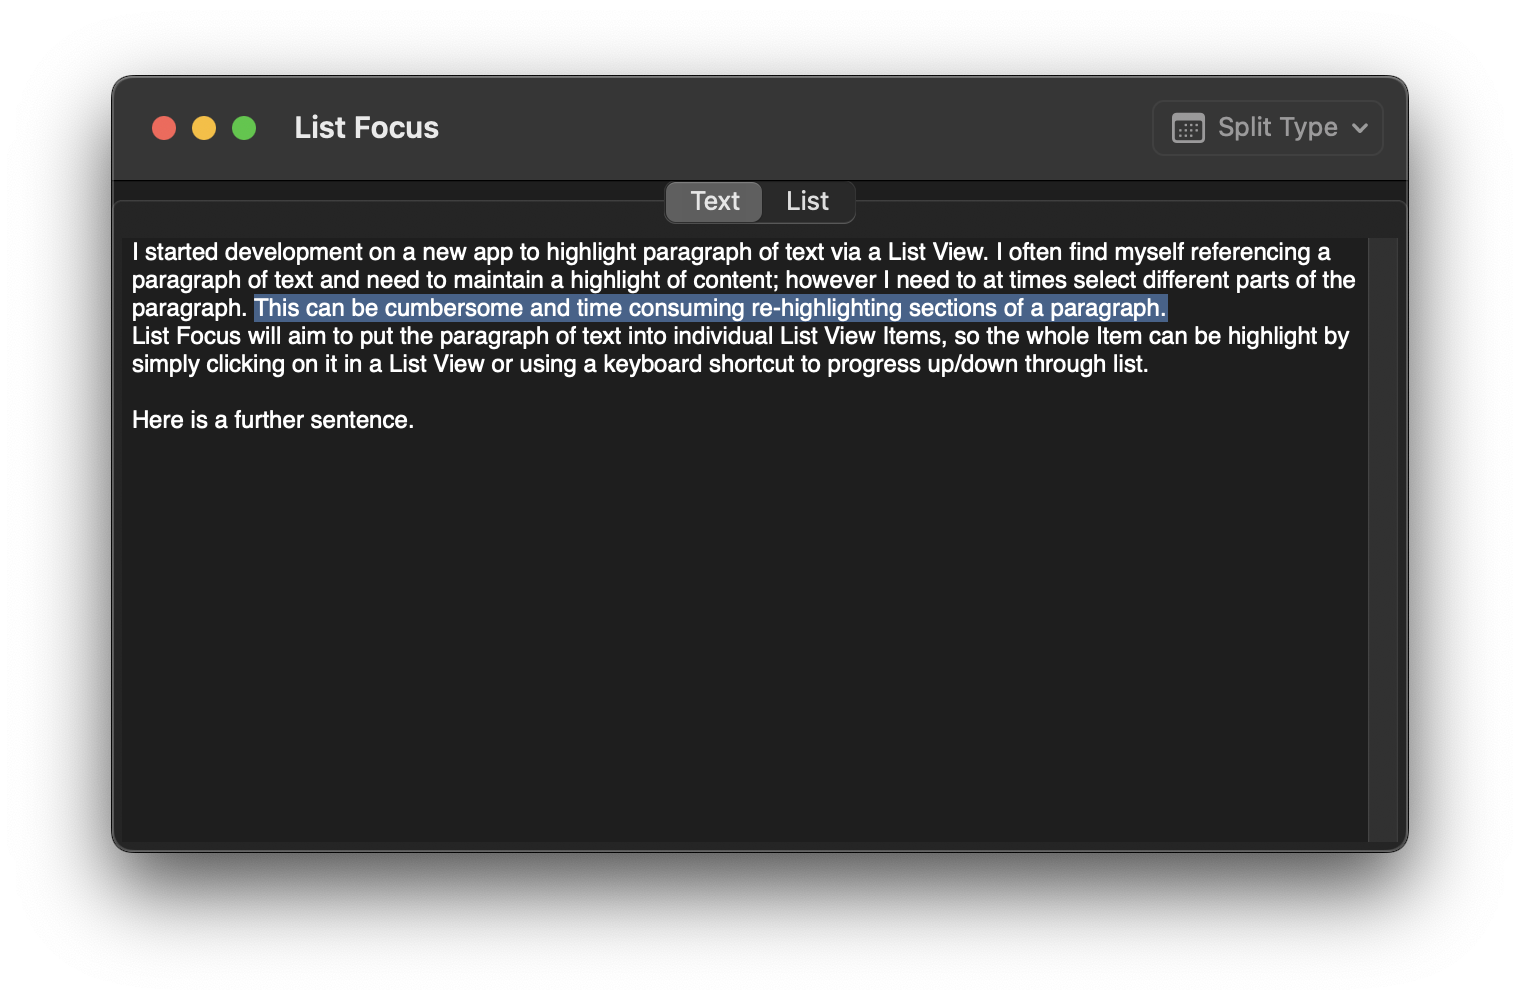
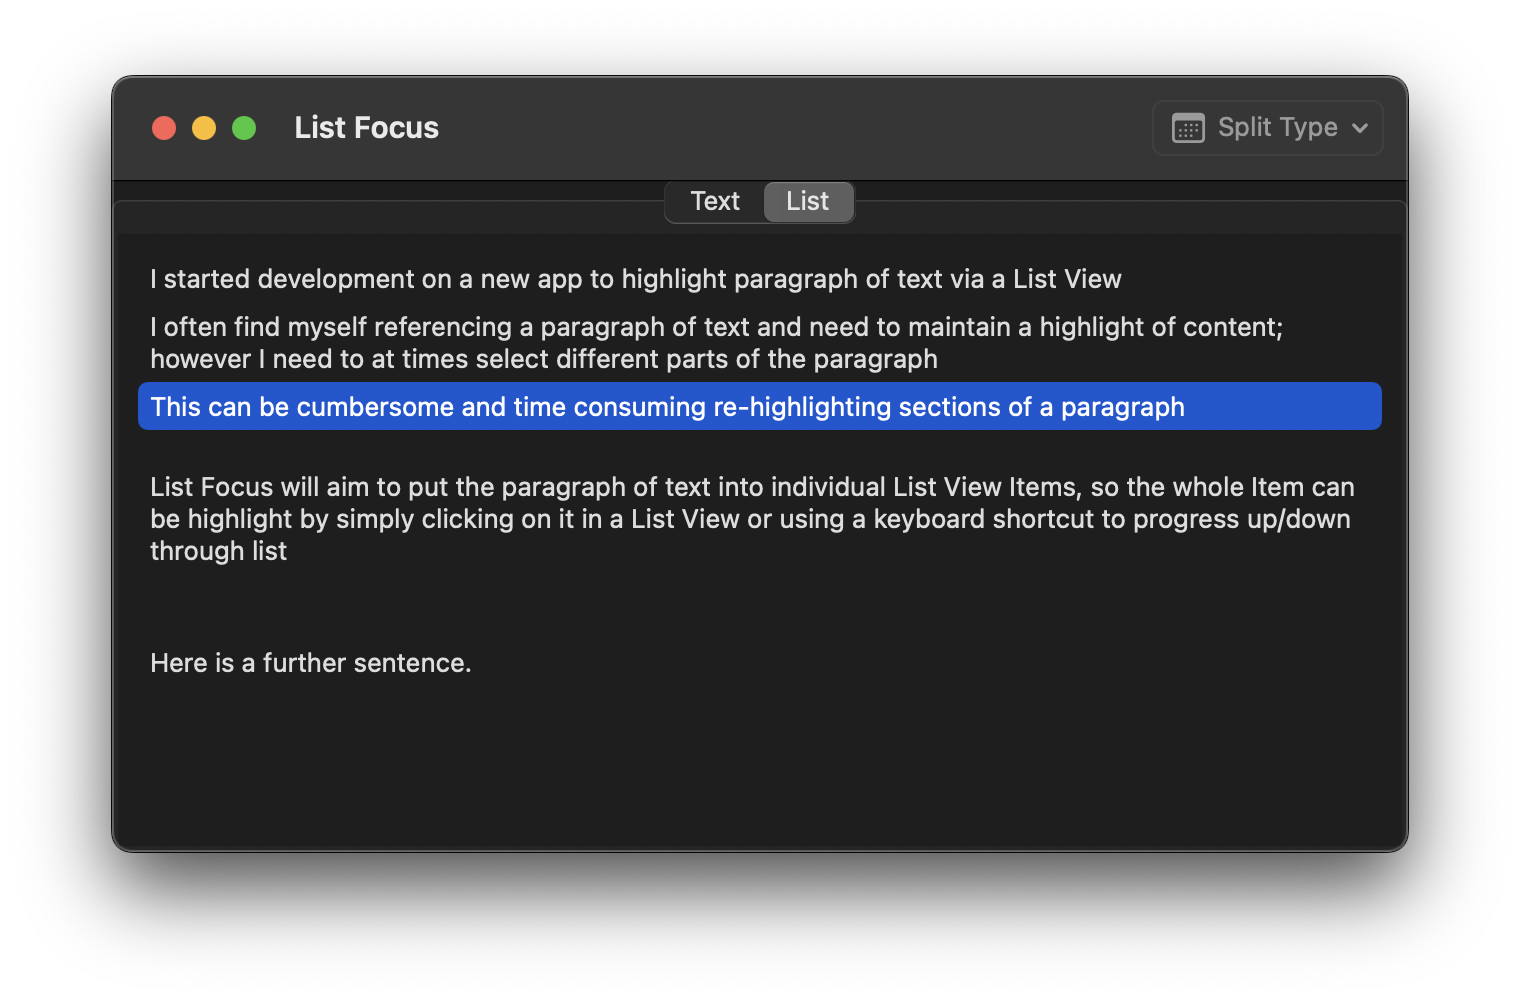
ThatDesk File Manager for macOS
11/14/2021 Filed in: ThatDesk
Working on ThatDesk file manager for macOS. Still in the early stages of designing and trying to mirror ThatDesk for Windows.
Keep Your Folder Open and Visible
12/18/2021 Filed in: ThatDesk
New File Manager to optimize your workflow and work smarter not harder.
ThatDesk for macOS. Use to keep quick and easy access to chosen directories, files, and websites. With Finder, you are repeatedly opening folder locations again and again. With ThatDesk, set your directories, files, or websites and have fast access to the resources with a single click.
Checkout ThatDesk for macOS, now available via the Mac App Store.
ThatDesk Info
Add Caption to macOS Image
01/08/2022 Filed in: Simple Image Caption
Completed another macOS app called Simple Image Caption. With this app you can assign an image caption, which gets stored to the file's meta-data.
Near Endless Virtual Desktop on macOS
01/29/2022 Filed in: Sidedesk
I built a new productivity app for macOS, called Sidedesk. This app follows along the same lines as its Windows 10 version of Sidedesk. Users can create a Nav menu full of Nav Items that open up into their own custom views and content. From the main view, users can add Elements, which consist of Files, Folders, ListViews, GridViews, Frames, Text, or Images. Clicking and dragging on the main view's background (canvas) will allow you to pan around all the content at once.
Group macOS Files by File Type
02/21/2022 Filed in: Lava File Manager
Completed a macOS file manager app called Lava File Manager. With this app you can manage files using a system of grouped lists. Powerful filter options gives you control over your displayed content, and a Date Range selector keeps results fast and focused to your preferred date modified era.
Add Notes to macOS Desktop Background
02/27/2022 Filed in: Background Notes
Completed another macOS app called Background Notes. Background Notes app allows you to embed text into images as note elements, then set the image as your Desktop Background. As with other Note taking apps, be mindful what content you place as notes. Since background images have the potential to be seen from computer login screens, care should be considered.
- Click the + icon. Type in a text name for navigation item. Click "Add" button.
- Select newly create navigation item. This will load the view.
- Click "Choose Image" button in toolbar. Navigate to an image file and click "Open" button.
- The image will be placed into the view as a "background image".
- Click "Add Text". A new text element will be dropped center in the view. You may need to adjust scroll bars and/or click drag "Zoom" slider to see newly added text element.
- Click + Drag text element around to desired location.
- Double-click text element to open the text-editor sheet. Enter in desired text. Click "Complete" button when done.
- The "Scaling" button can be used to adjust the scaling of text elements. This can be useful for very large dimension images. Default 1.0 scaling will suffice for ~1920x1080 images.
- Keep in mind text elements will be adjusted after change and they may inadvertently move to off view.
- Click the "Set Background" button to combine both the text+image content into an image and set it as Desktop Background.
- To remove a text element, right-click it and choose "Remove".
- To remove a text element that has been lost (e.g. offscreen), right-click the background image, select appropriate note from list and choose "Remove" or "Reset Position" (requires view refresh by clicking blank area of navigation view and then re-clicking navigation item) to bring the text element back to "center".
Image Finder Browser for macOS
03/20/2022 Filed in: Image Finder Browser
I decided to port Image Finder Browser over to macOS. I found the Windows version was quite useful. The macOS version includes a majority of the same features as the Windows version. One thing it is currently missing is keyboard navigation between images. I am planning on including this in the future.
Video Finder Browser for macOS Development
04/03/2022 Filed in: Video Finder Browser
I am starting to complete other "Finder Browser" themed apps to support getting easier access to certain file types. Similar to Image Finder Browser, Video Finder Browser aims to make video file locating and viewing easier and faster.
Play the Media for macOS Complete
04/24/2022 Filed in: Play the Media
Play the Media for macOS is now available in the macOS App Store. This app is also available for Windows.
Software Updates for macOS Apps
04/30/2022 Filed in: Video Finder Browser | Image Finder Browser
Made some updates to Video Finder Browser and Image Finder Browser.
- Added Selection Border.
- Added Navigation Sidebar pane toggle.
- Added Navigation Sidebar minimum pane width.
Play Multiple Videos at the Same Time with Media Wall Player App for macOS
05/14/2022 Filed in: Media Wall Player
Finished development on a new modern app called Media Wall Player for macOS. The concept behind this app is to visually playback multiple videos at the same time. It has an easy to use navigation view which allows you to quickly switch between directories containing video content. Control the grid layout using two modes, Flexible or Adaptive. Flexible - scales the video player to fit to the window’s size. Adaptive - adjusts the grid columns & rows to shift the videos around into a maintained grid state. There is a Grid Count function which will adjust how many videos are displayed. The more videos displayed the more potential to utilize computer resources like CPU & memory. This may need adjusted for some systems to improve video playback performance. Autoplay can be used to prevent videos from automatically playing when loaded. Controls can be hidden, this may be useful for some users who want to display the app’s videos in a dashboard setting. Standard video playback controls are available like play/pause, full screen, and picture-in-picture. The Shuffle button replaces the videos with another random video from the navigation view’s directory.