February 2024
How To Protect Photos Using Safe Swipe for iOS
02/26/2024 Filed in: Safe Swipe
I finished development on a new iOS app called Safe Swipe. The concept behind this app is, you pass another person your phone to look at photos and they inadvertently or advertently swipe through other photos that you didn't desire them to see. Safe Swipe solves that problem, by giving users the ability to choose specific photos to visually share. Photo selection is also locked behind biometrics/passcode. So others can only see the photos the device owner has selected.
Safe Swipe solves the problem of passing your phone to another and then they swipe through your photos. Photo selection is locked behind Face ID/passcode, so only photos users select are visible to others. They can swipe away without the worry of coming across an undesired photo.
1.) Startup app.
2.) Click "Choose Photos". Face ID approval may prompt.
3.) Enter Face ID/passcode.
4.) Tap photos to select. Click "Add".
5.) Photos are displayed.
6.) Tap a photo to open in Individual Photo Viewer.
7.) Ping Zoom to zoom-in. Tap-drag to pan.
8.) Double-tap to zoom back out to normal.
9.) Tap back arrow to return to photo grid-view.
10.) Click "X" button to clear photos from grid-view.
How To Narrate List Using Speaking List for macOS
02/17/2024 Filed in: Speaking List

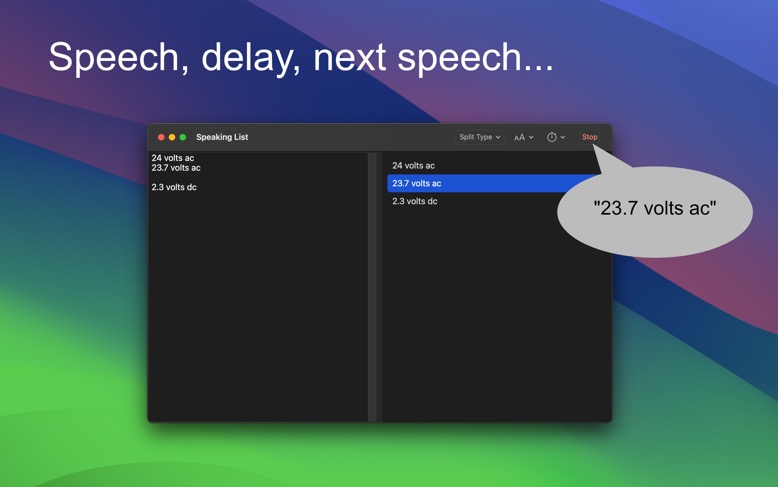
Use Speaking List to speak text back to you with an optional delay between list items. Useful when you need to turn away from the computer, but can still listen to spoken text reading things back to you. Can be used to translate data from one app to another via manual typing of content once text has spoken. Delay ensures adequate time for manual translation.

Type text into left side.
Choose Split Type in toolbar. Recommend selecting "Both".
Adjust Font Size.
Select Speaking Delay value. Recommend "2".
Verify right-side listview shows data to speak.
Make sure computer volume is at a reasonable level.
Click "Speak" button or double-click right-side list item.
How To Automatically Copy Text Using Auto Copy Order for macOS
02/16/2024 Filed in: Auto Copy Order

I finished development on Auto Copy Order for macOS. It is now live and available on the macOS App Store.
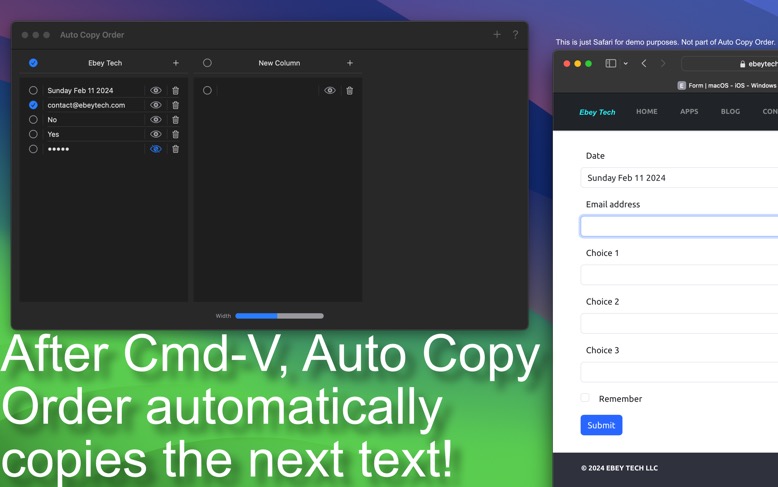
After pressing CMD-V to execute a 'paste' operation, Auto Copy Order automatically copies the next text content to the system clipboard for you. This can be especially useful when encountering a changing user interface like forms, or from apps that don't support autofill.

In order for 'Auto Copy Order' to detect when the 'V' key is pressed (user pasting via CMD-V), users will need to add 'Auto Copy Order' to the approved list of Accessibility Control. This setting is located under - Apple Menu > System Settings > Privacy & Security > Accessibility. Click the + button at the bottom, browse to the 'Auto Copy Order' app, then click Open. Auto Copy Order app will then be listed under the Accessibility control list. Verify the toggle button is ON. Finally restart Auto Copy Order app.
Click the + button in the toolbar to create a new Column Item.
Columns appear in a horizontal view. New Columns are inserted at the far left. Double-click the column name to rename the column. Right-click the column name to see context menu options for Rename and Delete. Each Column has a checkmark to their left, this activates which Column is currently active to provide automatic text copying to the clipboard. Clicking the checkmark also deactivates the Column. Right click a Column name and choose Reorder to access a list of Columns to be reordered.
Click a Column's + button to create new List Items.
Each List Item has a checkmark, a text field, and a delete button. Click in the center area or on an existing text string to modify a List Item's text. Click the far left checkmark to activate a List Item for automatic copying to clipboard. Click the Delete button to remove a List Item (holding option when clicking will Delete without Delete confirmation). Reorder List Items by dragging them to new positions.
Once you have your Column's List Items filled out with the appropriate text you want, click either the starting List Item or click the Column's checkmark to store the text to the clipboard. Locate the desired text field (external to Auto Copy Order) and press system CMD-V to initiate a paste operation. Auto Copy Order will detect (100ms detection rate) the keyboard shortcut was used and shift down to the next List Item, automatically copying its text string to the clipboard. Repeat operation. Auto Copy Order will loop back to the top List Item once it reaches the bottom of list.
The Mask button for each item obscures the text field characters, which can be useful when you need to hide text from view. Text content will still be copied in normal string format (unobscured).