Move File There for macOS v1.0 Release
03/14/2025 Filed in: Move File There

Move File There for macOS is now available!
Move File There is the best way to move files for macOS. It has been developed to provide a consistent and fast experience, especially when moving files in large directories. Dedicated source directories allow resuming from previous file move sessions. A dynamic file view provides a list, grid, or gallery layout to see files. Customizable folder destinations give unique control to users, so you can move files with ease. After moving a file the app automatically selects the next file, so at times you may only need to click one button (Move button).
Instructions for app operation:
1.) Startup app.
2.) In the upper left corner of the app window, click the + button. Navigate to a desired folder containing files. With the folder selected, click "Open".
3.) The added folder will appear in the left-side navigation list. Repeat process for adding new folders. Folders containing files can also be dragged/dropped onto the left-side navigation area to be added.
4.) Click the newly added folder. The "Files to Move" section will populate and list out any files contained in the chosen folder.
5.) Click the + button in the upper right corner of the app's window, toolbar area. Navigate to the desired folder, where you would like to "move" file(s) to. These folders are known as "Move Locations". You can also drag and drop folders into the Move Locations area.
6.) To complete a "move" operation, select a file from the middle "Files to Move" area, then click the "Move" button for the desired "Move Locations" folder. This will complete a macOS "move" operation, moving the file from the source folder to the destination folder.
7.) Upon move completion, if user needs to "return" the file back to the source, 3 dots will appear next to the Move Location's folder. Under the 3 dots, will list out all files moved to that location. Clicking the listed file there will return the file back to the source. This list will not "persist" through other source directory navigations nor app restarts.
8.) To see all "Move Locations" added within the app, even locations added under different Source Directories, use the 3 dots next to the "Move Locations" top title, called "Show All Locations".
9.) Added folders under the "Move Locations" area each have right-click options, one option called "Pin" will allow the folder to stay "pinned" to the top of the list, even if alternate sort methods are changed.
Recent Apps for Windows v1.0 Release
02/01/2025 Filed in: Recent Apps

Recent Apps for Windows is now available!
Recent Apps lists out current and previously launched applications. Choose from viewing content in a detailed list-view or a visually stunning grid-view. Use built-in toggle buttons to hide/show additional app details, like app path, launch date and launch count. Re-launch previous apps by double-clicking them. Easy pin and favorite functions allow easier and faster recent app management. Use the hide command to hide unneeded apps from view. Use the “Show Hidden” toolbar button to see previously hidden apps. Toolbar placed filter buttons give quick and easy access to common filtering needs, like favorite or to filter apps by just today’s launch date. The toolbar also has an easy to use Search field, which will dynamically populate below content with search results. Recent Apps must be running to track app use. It works independently from operating system’s tracking of recent apps.
Features:
* List of recent apps.
* App management.
* Track app use.
* List-view and grid-view layouts.
* Toggle properties for path, launch date, and launch count.
* Launch apps by double-clicking.
* Pin apps to top.
* Favorite apps.
* Hide apps from list.
* Filter by favorite, running, and today’s launch date.
* Search apps list.
Instructions for app operation:
1. Launch Recent Apps.
2. Launch other desired apps.
3. Recent Apps will build a historical list of launched apps.
4. Apps that are quit will remain in the list and appear dimmed.
5. Running apps will not appear dimmed.
6. Choose view layout, list-view or grid-view.
7. Choose optional properties to view - path, launch date, and launch count.
8. Re-launch an app by double-clicking. Double-clicking an already running app will make it active or may launch a new window.
9. Right-click an app and choose Pin to keep the app at the top of the list/grid (regardless of filter).
10. Right-click an app and choose Favorite to place a vibrant star next to app. Favorited apps will be shown when filtering by Favorite.
11. Right-click an app and choose Hide/Show to toggle between hiding and showing the app.
12. The toolbar has a toggle for showing hidden apps.
13. When an app is hidden, if it was pinned or favorited, those properties are removed - to avoid filtering confusion.
Compare 2 Text for macOS v1.6 Updates
01/25/2025 Filed in: Compare 2 Text
Compare 2 Text v1.6 update. The following features have been added:
- Changed placeholder text for “Enter text here...” to be less of a hassle.
- Added in toolbar toggle to persist text or not during app restarts.
Image Slide for macOS v1.3 Updates
12/31/2024 Filed in: Image Slide
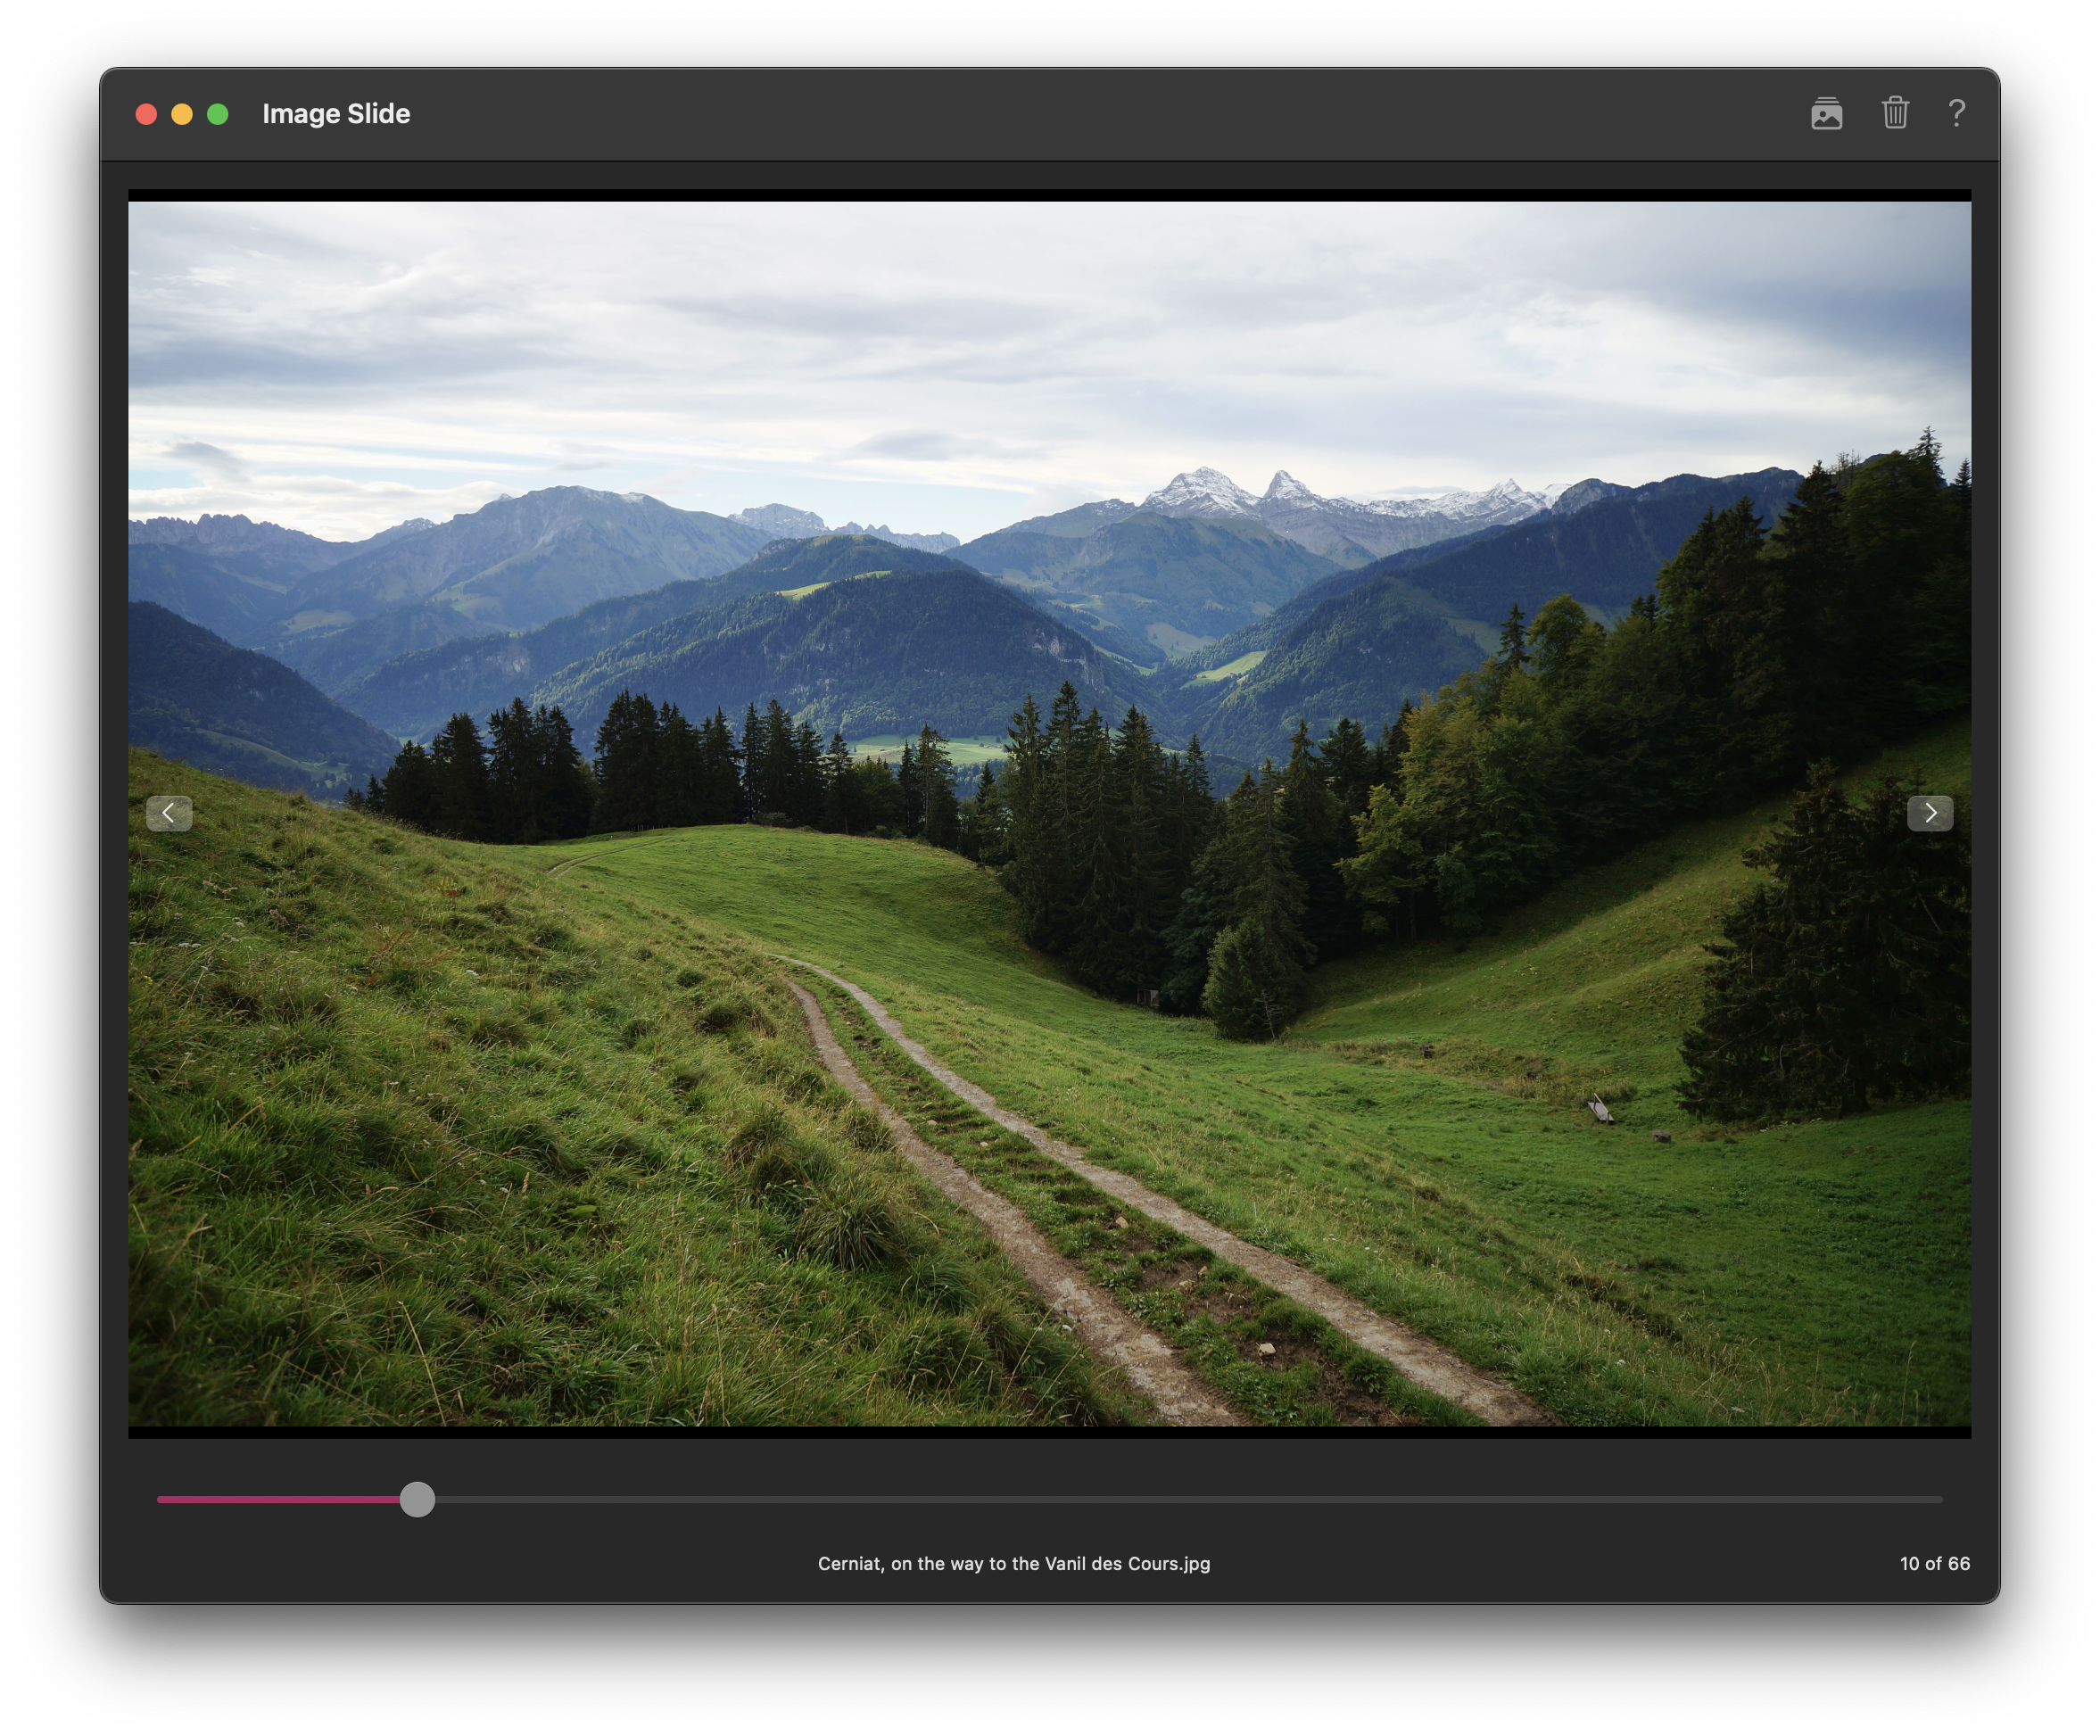
Image Slide for macOS v1.3 update. Adding the following features:
-Updated App Icon.
-Added prev/next buttons.
-Added left/right keyboard image change.
-Added UI component animations
Compare 2 Text for macOS v1.5 Updates
12/28/2024 Filed in: Compare 2 Text
Compare 2 Text v1.5 update. Adding the following features:
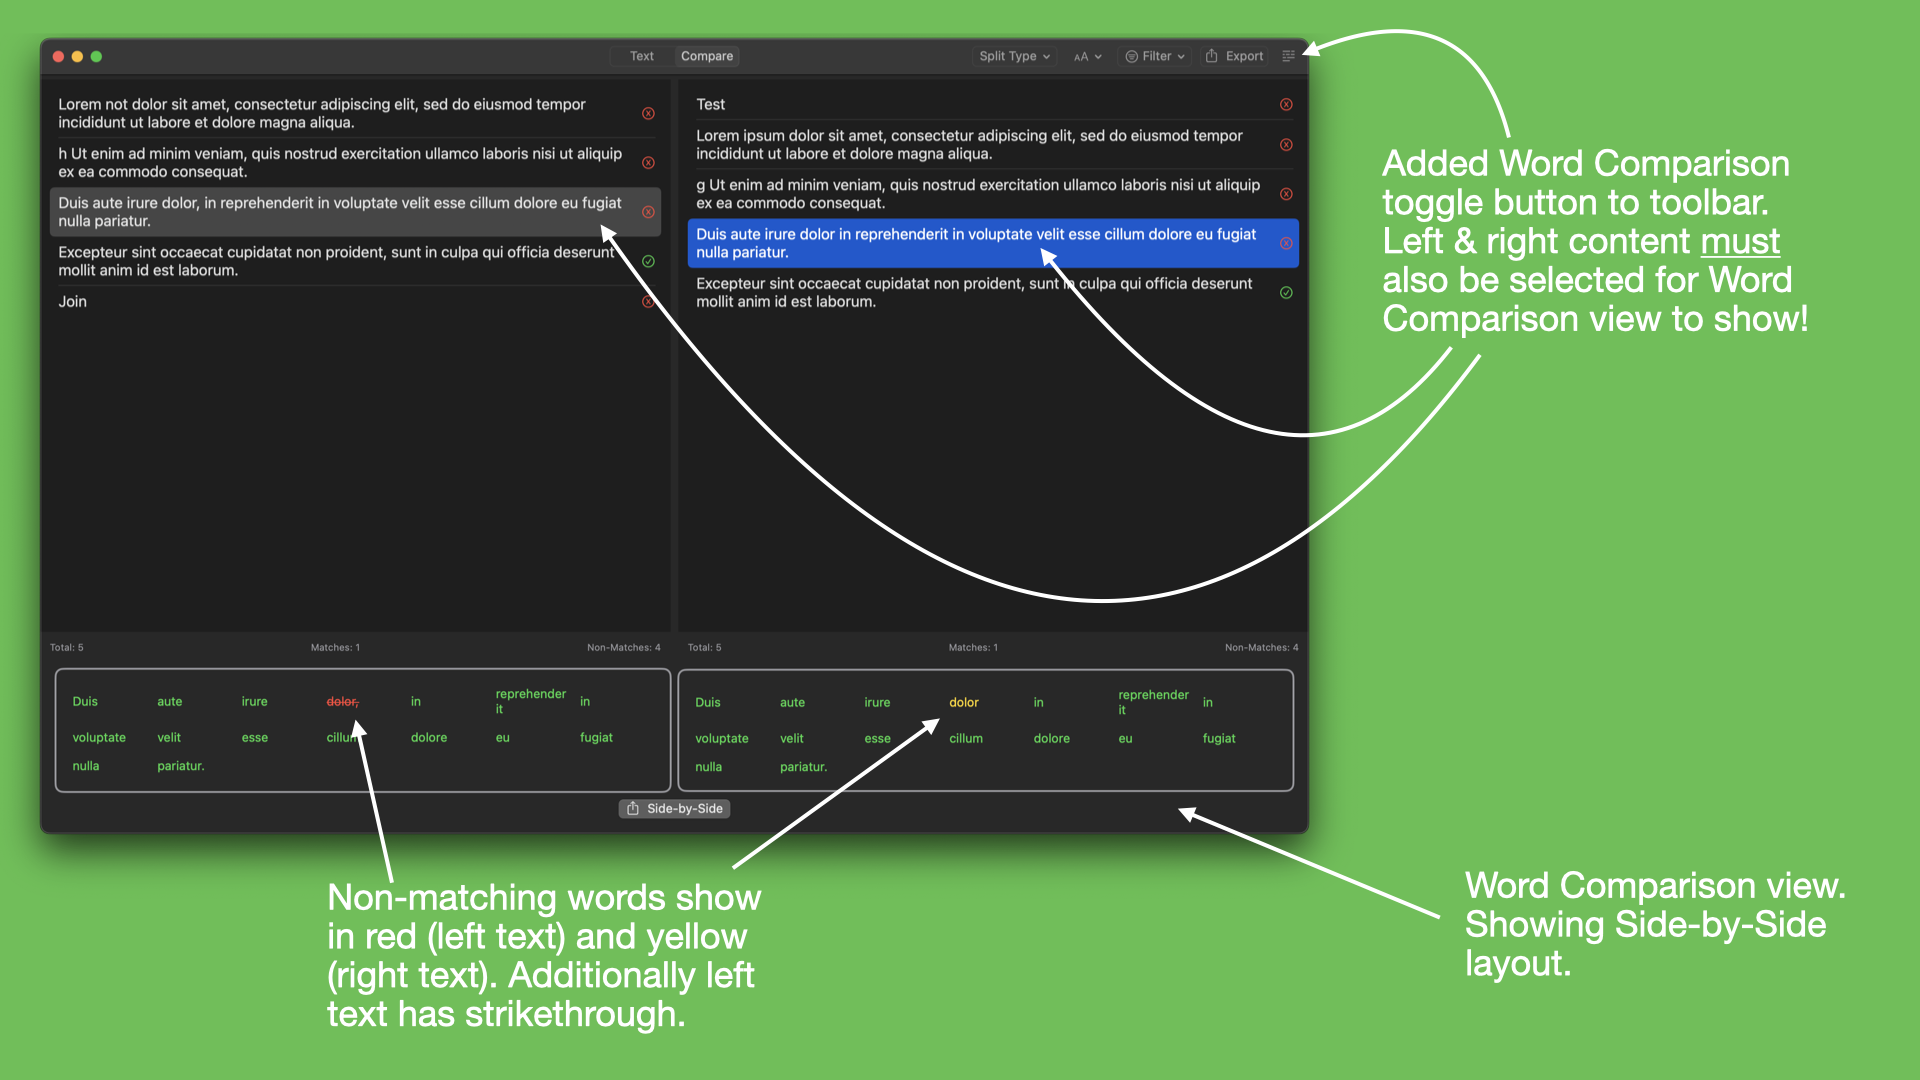
-Added Comparison View, with toolbar toggle button.
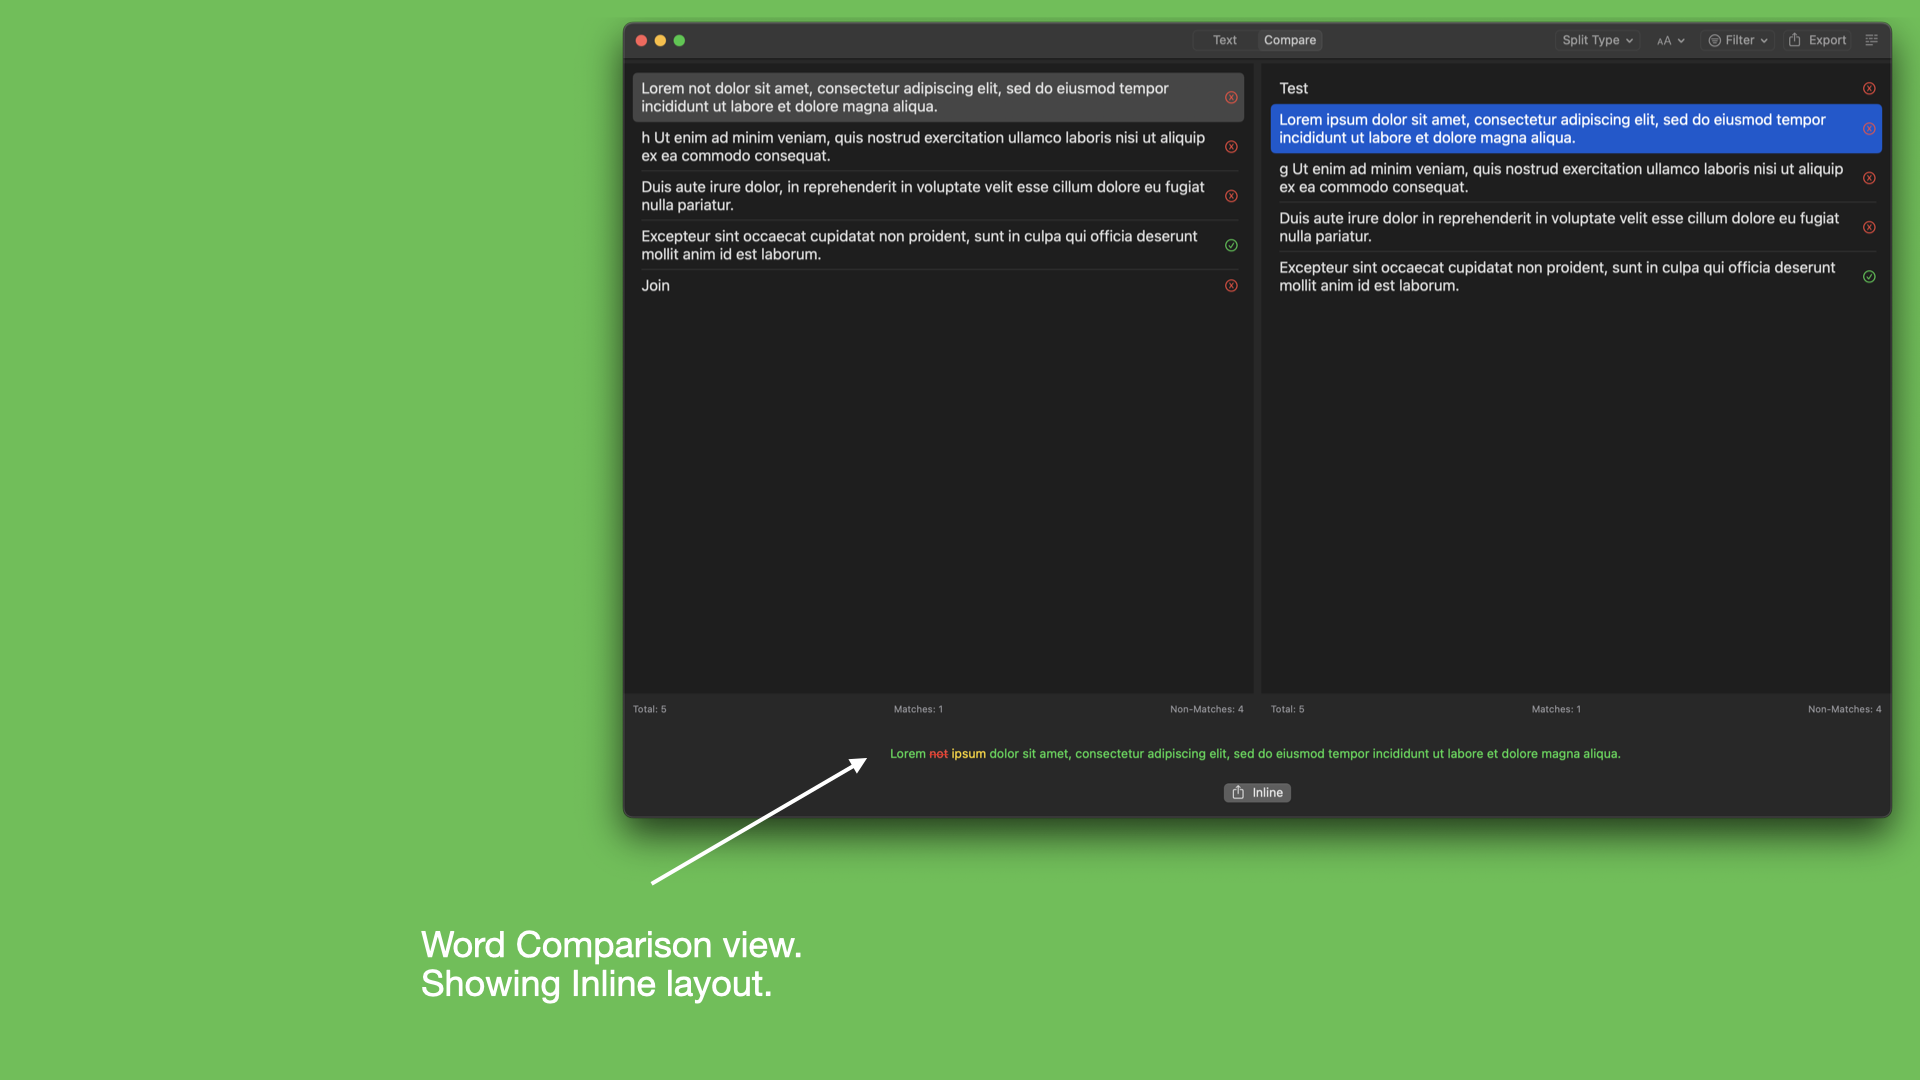
-Added Inline comparison view.
-Added Side-by-Side Comparison view.
-Adjusted 'Totals' footer layout, to make it easier to distinguish between text/values.